Number
Cable
6
Rear UID health module
7
Power supply
8
Power supply
11.
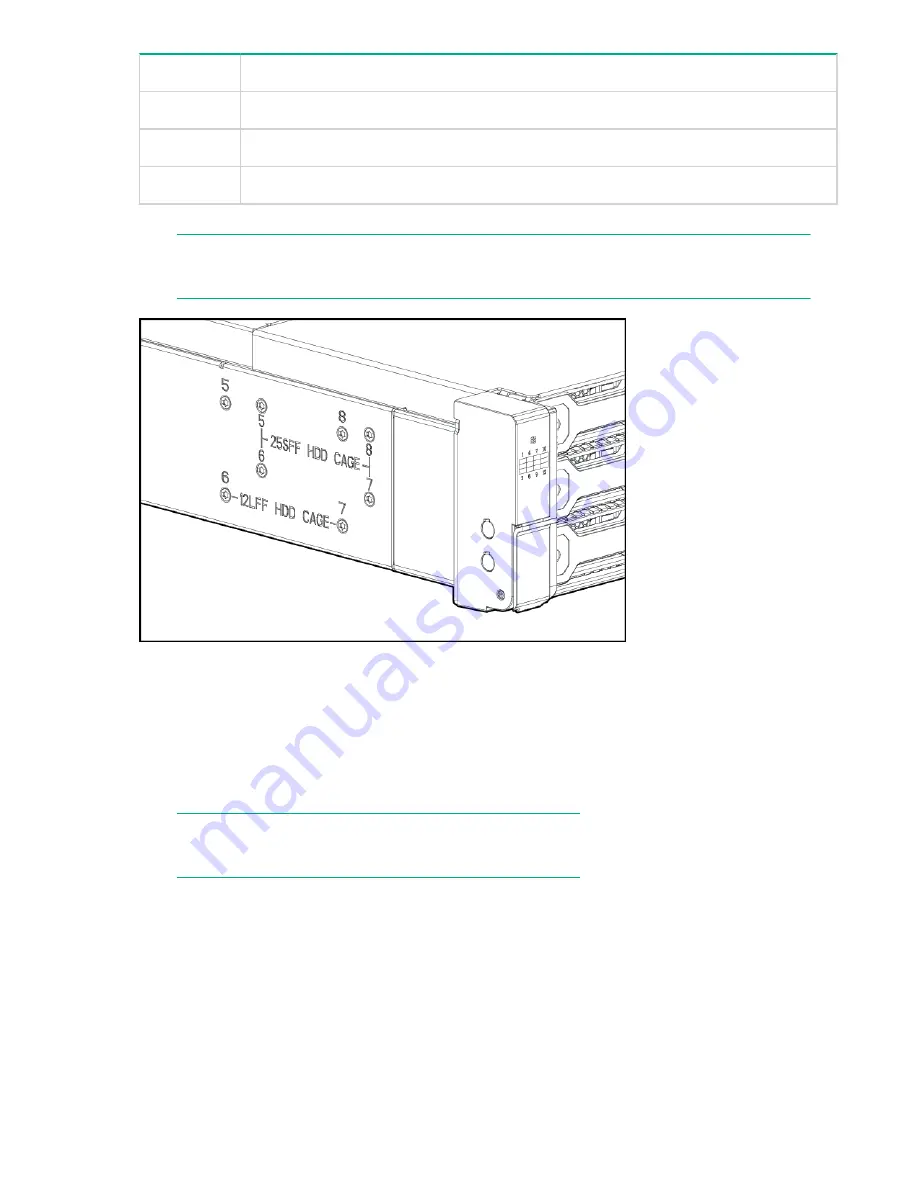
Remove the eight drive cage retaining screws. There are four to a side.
NOTE:
The StoreOnce System has 12 hard disks and the screws are in the 12LFF HDD Cage location.
12.
Slide the drive cage toward the front of the enclosure and lift free of the enclosure.
13.
Remove the two screws attaching the back plane to the drive cage.
14.
Slide the back plane toward the top of the drive cage and lift the back plane off the drive cage.
15.
Place the replacement back plane on the drive cage and slide toward the bottom of the drive cage on to
the retaining hooks.
16.
Install the two back plane screws.
17.
Place the drive cage in the enclosure and slide toward the back of the enclosure making sure the
locating pins in the bottom of the enclosure are all correctly located in the drive cage.
NOTE:
Depending on the specific unit, there are 6 or 8 locating pins.
18.
Install the eight drive cage retaining screws.
19.
Connect the two UID/Health module cables.
20.
Connect the power cables.
21.
Connect the fan control card cables.
22.
Install the enclosure cover and press the hood latch down to engage the latch.
23.
Install the enclosure in the rack.
24.
Install the I/O module.
25.
Install the power supplies.
26.
Install the fan modules.
27.
Install the disk drives in the same bays they were in the original enclosure.
74
HPE StoreOnce 5100 System Capacity Upgrade expansion shelves


