


Locate the following components, which were ordered separately:
•
Disk drives
•
FC cables
•
FC cable labels
Installing the DS2500
This section describes the procedure to install the DS2500:
1.
Installing the snap-in rails
, page 26
2.
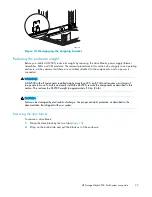
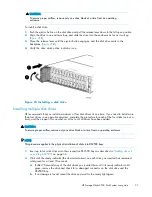
Reducing the enclosure weight
, page 29
3.
Installing the DS2500 in the rack
, page 31
4.
Connecting the cables
, page 33
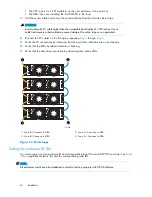
5.
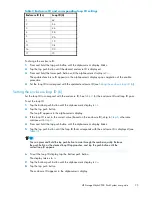
Setting the enclosure ID (En)
, page 34
6.
Setting the enclosure loop ID (Li)
, page 35
7.
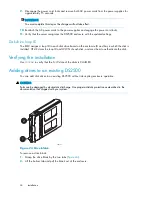
Verifying the installation
, page 36
NOTE:
HP recommends that you install the heaviest components low in the rack to ensure rack stability.
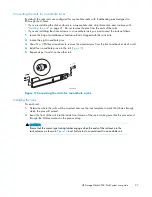
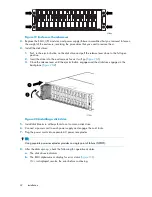
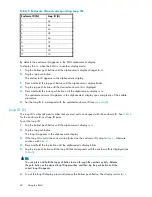
Installing the snap-in rails
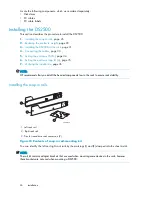
1
2
CXO8193A
3
1. Left rack rail
2. Right rack rail
3. Pins for round-hole rack conversion (8)
Figure 10 Contents of snap-in rail-mounting kit
You can identify the left and right rack rails by the markings (L) and (R) stamped into the sheet metal.
NOTE:
The rail kit contains adapter brackets that are used when mounting some devices in the rails; however
these brackets are not used when mounting a DS2500.
26
Installation
Summary of Contents for StorageWorks 2500
Page 1: ...HP StorageWorks 2500 Disk System user guide Part number 5697 6800 Second edition June 2007 ...
Page 8: ...8 ...
Page 12: ...12 About this guide ...
Page 44: ...44 Using the EMU ...
Page 54: ...54 Troubleshooting ...
Page 64: ...Figure 35 Replacing a disk drive 64 Customer self repair ...
Page 68: ...68 Specifications ...
Page 78: ...78 Regulatory notices ...


