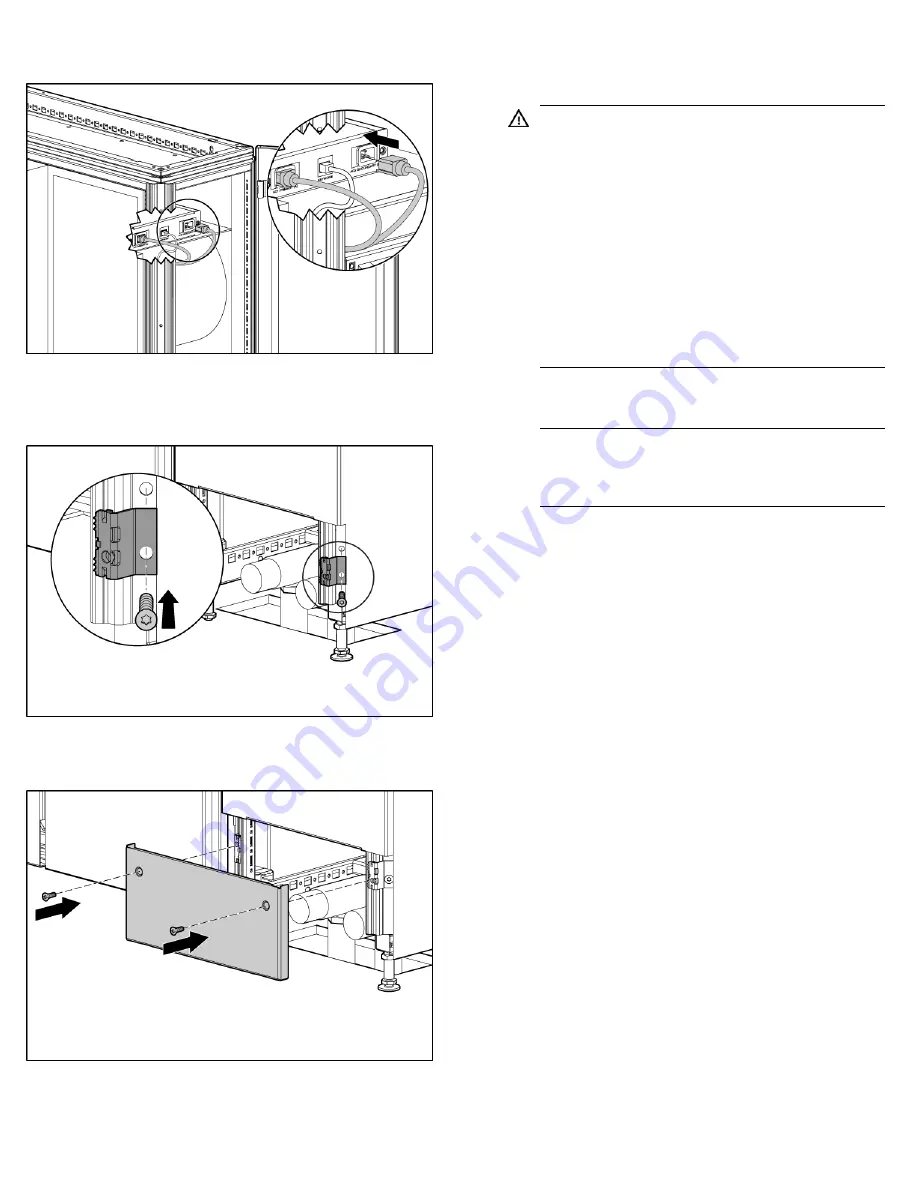
17.
If you are using a secondary power cord, plug it into the
power connector on the right.
18.
Guide the other ends of the power cords through the MCS unit,
and then plug them into an appropriate power source.
19.
(Optional) Secure the two brackets to the MCS frame using two
M6 trilobe flathead screws.
20.
(Optional) Align the access panel with the two brackets.
21.
(Optional) Secure the access panel to the brackets on the MCS
frame using two M6 flathead screws.
Installation is complete.
Powering up and configuring
the unit
WARNING:
To reduce the risk of electric shock or
damage to the equipment:
•
Do not disable the power cord grounding plug. The
grounding plug is an important safety feature.
•
Plug the power cord into a grounded (earthed)
electrical outlet that is easily accessible at all times.
•
Unplug the power cord from the power supply to
disconnect power to the equipment.
•
Do not route the power cord where it can be walked
on or pinched by items placed against it. Pay
particular attention to the plug, electrical outlet, and
the point where the cord extends from the storage
system.
1.
Plug the power cords into an appropriate power source.
2.
Connect the network cable to your network infrastructure.
NOTE:
If you have a DHCP server, you can change the IP
address through the web interface instead of through the
serial port. For more information, refer to "Configuring the
IP address through the web interface (on page 8)."
3.
Using the serial cable provided, connect a PC with a serial
port or an asynchronous terminal to the serial communication
port on the management module.
4.
Access the management module through a terminal emulation
program, such as HyperTerminal or Minicom.
5.
Confirm that you have set the following parameters to access a
terminal emulation program:
o
Bits per second: 9600
o
Data bits: 8
o
Parity: none
o
Stop bits: 1
o
Flow control: none
6.
Log in to the HP Modular Cooling System Configuration Utility.
a.
In the login field, enter the user name. The default user
name is Admin.


