CAUTION:
Contaminated water might cause decreased
cooling capacity or disruption in service. The water
flowing into the MCS unit must meet the guidelines stated
in the
HP Modular Cooling System G2 Site Preparation
Guide
. The MCS warranty does not cover damage caused
by contaminated water.
IMPORTANT:
Before you begin the installation process,
read the
HP Modular Cooling System G2 Site Preparation
Guide
.
1.
Install the HP Hook-Up Kit.
2.
Read the unpacking instructions on the MCS packaging
material.
3.
Remove the MCS unit and rack from the pallet with four or
more people.
4.
Roll the MCS unit and rack to the final location.
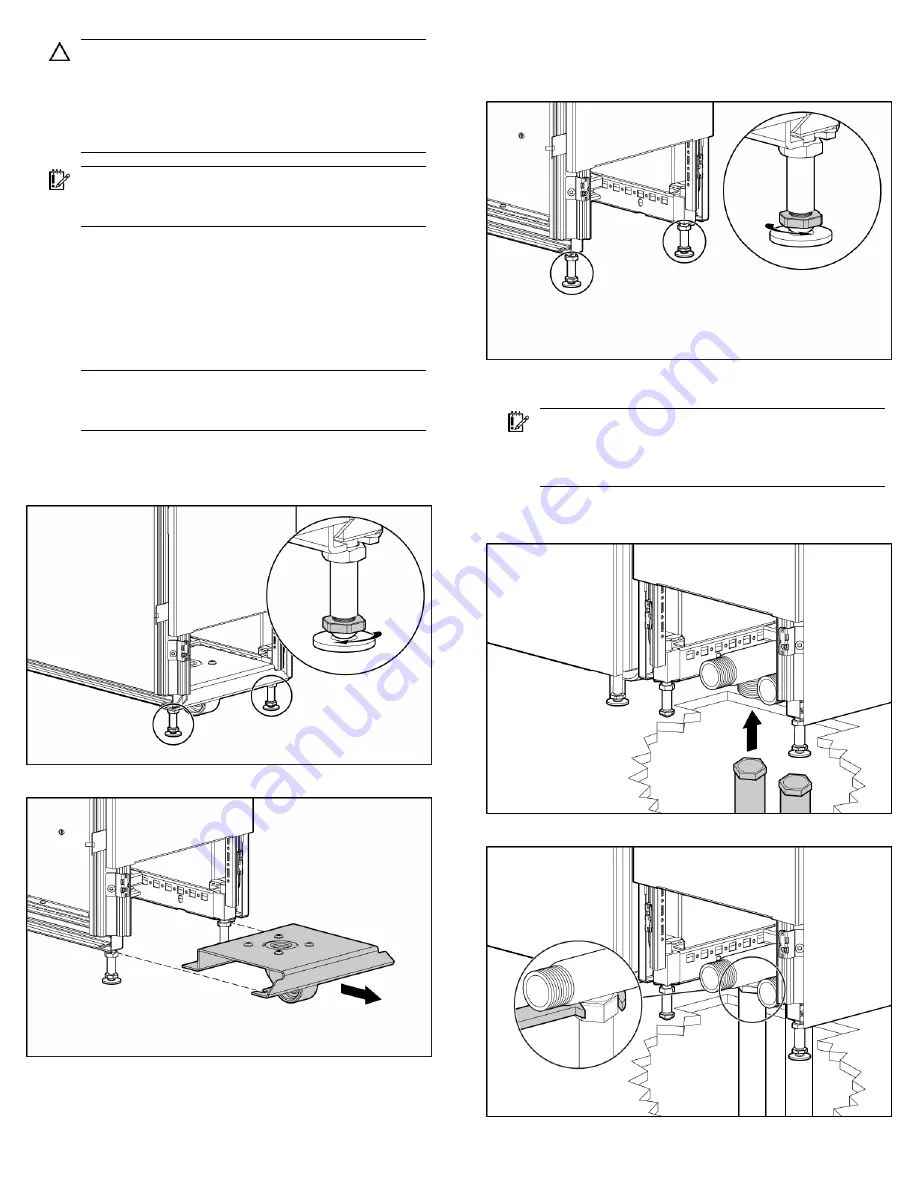
NOTE:
You only need to remove the caster plate (steps 4
through 6) if you are routing your hoses through the hole
in the raised floor.
5.
Loosen the jam nut, and then raise the unit by lowering the two
rear leveling feet on both the MCS unit and the rack until you
can remove the rear caster plate.
6.
Remove the rear caster plate.
7.
Lower the unit by raising the two rear leveling feet on both the
MCS unit and the rack so that the MCS unit can move freely on
the remaining casters.
8.
Adjust the leveling feet to level the MCS unit and rack, using a
bubble level.
IMPORTANT:
Check both ball valves on the water hoses to
confirm that they are in the closed position before
attaching the hoses to the MCS unit. Water that leaks into
the unit can cause significant damage.
9.
Route the water hoses from the HP Hook-Up Kit through the
floor cut-out.
10.
Install each main hose to the MCS unit using the hose wrench.


