Installation
and
Calibration
HP
11757B
Basic
Front
P
anel
Checks
The
\Basic
F
ron
t
P
anel
Chec
ks"
pro
vide
a
metho d
for
testing
the
fron
t
panel
features
of
the
F
ader.
This
test
can
b e
p erformed
at
incoming
insp ection
to
c
hec
k
F
ader
op eration.
Description
The
functions
of
the
F
ader
are
c
hec
k
ed
using
a
signal
source
and
a
sp ectrum
analyzer.
These
c
hec
ks
pro
vide
reasonable
assurance
that
most
of
the
fron
t
panel
con
trolled
functions
are
b eing
executed
b
y
the
F
ader.
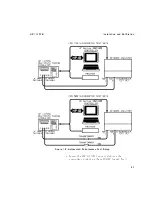
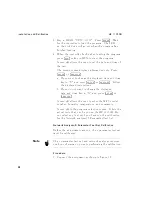
Equipment
Sp ectrum
Analyzer
:
:
:
:
:
:
:
:
:
:
:
:
:
:
:
:
:
:
:
:
:
:
:
:
HP
8566B
Syn
thesized
Sw
eep er
:
:
:
:
:
:
:
:
:
:
:
:
:
:
:
:
:
:
HP
8360
series
Matching
T
ransformer
:
:
:
:
:
:
:
:
:
:
:
:
:
:
:
:
:
:
:
:
HP
11694A
75
Cables
:
:
:
:
:
:
:
:
:
:
:
:
:
:
:
:
:
:
:
:
:
:
:
:
:
:
:
:
HP
8120-3616
50
Adapters
:
:
:
:
:
:
:
:
:
:
:
:
:
:
:
:
:
:
:
:
:
:
:
:
:
:
HP
1250-0780
Procedure
1.
T
urn
on
the
F
ader
and
observ
e
the
p o
w
er
up
routine.
During
p o
w
er
up
the
diagnostics
stored
in
R
OM
are
executed
under
micropro
cessor
con
trol
and
turn
on
all
the
display
segmen
ts
and
ann
unciators.
The
self-test
takes
ab out
10
seconds.
When
the
self-test
is
nished,
the
F
ader
will
display
\ SELF
TEST
OK ".
If
an
error
o ccurs
during
the
p o
w
er-up
tests,
the
F
ader
will
display
\ SELF
TEST
FAIL ".
T
ry
the
turn
on
pro cedure
again.
If
the
FAIL
message
app ears
again,
refer
to
the
service
man
ual
or
to
y
our
customer
represen
tativ e
for
information.
2.
Press
the
4
PRESET/LOCAL
5
k
ey
,
then
the
4
ENTER
5
k
ey
.
This
sets
the
F
ader
Notc
h
F
requency
to
70
MHz
with
a
Notc
h
Depth
of
0
dB.
Start
and
Stop
Sw
eep
22

