ENG
17
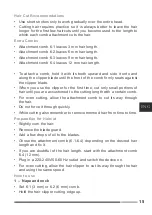
Short haircuts
• Starting with the longest attachment comb (12 mm) cut from the back of
the neck to the crown. Hold the attachment comb flat against the head and
slowly move the hair clipper through the hair.
• Cut the hair against their growth direction from the front to the top of the
head. Then cut the sides.
• To give a “flat top” look, the hair on the top of the head must be cut over the
top of a flat comb rather by using an attachment comb. Start the cut from
the top.
• Using the shorter attachment comb cut hair to taper the hair down to the
neckline. Comb the hair and check for uneven areas, and outline of sides
and neckline as described previously
.
Warning!
• The hair clipper can continuously operate for 10 minutes maximum. You can
continue operation after a 10-minute break.
Blade oiling
• The blades should be oiled before and after every haircut.
• Turn the appliance off using the On/Off switch (3).
• Apply one-two drops of oils at the blade’s teeth and back side of the top
blade and then switch the unit on and make sure it is running smoothly.
• Unplug the appliance and remove surplus oil with a dry cloth.
Cleaning and Maintenance
• The appliance requires a regular clean-up.
• Disconnect the device from power source. The cord can be wiped with a
slightly wet cloth. Do not chemically active or abrasive detergents to clean
the appliance as it can damage its surface.
• The detachable parts of the appliance should be washed in warm soapy
water.
• Remove the foil frame and clean it with running water.
• The blades should be cleaned from hair with brush supplied. Additionally,
the blade unit should be removed from time to time to for clean-up.
• Remove the blade block by pressing on the upper part of the block on the
blades side. Clean the blade block and the inner cavity of the trimmer under
the blade block with the brush. Install the blade block back to its place by
inserting the bottom part of the block into the groove on the unit body and
pressing the upper part of the block. A click of the locks shows that the
blade block is set properly.
Summary of Contents for HT-964-200
Page 1: ...RUS 1 HT 964 200 10 220 240 50 60 II HT 964 200 www hottek ru...
Page 2: ...RUS 2...
Page 3: ...RUS 3...
Page 4: ...RUS 4 1 2 3 4 5 6 4 3 6 9 12 7 8 9 10 11 1 2...
Page 5: ...RUS 5 5 5 5 6 1 3 6 4 12 5 5 5...
Page 6: ...RUS 6 6 1 3 6 2 6 6 3 9 6 4 12...
Page 8: ...RUS 8 6 1 6 2 3 6 5 12...
Page 9: ...RUS 9 10 10 3 40 70 1...
Page 10: ...RUS 10 CE 3 401 20 7 495 204 17 75 0919 2019...
Page 20: ...KAZ 20 HT 964 200 H 964 200 10 220 240 B 50 60 II www hottek ru...
Page 21: ...KAZ 21...
Page 22: ...KAZ 22 1 2 3 4 5 6 4 3 6 9 12 7 8 9 10 11 1 2...
Page 23: ...KAZ 23 5 5 5 6 1 3 6 4 12 5 5 5...
Page 24: ...KAZ 24 6 1 3 6 2 6 6 3 9 6 4 12...
Page 26: ...KAZ 26 5 12 10 10 3...
Page 27: ...KAZ 27 40 70 1...

