


RUS
10
Дефекты принадлежностей не являются основанием для замены всего
прибора. Разбитые и поломанные детали возмещаются только за
дополнительную плату.
Изнашиваемые и трущиеся детали, их чистка, техобслуживание и замена
не подпадают под действие гарантии и производятся за отдельную плату.
Гарантия автоматически теряет свою силу при вскрытии / ремонте прибора
посторонними лицами.
Ремонт по истечении срока гарантии
По окончании срока гарантийного обслуживания ремонт прибора
производится специалистами сервисных центров или мастерских за плату.
Прибор прошел все необходимые испытания на соответствие и
безопасность, определенные директивами CE и стандартами ГОСТ-Р, и
соответствует современным техническим стандартам безопасности.
Утилизация
После окончания срока службы не выбрасывайте
прибор вместе с бытовыми отходами. Передайте его в
специализированный пункт для дальнейшей утилизации.
Этим Вы поможете защитить окружающую среду.
Производитель сохраняет за собой право изменять дизайн и технические
характеристики прибора без предварительного уведомления.
Срок службы прибора - 3 года
Изготовитель:
Иу Фенгланг Импорт энд Экспорт Компани Лимитед
Адрес:
401 Юнит, Билдинг 20, Кингку, Иу, Чжэцзян, Китай
Данное изделие соответствует всем требуемым европейским
и российским стандартам безопасности и гигиены.
Единая справочная служба: +7(495) 204-17-75
Изготовлено в КНР
Дата производства изделия указана в серийном номере на табличке с
техническими данными.
Серийный номер представляет собой одиннадцати-значное число, первые
четыре цифры которого обозначают дату производства. Например,
серийный номер 0919ххххххх означает, что изделие было произведено в
сентябре (девятый месяц) 2019 года.
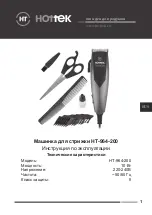
Summary of Contents for HT-964-200
Page 1: ...RUS 1 HT 964 200 10 220 240 50 60 II HT 964 200 www hottek ru...
Page 2: ...RUS 2...
Page 3: ...RUS 3...
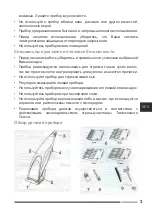
Page 4: ...RUS 4 1 2 3 4 5 6 4 3 6 9 12 7 8 9 10 11 1 2...
Page 5: ...RUS 5 5 5 5 6 1 3 6 4 12 5 5 5...
Page 6: ...RUS 6 6 1 3 6 2 6 6 3 9 6 4 12...
Page 8: ...RUS 8 6 1 6 2 3 6 5 12...
Page 9: ...RUS 9 10 10 3 40 70 1...
Page 10: ...RUS 10 CE 3 401 20 7 495 204 17 75 0919 2019...
Page 20: ...KAZ 20 HT 964 200 H 964 200 10 220 240 B 50 60 II www hottek ru...
Page 21: ...KAZ 21...
Page 22: ...KAZ 22 1 2 3 4 5 6 4 3 6 9 12 7 8 9 10 11 1 2...
Page 23: ...KAZ 23 5 5 5 6 1 3 6 4 12 5 5 5...
Page 24: ...KAZ 24 6 1 3 6 2 6 6 3 9 6 4 12...
Page 26: ...KAZ 26 5 12 10 10 3...
Page 27: ...KAZ 27 40 70 1...