


ENG
18
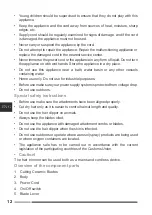
• Do not clean the hair trimmer using any tools.
• Never submerge the appliance in water or other liquid.
• It is recommended that you replace the system outer foil at least once a year
and the inner blade at least once every 2 years to maintain your shaver’s
cutting performance
Storage
• To store the appliance, thoroughly clean it.
• Store the appliance in a dry cool place out of reach of children.
• Electrical equipment have to be stored in a dry place at ambient temperature
no higher than plus 40 °C with a relative humidity of 70%, and the absence
of dust, acid and other fumes in surrounding medium which affect adversely
the materials of the electrical devices.
Warranty
The warranty period on the territory of the Russian Federation is 1 year.
In the event of a claim under warranty, present the unit in a complete package,
with original packaging and cashier's receipt to the accredited service center.
Free repair or replacement of the unit is impossible without the cashier's
receipt.
Accessories defects are not the reason to replace the whole unit.
Defects in wear or friction parts, as well as cleaning, maintenance or
replacement of the friction parts are not covered by the warranty.
Warranty is lost after the opening of the unit by unauthorized persons.
Repairs after the warranty period
After the expiry of the warranty period the repair of the appliance is made for
payment by accredited service centers.
The appliance has passed all the required tests for compliance and safety,
specified by the CE directives and GOST-R standards, and meets current high-
tech safety standards.
Utilization
After the end of the service life do not discard the unit with
household waste. Hand it at an official collection point for
recycling. Doing it you will help protect the environment.
The manufacturer preserves the right to change the design and the
specifications of the unit without a preliminary notification.
Summary of Contents for HT-964-200
Page 1: ...RUS 1 HT 964 200 10 220 240 50 60 II HT 964 200 www hottek ru...
Page 2: ...RUS 2...
Page 3: ...RUS 3...
Page 4: ...RUS 4 1 2 3 4 5 6 4 3 6 9 12 7 8 9 10 11 1 2...
Page 5: ...RUS 5 5 5 5 6 1 3 6 4 12 5 5 5...
Page 6: ...RUS 6 6 1 3 6 2 6 6 3 9 6 4 12...
Page 8: ...RUS 8 6 1 6 2 3 6 5 12...
Page 9: ...RUS 9 10 10 3 40 70 1...
Page 10: ...RUS 10 CE 3 401 20 7 495 204 17 75 0919 2019...
Page 20: ...KAZ 20 HT 964 200 H 964 200 10 220 240 B 50 60 II www hottek ru...
Page 21: ...KAZ 21...
Page 22: ...KAZ 22 1 2 3 4 5 6 4 3 6 9 12 7 8 9 10 11 1 2...
Page 23: ...KAZ 23 5 5 5 6 1 3 6 4 12 5 5 5...
Page 24: ...KAZ 24 6 1 3 6 2 6 6 3 9 6 4 12...
Page 26: ...KAZ 26 5 12 10 10 3...
Page 27: ...KAZ 27 40 70 1...