70
Programming Guide — JR™ 10X/10SXII/10SX
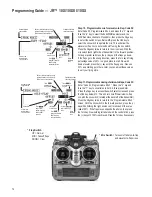
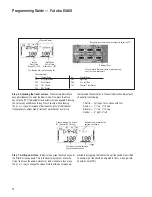
Touch the to
decrease the
travel adjust for
the shaded area
(0-150%)
Channel
(servo)
Touch to allow each
direction of travel adjust
to be set individually
(10X only)
Touch the to
increase travel
adjust for shaded
area (0-150%)
Touch
simultaneously, or
press
CL
to reset the
shaded area to 100%
factory default
Touch to
access the next
five channels
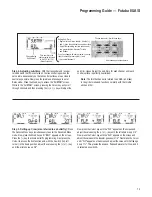
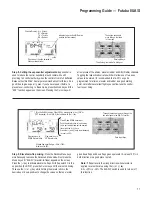
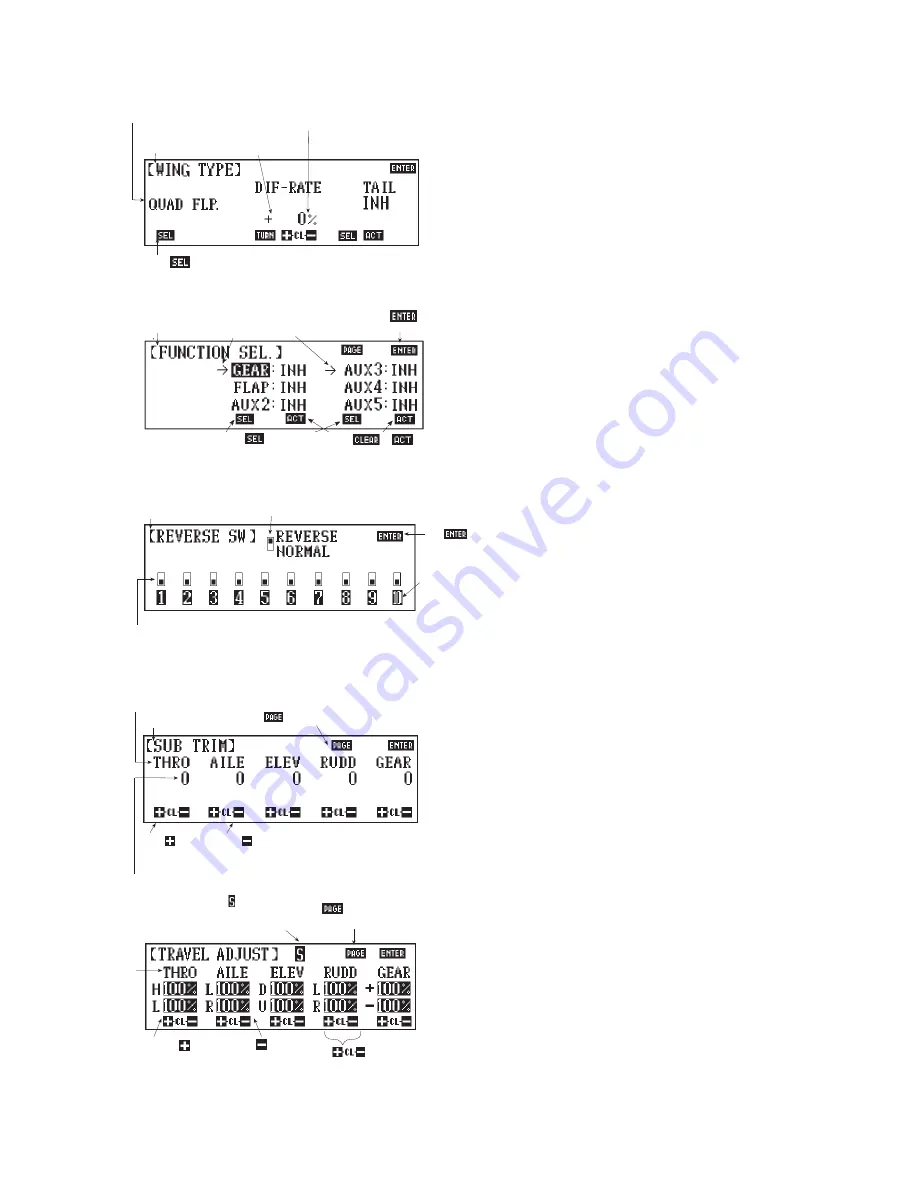
Indicates current wing
type selection
Indicates function
being programmed
Touch to
advance to next
wing type selection-
NORMAL
Indicates the aileron
dif ferential percentage
Indicates the aileron
differential direction
Indicates feature
being programmed
Touch
to exit program
Touch to select the
control you wish to inhibit or
activate
Arrow indicates
control selected
Press or
to clear or activate the
selected control
Touch to
memorize data
and exit program
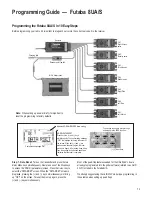
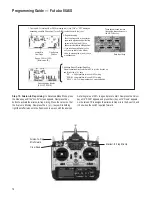
Indicates which code
is being programmed
Depiction of servo
travel direction
Denotes travel direction
(
NOTE:
If upper area is
shaded, travel is reversed;
If lower area is shaded,
then travel is normal.)
Respective
channel number.
Touch to reverse
servo travel direction
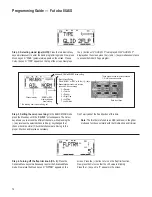
Indicates function
being programed
Channel (servo)
Offset value
±
Touch to
decrease
trim value
Touch to
increase
trim value
Touch to display
other five channels
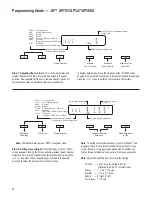
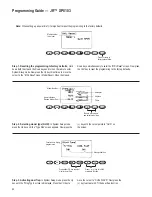
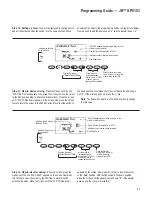
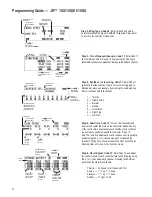
Step 2. Wing Type, Code 22:
Enter Code 22 and below
normal press the
SEL
key until QUAD.FLP appears. Press
Enter
to return to the Function mode screen.
Step 3. Turn off unused channels, Code 17:
Enter Code 17
and inhibit channels 5 through 10 by pressing the
SEL
key to
select each channel, then press the
Clear
key to inhibit each channel.
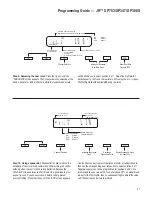
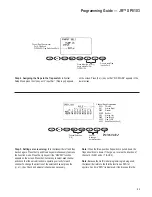
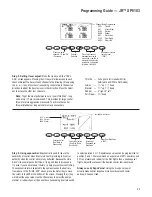
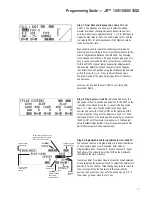
Step 5. Sub-Trims, Code 15:
Turn on the transmitter and
receiver and center the trims on the transmitter. Reposition any
of the control arms as necessary such that the control surfaces
are as close to neutral as possible. Now enter “Code 15,
Sub-Trim” and fine adjust each control surface until it’s perfectly
neutral using the (+) or (-) keys below each corresponding
channel. The
Page
key allows access to the other five channels.
Pressing
Enter
will return to the Function mode.
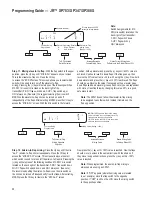
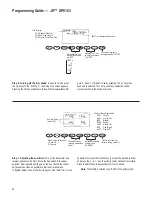
Step 6. Travel Adjust, Code 12:
Enter Code 12 and adjust
the control travels of each control surface to the following using
the (+) or (-) key below each channel. Pressing the
PAGE
key
will access the other five channels.
Throttle — Full open to full closed with trim
Aileron — 1
1
/
4
" up, 1
1
/
4
" down
Elevator — 1
1
/
2
" up, 1
1
/
2
" down
Rudder — 4" right, 4" left
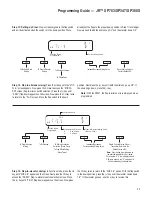
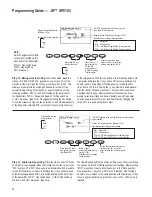
Step 4. Set the servo reversing, Code 11:
Enter Code 11
and check that the direction of each servo is moving properly.
Reverse any servo as necessary by pressing the numbered key
that corresponds with that channel.
1 — Throttle
2 — Right Aileron
3 — Elevator
4 — Rudder
5 — Left Aileron
6 — Right Flap
7 — Left Flap

