


8
Section 1a: Quad-Flap Wing Assembly
Required Parts
• Left wing aileron/flap
• Right wing aileron/flap
• Left wing panel with aileron and hinges
• Right wing panel with aileron and hinges
Required Tools and Adhesives
• Sealing iron
• Paper towels
• Instant thin CA glue
• CA remover/debonder
• T-pins (one for each hinge)
• Hobby knife with #11 blade
Note
: The procedure for hinging the
flap/aileron in each wing panel is the same as
described for the conventional wing.
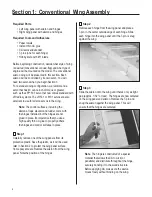
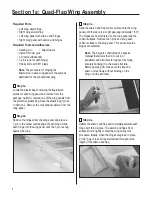
Step 1a
Locate the plastic bag containing the flap/aileron
pieces for each wing panel and remove from the
package. Carefully remove one of the wing panels from
the protective plastic bag. Save the plastic bag for use
in Section 2. Remove the conventional aileron from the
wing panel.
Step 2a
Remove the hinges from the wing panel and place a
T-pin in the center outside edge of each hinge. Slide
each hinge into the wing panel until the T-pin is snug
against the wing.
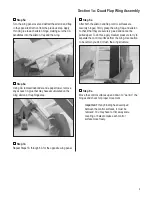
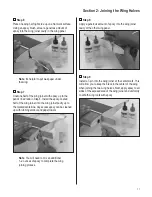
Step 3a
Slide the aileron and flap control surface onto the wing
panel until there’s only a slight gap (approximately 1/32").
The hinges are now centered on the wing panel and the
control surfaces. Remove the T-pins and snug each
control surface to the wing panel. This will ensure the
hinges are centered.
Note
: The hinge is constructed of a special
material that allows the CA to wick (or
penetrate) and distribute throughout the hinge,
securely bonding it to the wood structure.
Before applying CA, make sure the flap and
aileron move freely without binding on the
wing or with each other.
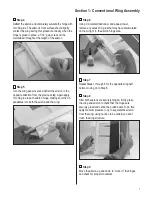
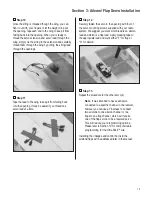
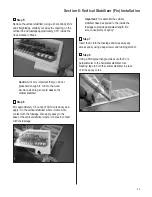
Step 4a
Deflect the aileron and flap and completely saturate each
hinge with thin CA glue. The aileron and flap’s front
surface should lightly contact the wing during this
procedure. Ideally, when the hinges are glued in place,
a 1/32" gap or less will be maintained throughout the
length of the aileron and flap.