


First Time Setup (cont'd)
15
Set the “Start DST” time and then the “End DST” time by selecting the appropriate
Month
,
Weekend
and
Hour
that DST starts and ends.
When done, press
Apply
.
After each selection the window closes automatically and the selection is displayed.
Select a 12-hour or 24-hour format for your time display by pressing the circle to the left of the
12 Hour
display.
When done, a confirmation screen appears.
Yes
saves the time changes in your security system.
No
saves the changes to the Tuxedo only.
NOTE:
A
Yes
response is recommended.
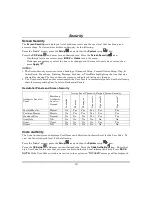
Power Mode Setup
Power Mode allows you to reduce power consumption in the event of a system trouble such as AC Loss
or Panel Low Battery.
Press the
Setup
,
System
setup
and
Power Mode Setup
icons and enter your authorized
code, if required.
Select
Power Save Mode
to enable; then choose Turn-off Network, or Override Display Settings.
Press
Apply
to save settings.
NOTE:
When Override Display Settings is selected, Display settings are overwritten and Tuxedo
operates in low power mode:
- Brightness/Volume
controls decrease to minimum levels.
- Return
To Homepage After
time resets to 30 seconds.
- Auto SlideShow After
time reverts to Never.
- When AC power is restored, the original Display settings resume.
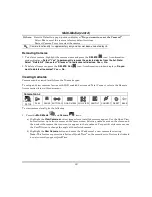
Remote Access Setup
Tuxedo’s remote access option offers built-in web hosting capability to access your system via any web
enabled device. Tuxedo can connect to a network router via Ethernet cable (LAN network) or via WiFi
depending on the installation preference. Refer to the Remote Access section for details on using
Tuxedo remotely.
From the "Home" screen, press the
Setup
and
IP Setup
icons.
Select a type of network connection
:
LAN ON
or
WIFI ON
and press
Save
.
Go to that section below for further information.
Setup a LAN Connection
Press the
LAN ON
button. A pop-up window displays:
This will switch off WLAN Network, do you want to continue? Yes or No
Connect an Ethernet cable between the router and the keypad; the IP address and default gateway
address of the router is displayed.
Summary of Contents for TUXWIFIS
Page 10: ...About the System cont d 10 ...
Page 28: ...Multi Media cont d 28 ...
Page 40: ...Z Wave Setup cont d 40 ...
Page 46: ...46 Software Updates cont d ...
Page 50: ...Keypad Diagnostics and Calibration Tests cont d 50 ...
Page 57: ...Notes and Compatible Devices cont d 57 ...
Page 58: ...Notes and Compatible Devices cont d 58 ...
Page 59: ...Notes and Compatible Devices cont d 59 ...
Page 60: ...Notes and Compatible Devices cont d 60 ...
Page 61: ...Notes and Compatible Devices cont d 61 ...
Page 62: ......