3
SET UP
MOVING THE HEATER
• The Honeywell ComfortTemp™ 4 Ceramic Heater requires no assembly. Simply unpack heater and save all
packaging materials for off-season storage.
• Place the heater on a firm, level, open surface free from obstructions and at least 3 feet (0.9m) away from any
wall or combustible material.
•
DO NOT
use on an unstable surface such as bedding or deep carpeting.
• BE SURE THE HEATER IS NOT IN A POSITION WHERE IT MAY BE TRIPPED OVER BY CHILDREN OR PETS.
• This heater is equipped with a Cool Touch handle for your convenience.
• Turn off the heater.
• Allow it to cool for ten minutes.
• Unplug heater and move.
OPERATION
•
NOTE: NEVER LEAVE AN OPERATING HEATER
UNATTENDED
• Plug the heater into a polarized 120V outlet.
DO NOT FORCE THE POLARIZED PLUG INTO
THE OUTLET
; it will only fit one way.
• With 90° oscillation, the Honeywell ComfortTemp™
4 Ceramic Heater is versatile and designed to be
placed in the center of the room or closer to the wall
(at least 3 feet away) for maximum convection room
heating.
• Turn heater on by pressing the Power Button ( ).
The Power Indicator will illuminate and the heater
will start in the highest level setting (Heat Blast).
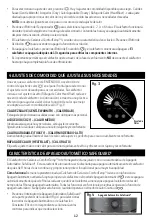
• The heater has two operational modes, which can be
chosen using the red switch on the back of the unit
(Fig. 2):
- Continuous heating (
) – heater will run until it
is manually shut off.
- Auto Shut-Off (
) mode - heater will
automatically shut off after 8 hours each time that
you use the heater. This is a built-in safety feature
to help ensure the heater isn’t accidentally left on
for an extended period of time.
NOTE:
See the SafeGuard® Auto Shut-Off feature section for more information on this feature.
• This heater comes pre-set from the factory with the Auto Shut-Off mode engaged. When the unit is turned on, the
Auto Shut-Off icon (
) will be illuminated on the top of the controls. All features are functional while operating in
the Auto Shut-Off mode.
• Should you
NOT
want the heater to automatically shut off after 8 hours, switch to Continuous heating by simply
pressing the red switch on the back of the unit. Once selected, the Continuous heat icon (
) will illuminate on
the top of the control panel.
Fig. 1
Power
Button
Heat
Levels
Continuous
Timer
Heat
Setting
Heat
Level
Indicator
Auto Shut-Off
Oscillate
NOTE:
Controls/features will vary slightly by model
Fig. 2
Auto Shut-Off
Continuous
Summary of Contents for COMFORTTEMP 4 HCE640 Series
Page 8: ......

