❏
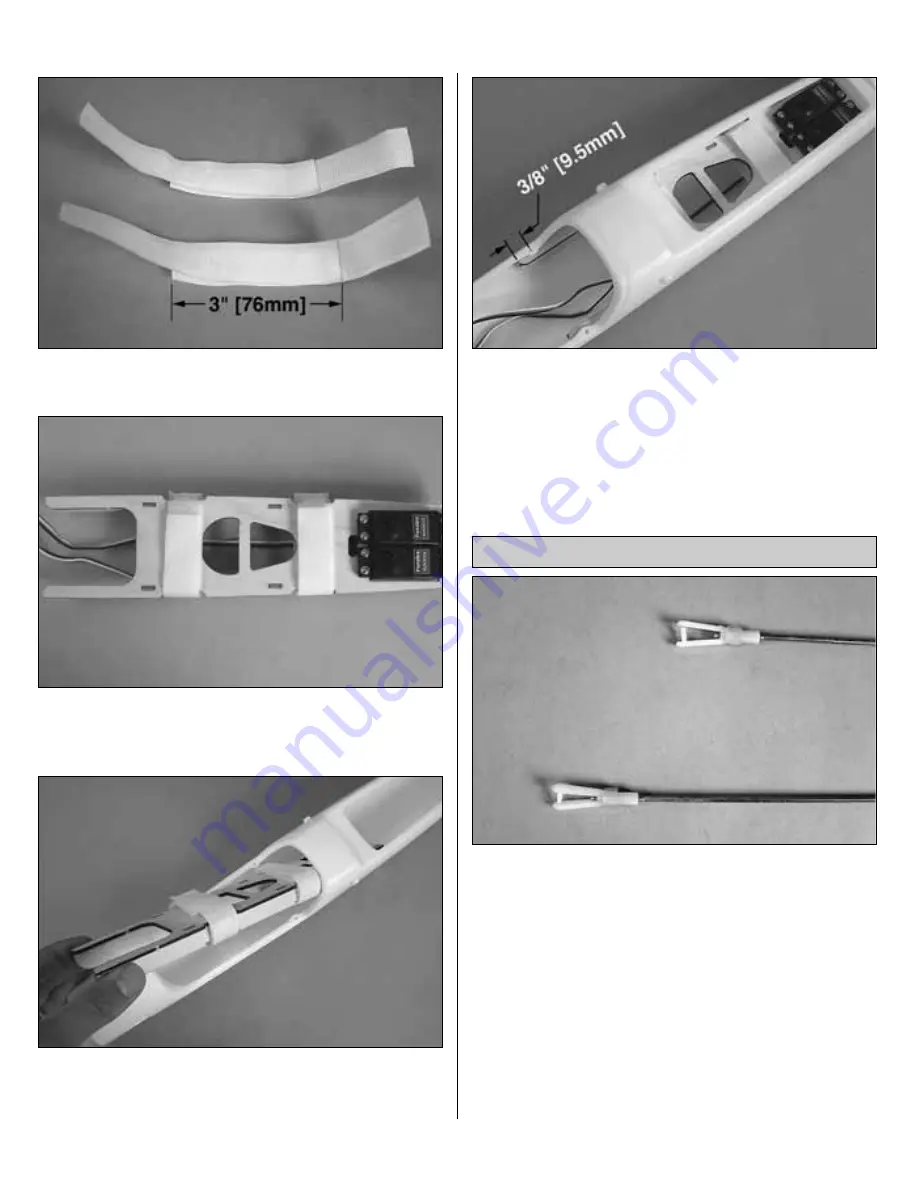
4. Overlap two sets of
hook and loop material
by
approximately 3" [76mm].
❏
5. Wrap the hook and loop material around the
notches in the radio tray.
❏
6. Maneuver the radio tray assembly into the
fuselage. Squeezing or skewing the fuselage slightly
while sliding the tray back will allow it to fit into place.
❏
7. Position the tray so that the front tips of the tray are
3/8" [9.5mm] forward of the front mounting holes.
Using a 1/16" [1.6mm] bit, drill out the six mounting
holes and secure the radio tray with (6) #2 x 1/4" [6mm]
screws. There are two indented mounting screw holes
on each side of the fuselage and two toward the front of
the radio tray.
❏
1. Thread two nylon clevises along with two silicone
clevis retainers onto the two 24" [610mm] pushrods. Be
sure that each clevis is threaded on approximately 14
complete rotations.
CONNECT THE CONTROL LINKAGES
10


