−
22
−
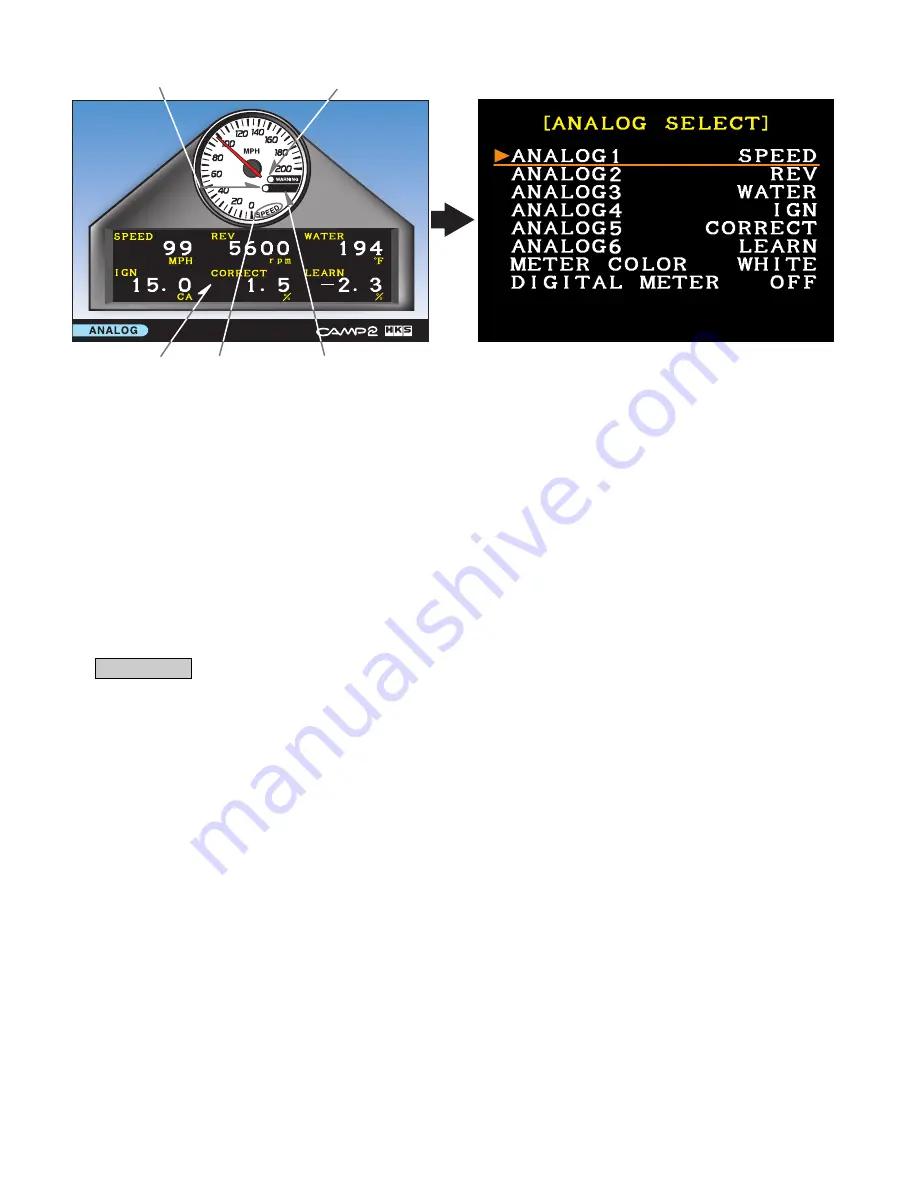
[1 Analog Meter with 6 Digital Meters]
Digital Indication
Peak Indicator
Warning Indicator
6 Digital Meters
Meter Name
<Setting>
・
From the menu, select [ANALOG] using the directional arrow buttons. Press ENTER.
・
Press the SELECT button of the controller to switch to [ANALOG SELECT]
(The right illustration above.).
●
ANALOG 1 - 6 (Selecting items to indicate)
・
To change individual settings, select from ANALOG 1 - 6 using the directional arrow buttons.
Press ENTER. After the character color changes from white to orange, the setting can be
edited.
・
To edit, select 1 from a possible 25 items using the directional arrow buttons. Press ENTER.
When the character color changes from orange to white, the edit is complete. (When "NONE"
appears, it means that there is no item to show.)
・
If more items needed to be edited, repeat the procedure above.
Advice
・
ANALOG 1 appears as the analog meter, and ANALOG 1 to 6 are to be shown as digital
meters below the analog meter.
・
6 digital meters on the screen shows ANALOG 1 to 3 from upper left hand side and ANALOG
4 to 6 from lower left hand side.
●
METER COLOR
・
Select the color of the meter from white, black, or red.
WHITE
BLACK
RED
●
DIGITAL METER (Digital data in the analog meters)
・
Digital data appears in a black portion on the right.
DIGITAL METER ON
DIGITAL METER OFF
After setting is complete, press the BACK button of the controller to go back to [ANALOG]
that is on the left illustration above.
: White panel / Black scale
: Black panel / White scale
: Black panel / Red scale
: Digital data are shown.
: Digital data are NOT shown.


