


INTRODUCTION
Version 2.0, February 2012. Copyright
2012 Hitron Technologies
16
Version 2.0, February 2012. Copyright
2012 Hitron Technologies
16
HITRON CGN USER’S GUIDE
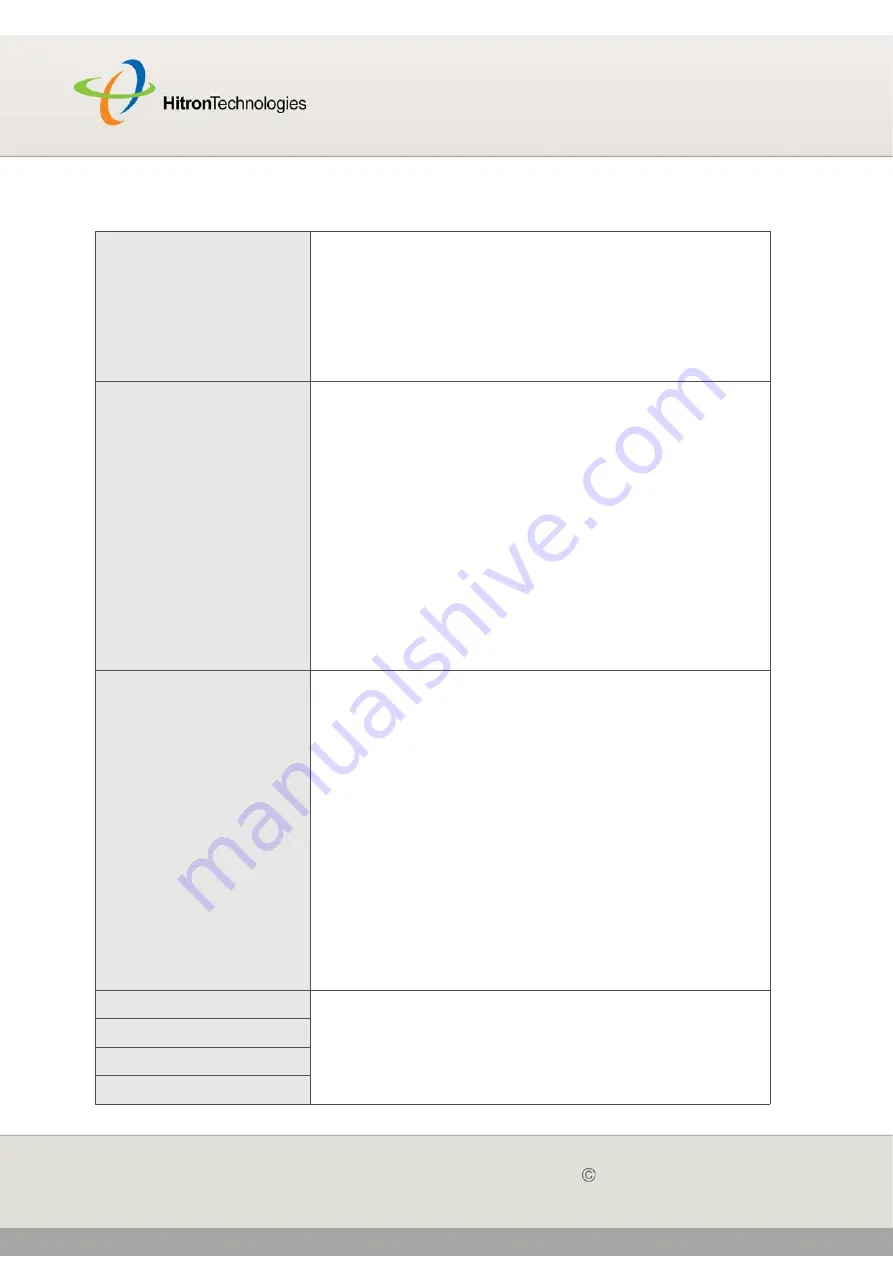
Table 2:
Hardware Connections
WPS PBC
Press this button to begin the WiFi Protected Setup
(WPS) Push-Button Configuration (PBC) procedure.
Press the PBC button on your wireless clients in the
coverage area within two minutes to enable them to join
the wireless network.
See
WPS
on page
85
for more information.
Reset
Use this button to reboot or reset your CGN.
Press the button and hold it for less than five seconds
to reboot the CGN. The CGN restarts, using your
existing settings.
Press the button and hold it for more than five
seconds to delete all user-configured settings and
restart the CGN using its factory default settings. See
Resetting the CGN
on page
24
for more information
on resetting the CGN.
NOTE:
Unless you previously backed-up the CGN’s
configuration settings prior to resetting the CGN,
the settings cannot be recovered.
USB
The CGN provides one USB 2.0 host port, allowing you
to plug in a USB flash disk for mounting and sharing
through the LAN interfaces via the Samba protocol
(network neighborhood).
The CGN supports the following Windows file systems:
FAT16
FAT32
NTFS
USB devices must not drain more than 500mA
from the USB port. USB devices requiring
more than 500mA should be provided with
their own power source(s).
LAN1
Use these ports to connect your computers and other
network devices, using Category 5 or 6 Ethernet cables
with RJ45 connectors.
LAN2
LAN3
LAN4


