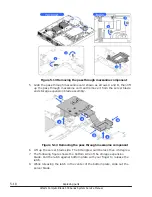


Figure 5-35 Removing the connection bracket
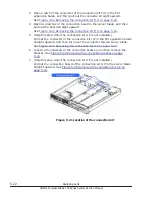
Figure 5-36 Removing the connection kit L/P
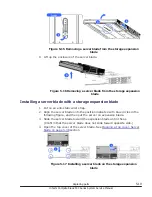
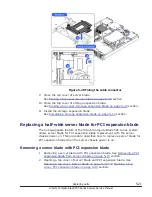
8
.
Lift up the PCI expansion blade side with the tilt angle of less than 45
degree.
9
.
While pulling down the latch against the bottom plate with your finger to
release the latch, slide the PCI expansion blade toward outer side.
Replacing parts
5-31
Hitachi Compute Blade 500 Series System Service Manual
Summary of Contents for CB 520A A1
Page 26: ...xxvi Preface Hitachi Compute Blade 500 Series System Service Manual ...
Page 152: ...4 64 Common process for replacement Hitachi Compute Blade 500 Series System Service Manual ...
Page 294: ...6 12 Identifying RAID rebuild status Hitachi Compute Blade 500 Series System Service Manual ...
Page 432: ...9 16 Updating firmware Hitachi Compute Blade 500 Series System Service Manual ...
Page 439: ...Change LOM configuration 10 7 Hitachi Compute Blade 500 Series System Service Manual ...
Page 442: ...10 10 Change LOM configuration Hitachi Compute Blade 500 Series System Service Manual ...
Page 450: ...10 18 Change LOM configuration Hitachi Compute Blade 500 Series System Service Manual ...
Page 464: ...11 14 Troubleshooting Hitachi Compute Blade 500 Series System Service Manual ...
Page 465: ...Hitachi Compute Blade 500 Series System Service Manual ...