- 13 -
Automatic Search:
Automatic search is started by pressing the
OK
button in the auto-search pop up
menu. All the services are searched and a
channel table is created automatically.
All channels found are stored in a sorted
form with respect to their channel numbers.
Some services may not appear with the cor-
rect channel number. At the time of printing,
not all broadcasters are sending their chan-
nel number information.
Manual Search:
In manual search, the number of the multi-
plex is entered manually and only that multi-
plex is searched for the channels. For every
valid channel number, signal level, signal
quality and network name are shown at the
bottom of the screen.
In both manual and auto search any existing
channel in the database is not re-stored to
avoid redundant duplicates of that channel.
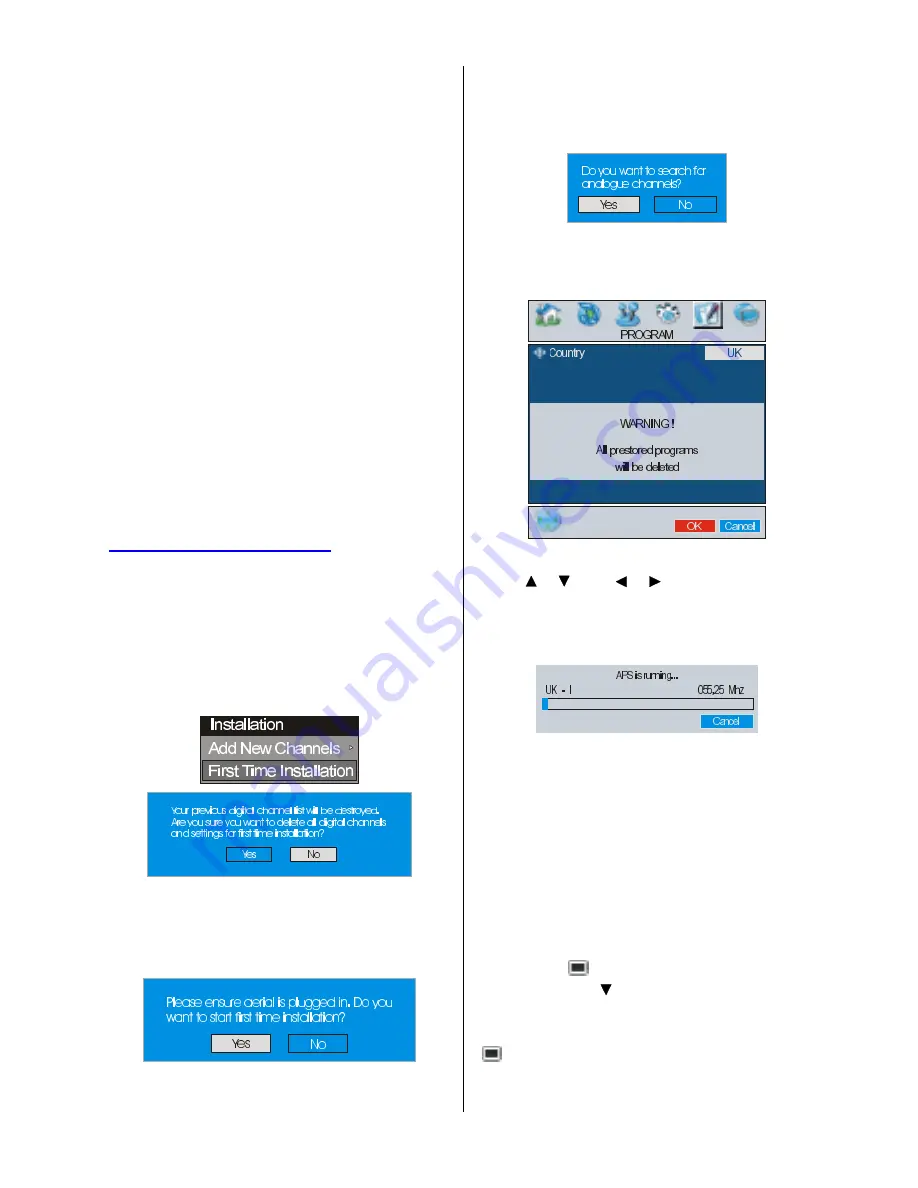
FIRST TIME INSTALLATION
The user can use this item to load default
settings, which had been loaded to the re-
ceiver at the factory.
To install factory settings, highlight
First
Time Installation
menu and press the OK
button, then you will be asked to confirm for
deleting all channels and settings.
By selecting YES and pressing the OK but-
ton, the existing channel table will be deleted.
After factory settings is loaded,
First Time
Installation
menu will be displayed.
Press the OK button to start installation. Af-
ter search is completed for digital channels, a
message asking search for analogue chan-
nels appears on the screen.
Press the OK button to search for analogue
channels.The following menu appears on the
screen for analogue channel search.
First of all choose Language and Country by
using / and / buttons. This will af-
fect the sort process in APS. To start APS,
press the RED or OK button.
After APS is finalized, the programme table
will appear on the screen. In the programme
table you will see the programme numbers
and names assigned to the programmes.
If you do not accept the locations and / or the
programme names, you can change them in
the Program menu. (See page 21 for Pro-
gram table explanation.)
Configuration
Press the button to display the Main
Menu and the button twice to highlight
Configuration, then press the
OK
button to
display the Configuration menu. Press the
button to leave the menu.
Summary of Contents for 37LD8700U
Page 1: ...GB Instructions for use 37LD8700U ...
Page 4: ... 3 LCD TV FRONT VIEW REAR VIEW 3RZHU RUG QSXW 3RZHU 2Q 2II EXWWRQ ...
Page 30: ... 29 Connect Peripheral Equipment Aerial Connection ...
Page 36: ... 35 Appendix D Main and PIP PAP Picture Combinations ...
Page 43: ... 2 Attention Only the original wall bracket should be used with this product 85 ...


