


Crossover Relief Valve Testing and Adjustment 29
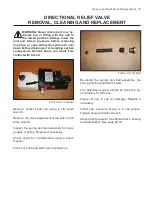
DIRECTIONAL RELIEF VALVE
TESTING AND ADJUSTMENT
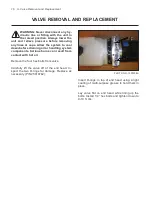
WARNING: Never disconnect any hy-
draulic line or fitting with the unit in
the raised position. Always lower the
unit and relieve pressure before removing
any lines or caps. Allow the system to cool
down before draining oil or handling system
components. Serious burns can result from
contact with hot oil.
Test Conditions:
WARNING: Vehicle engine must be
running for this procedure. Make sure
that there is adequate ventilation in
test area and/or that vehicle exhaust is vent-
ed outside of test area building. FAILURE TO
HEED CAN RESULT IN SERIOUS INJURY OR
DEATH.
- Vehicle battery is fully charged.
- Hydraulic oil level is to “Fill Line.”
Procedure:
Park vehicle in an area with adequate ventilation
and with enough room to safely angle the plow.
Set park brake. Lower the plow. Remove pump
cover.
WARNING: Plow must be angled dur-
ing this test. DO NOT stand between
the Blade and the vehicle while motor
is being tested. FAILURE TO HEED CAN RE-
SULT IN SERIOUS INJURY OR DEATH.
PHOTO NO. 1000391
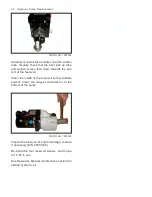
Carefully disconnect the hydraulic hose from ei-
ther port A or B depending on which side is be-
ing tested.
Using the proper fittings, install 0-3000 PSI pres
-
sure gauge as shown. See photo.
Locate the System Relief Valve on the end head
of the power unit, see photo no. 1000296C page
30. Remove cap and turn adjusting screw clock-
wise until it bottoms out.
Start the vehicle. While holding the joystick in
the FULL LEFT or RIGHT position, record the
pressure reading.
A change in pitch from the hydraulic motor should
be heard and a pressure of 1600 PSI + / - 100
PSI, 10’ Plows, 2100 PSI + / - 100 PSI, Home
Owner and Steel Straight Plows, 2500 PSI + / -
100 PSI, Poly Trip and Scoop Plows, should be
indicating on the pressure gauge.
If pressure readings are high or low, refer to the
following adjustment procedures.