User Manual of Digital Video Recorder
165
9.2.6
Configuring NAT Settings
Two ways are provided for port mapping to realize the remote access via the cross-segment network, UPnP™
and manual mapping.
UPnP
TM
Purpose:
Universal Plug and Play (UPnP™) permits the device to discover the presence of other network devices on the
network seamlessly and establish functional network services for data sharing, communications, etc. You can
use the UPnP™ function to enable the fast connection of the device to the WAN via a router without port
mapping.
Before you start:
Enable the UPnP™ function of the router to which your device is connected. When the network working mode
of the device is set as multi-address, the Default Route of the device should be in the same network segment as
that of the LAN IP address of the router.
Steps:
1.
Enter the Network Settings interface.
Menu > Configuration > Network
2.
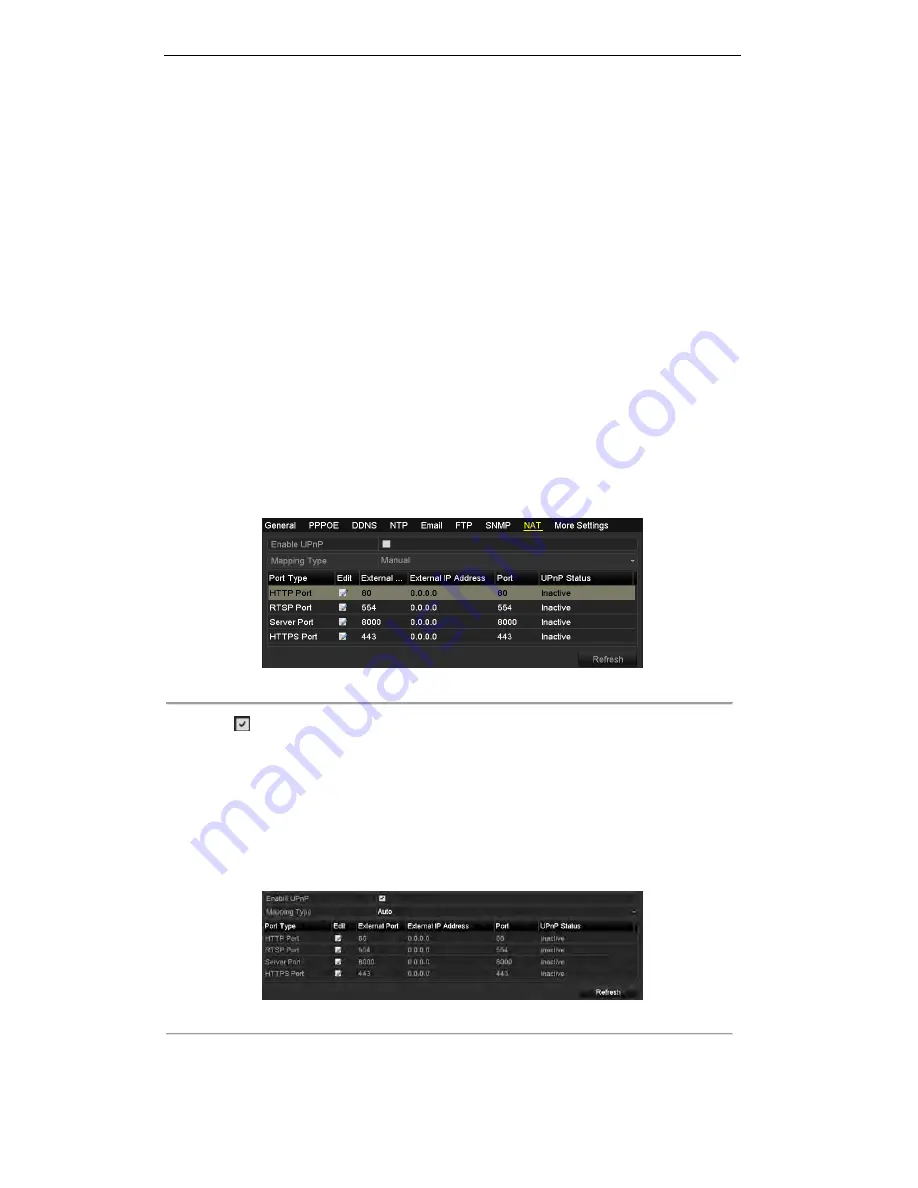
Select the
NAT
tab to enter the UPnP™ interface.
Figure 9. 23
UPnP™ Settings Interface
3.
Check
checkbox to enable UPnP™.
4.
Select the Mapped Type as Manual or Auto in the drop-down list.
Task1: Auto
If you select Auto, the Port Mapping items are read-only, and the external ports are set by the router
automatically.
Steps:
1)
Click
Apply
to save the settings.
2)
You can click
Refresh
to get the latest status of the port mapping.
Figure 9. 24
UPnP™ Settings Finished-Auto
Task2: Manual
Summary of Contents for DS-7208HWI-SV DS-7216HWI-SV
Page 1: ...Digital Video Recorder User Manual UD 6L0202D1336A01 ...
Page 15: ...User Manual of Digital Video Recorder 14 Chapter 1 Introduction ...
Page 30: ...User Manual of Digital Video Recorder 29 Chapter 2 Getting Started ...
Page 42: ...User Manual of Digital Video Recorder 41 Chapter 3 Live View ...
Page 50: ...User Manual of Digital Video Recorder 49 Figure 3 9 Information ...
Page 56: ...User Manual of Digital Video Recorder 55 Chapter 4 PTZ Control ...
Page 66: ...User Manual of Digital Video Recorder 65 Chapter 5 Record and Capture Settings ...
Page 79: ...User Manual of Digital Video Recorder 78 Figure 5 27 Record Schedule ...
Page 92: ...User Manual of Digital Video Recorder 91 Chapter 6 Playback ...
Page 104: ...User Manual of Digital Video Recorder 103 mode ...
Page 117: ...User Manual of Digital Video Recorder 116 Chapter 7 Backup ...
Page 136: ...User Manual of Digital Video Recorder 135 Chapter 8 Alarm Settings ...
Page 142: ...User Manual of Digital Video Recorder 141 Figure 8 12 Copy Settings of Alarm Input ...
Page 153: ...User Manual of Digital Video Recorder 152 Figure 8 27 Copy Settings of Alarm Output ...
Page 155: ...User Manual of Digital Video Recorder 154 Chapter 9 Network Settings ...
Page 182: ...User Manual of Digital Video Recorder 181 Chapter 10 RAID Configuration ...
Page 189: ...User Manual of Digital Video Recorder 188 Figure 10 14 Hot Spare Disk ...
Page 196: ...User Manual of Digital Video Recorder 195 Figure 10 28 Upgrade the Firmware ...
Page 197: ...User Manual of Digital Video Recorder 196 Chapter 11 HDD Management ...
Page 217: ...User Manual of Digital Video Recorder 216 Chapter 12 Camera Settings ...
Page 223: ...User Manual of Digital Video Recorder 222 Chapter 13 Device Management and Maintenance ...
Page 234: ...User Manual of Digital Video Recorder 233 Chapter 14 Others ...
Page 247: ...User Manual of Digital Video Recorder 246 Chapter 15 Appendix ...


