28
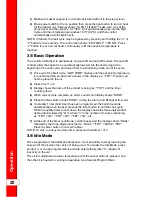
set to “YES” (If control suspects oil in drain pan “CAUTION IS THERE OIL IN
PAN?” “YES NO” may show in display. Make sure drain pan is empty before
proceeding).
4
4))
Press “✓” button; “DRAIN VAT?” “YES NO” shows in display. Press “X” button if
drain pan has oil in it, skip to step 9.
5
5))
Press “✓” button and display shows “OPEN DRAIN”. Pull out on drain knob to
open drain and display shows “DRAINING”. Oil drains from vat into drain pan.
6
6))
Display shows “VAT EMTY” “YES NO”. Verify that vat is empty, and press “✓”
button.
7
7))
Display shows “CLEAR OLD OIL FROM OIL LINES” “✓=PUMP” “X=DONE”.
Press and hold “✓” button for a few seconds to clear old oil. Once cleared, press
“X” button.
8
8))
Display shows “CLN VAT COMPLETE” “YES NO”. Once vat is clean, press “✓”
button.
9
9))
Display shows “DISPOSE” and then “✓=PUMP” “X=DONE”. Press ✓.
1
10
0))
Display shows “DISPOSING...” “X=STOP” and oil is pumped from drain pan to
bulk oil container. When all oil is pumped from pan, press “X” button (STOP).
1
11
1))
Display shows “DISPOSE” and then “✓=PUMP” “X=DONE”. Press “X” button;
display shows “CLOSE DRAIN”. Close drain.
1
12
2))
Display shows “MANUAL FILL VAT” (or “FILL VAT FROM BULK” if so
equipped), followed by “IS POT FILLED?” “YES NO”. Fill the vat to the lower
indicator line on the rear of the vat. See
Filling Or Adding Oil, page 18
1
13
3))
Press “✓” button and fryer returns to normal operation.
3
3..1
12
2..3
3 D
Diisscca
arrd
d O
Oiill U
Ussiin
ng
g O
Op
pttiio
on
na
all O
Oiill D
Diisscca
arrd
d S
Sh
hu
uttttlle
e O
OD
DS
S--
4
40
00
0
W
Wiitth
h p
prro
ollo
on
ng
ge
ed
d u
usse
e,, tth
he
e fflla
assh
h--p
po
oiin
ntt o
off o
oiill iiss rre
ed
du
ucce
ed
d.. D
Diisscca
arrd
d o
oiill
iiff iitt ssh
ho
ow
wss ssiig
gn
nss o
off e
exxcce
essssiivve
e ssm
mo
okkiin
ng
g o
orr ffo
oa
am
miin
ng
g.. S
Se
erriio
ou
uss
b
bu
urrn
nss,, p
pe
errsso
on
na
all iin
njju
urryy,, ffiirre
e,, a
an
nd
d// o
orr p
prro
op
pe
errttyy d
da
am
ma
ag
ge
e cco
ou
ulld
d
rre
essu
ulltt..
1
1))
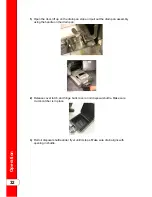
Open the door, lift up on the drain pan stop and pull out the drain pan assembly
using the handle on the drain pan.
Summary of Contents for Wendy's Evolution Elite EEG-251
Page 2: ......
Page 5: ...Contents iii...
Page 14: ...Introduction 2...
Page 19: ...Installation 7 Figure 2 1 Flexible Gas Line Cable Restraint Installation...
Page 22: ...Figure 2 2 1 Well Dimensions Figure 2 3 2 Well Dimensions Installation 10...
Page 23: ...Figure 2 4 3 Well Dimensions Figure 2 5 4 Well Dimensions Installation 11...
Page 24: ...Installation 12...
Page 51: ...Operation 37...
Page 62: ...Operation 48...
Page 68: ...Information Mode 54...
Page 72: ...Product Program Mode 58...
Page 87: ...Troubleshooting 73...
Page 88: ...Troubleshooting 74...
Page 89: ...blank page...


