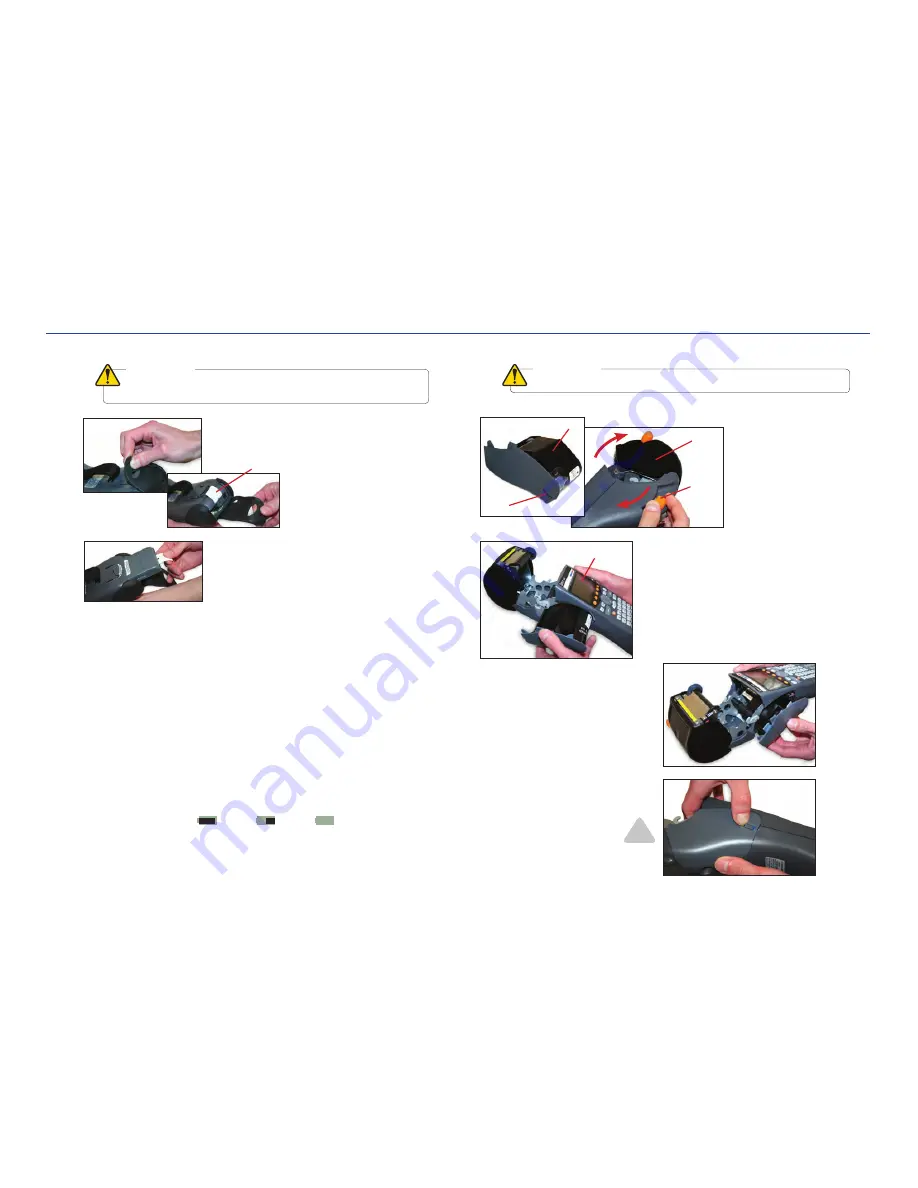
REMOVING THE BATTERY
u
nOte:
Do not remove the
pull
Pull Tab
1.
To remove the
battery,
first open the
battery
3. the batterY
INSTALLING THE RIBBON CARTRIDGE
Printer
Cover
Release
Ribbon
Locking
Tab
4. lOadinG Printer SUPPlieS
5.
Lock the
ribbon cartridge
in place by
6.
Turn the printer on and press
to tighten the
ribbon
.
3.
Lift the
ribbon cartridge
slightly
to avoid snagging the
ribbon
on the
parts below. Gently slide the
ribbon
cartridge
into the side of the
printer
until it snaps tightly and is flush with
2.
Orient the
ribbon cartridge
so the
section of exposed ribbon faces up,
toward the underside of the
LCD screen
.
Rest the ribbon cartridge on the bottom
1.
Open the
printer
cover
by pulling the
LCD Screen
USING THE BATTERY
The Sport has an intelligent battery voltage monitor. As the voltage drops, the
firmware drives the battery harder to deliver the voltage needed to maintain high
print quality—even as the battery becomes completely discharged. Printed labels
maintain the same high quality right up until the battery is completely exhausted.
Printing large characters and/or large labels requires more power than small ones
and will drain the
battery
faster.
Battery usage is monitored by the printer internally to maximize battery life. If the
printer
is on and not in use after approximately 15 minutes, the
printer
saves the
current label design and powers off to preserve the
battery
. When the
printer
is
turned on again, the
printer
will resume from the same screen as when it powered
off.
u
WarninG:
Risk of fire or explosion if the
battery
is replaced by an incorrect type.
Use only a HellermannTyton approved battery.
Full Battery
Partial Battery
Empty Battery
iMPOrtant:
Always power down the printer before removing the battery
to prevent damage to the LCD.
iMPOrtant:
The printer should be off prior to installing the ribbon cartridge.
-6-
-5-
Feed


