Units of Measure
Selection of units of measure:
1. Select option Units of Measure
with UP (10) / DOWN (8)buttons.
2. Enter the submenu with a short press of the M (9) button.
3. Select the desired units of measurement with a short press of the UP (10) / DOWN (8)
buttons: Meters or Yards.
4. Save the selection with a short press of the M (9) button.
5. Menu exit will take place automatically.
Objective Lens
Lens selection is used when replacing objective lenses.
Selection of the lens type is important for the correct display of the optical magnification and
adequate operation of the
.
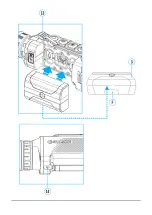
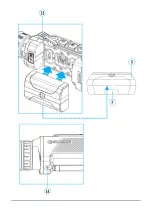
1. Replace the objective lens: to do this, move the latch(12) backwards, turn the lens
counter- clockwise all the way and remove the lens.
2. Install a new lens, move the latch (12) backwards and move clockwise until the latch
snaps.
3. Enter the General Settings
submenu.
4. Select theObjective Lens
submenu with UP (10) / DOWN (8)buttons
5. Enter the submenu with a short press of the M (9) button.
6. With a short press of the UP (10) / DOWN (8) buttons select the desired lens: 28; 38 or
50.
7. Confirm selection with a long press of the M (9) button.
Default Settings
This menu option allows you to return the settings to their defaults.
1. Select option Default Settings
with UP (10) / DOWN (8) buttons.
2. Enter the submenu with a short press of the M (9) button.
3. With a short press of the UP (10) / DOWN (8) buttons select "Yes" to restore default
settings or "No" to abort.
4. Confirm selection with a short press of the ? (9) button.
If "Yes"is selected the display will show "Return default settings?" and "Yes" and "No"
options.
Select "Yes" to restore default settings. If "No" is selected the action is aborted and you
return to the submenu.
The following settings will be returned to their defaults before being changed by the user:
Video Recorder Operating Mode- Video
Summary of Contents for 2 XP50 PRO
Page 1: ...Helion 2 Pro Manual ...
Page 6: ...Components and Controls ...
Page 7: ...1 Lens cover ...
Page 15: ...External Power Supply Show device diagram ...
Page 16: ......
Page 18: ...Powering on and Image Setting Show device diagram ...
Page 19: ......
Page 21: ...Microbolometer Calibration Show device diagram ...
Page 22: ......
Page 24: ...Discrete Digital Zoom Show device diagram ...
Page 25: ......
Page 28: ...Quick Menu Functions Show device diagram ...
Page 29: ......
Page 31: ...Enter the Main Menu Show device diagram ...
Page 32: ......
Page 34: ...Mode Show device diagram ...
Page 35: ......
Page 37: ...Image Detail Boost https www youtube com embed GNezJKveMRc Show device diagram ...
Page 38: ......
Page 40: ...Color Modes Show device diagram ...
Page 41: ......
Page 44: ...Calibration Mode Show device diagram ...
Page 45: ......
Page 47: ...Microphone Show device diagram ...
Page 48: ......
Page 50: ...Icon Brightness Show device diagram ...
Page 51: ......
Page 53: ...General Settings Show device diagram ...
Page 54: ......
Page 58: ...Wi Fi Activation Show device diagram ...
Page 59: ......
Page 61: ...Wi Fi Settings Show device diagram ...
Page 62: ......
Page 64: ...Device Information Show device diagram ...
Page 65: ......
Page 67: ...Video Recording and Photography Show device diagram ...
Page 68: ......
Page 71: ...Stadiametric Rangefinder Show device diagram ...
Page 72: ......
Page 74: ...Display Off Function Show device diagram ...
Page 75: ......
Page 77: ...PiP Function Show device diagram ...
Page 78: ......
Page 83: ...USB Connection Show device diagram ...
Page 84: ......
Page 95: ......


