background image

9

fiber orientation. If deep tissue layers are to

be stimulated  the electrodes must be placed

across  to  the  fiber  orientation  or  cross 
electrode arrangement. Please see the figure 

1 and 2 on page no 19. 

•   In order to extend the durability of the 

electrodes, use them on clean skin which 
should be free from hair and grease. 
If necessary, clean the skin with water 
before application and remove the hair.

•   If an electrode becomes detached during 

the application, the pulse intensity 
of both channels goes to the lowest 
setting. Press the PAUSE key to pause 
the application. Reposition the electrode 
and continue the application by pressing 
the ON/OFF key again and setting the 
required pulse intensity.

Program Overview

The PL-982 unit has a total 30 programs:
• 10 TENS programs
• 10 EMS programs
• 10 MASSAGE programs

For all programs, you can set the length
of application from 5 minutes to 90 minutes. 
And also  can set different intensity levels , 
if required for each channel.
Besides this for TENS and EMS programs P0, 
you can also change the pulse frequency & 
pulse width of the individual cycles as you 
wish.
Cycles are the different sequences making 
up the programs.
They automatically run one after the other

and increase the efficiency of stimulation on
different types of muscle fiber and combat
pre-mature muscle fatigue. You will find the

standard stimulation parameter settings and
information on placing the electrodes in the
following program charts for TENS, EMS and
MASSAGE.

Summary of Contents for purecare 982

Page 1: ...982 TENS EMS MASSAGE Advanced Pro DigitalElectricStimulator User s Manual 2 2 SUPER CHANNELS Handheld Advanced Please read this User s Manual thoroughly before using your digital electric stimulator...

Page 2: ......

Page 3: ...0 Program Overview 10 7 How to Use Tens Ems Massage modes 10 8 How to change settings 11 9 How to customize own program 12 10 Maintenance 14 11 Problems Solutions 15 12 Technical Specification 17 13 E...

Page 4: ...ulation means Electrical Stimulation of Nerves through the skin 2 EMS Electrical Muscle Stimulation is a widespread and generally recognized method It has been used for years by the sports men women I...

Page 5: ...ting application and the second one to achieve relaxing resting effect relaxing application 3 MASSAGE Muscle relaxation in order to loosen up muscular tension Improving muscular fatigue symptoms Accel...

Page 6: ...e any metal implants 11 Do not use near the genitals GENERAL SAFETY INSTRUCTIONS 12 Do not use on injured or inflamed skin 13 The device must not be used near the heart 14 Do not apply on the forehead...

Page 7: ...the same time 30 Ensure that no metallic objects such as belts buckles or necklaces can come in contact with the electrodes during stimulation 31 Do not use it near any high flammable substances gase...

Page 8: ...2 Program Number 3 Treatment Timer 4 Intensity Indicators 5 Low Battery Indicator 6 Frequency Display 7 Pulse Width Display 8 Body Map Indicator Keys A On OFF B Menu C Up Down D Enter E Intensity adj...

Page 9: ...Press and hold to unlock when keys are locked during stimulation C UP DOWN KEY 1 Use to select treatment programe and treatment time D ENTER KEY 1 Use to confirm selection and move to next step E Int...

Page 10: ...y is pressed this is acknowledged by a signal tone in order to ensure that any unintentional pressing of a key is detected This signal tone cannot be switched off If an admissible key is pressed there...

Page 11: ...ON OFF key again and setting the required pulse intensity Program Overview The PL 982 unit has a total 30 programs 10 TENS programs 10 EMS programs 10 MASSAGE programs For all programs you can set th...

Page 12: ...ng the ENTER KEY Fig 1 5 Using the UP DOWN keys select the program you want and confirm it by pressing the ENTER KEY Fig 2 6 Using the UP DOWN keys select the total treatment time and confirm by press...

Page 13: ...vent further change of intensity or it will automatically lock after 20 seconds Interrupting stimulation Press the pause key which is located between CH1 and CH2 intensity adjustment dials To resume s...

Page 14: ...may be helpful to you 3 Press the ON OFF key in order to switch on the device 4 Press MENU and navigate through the submenus TENS EMS and confirm your selection with ENTER KEY Fig 1 5 Using the UP DO...

Page 15: ...peration status display The graphic will starts flashing Fig 6 10 Adjust the pulse intensity which is the most comfortable for you by rotating intensity adjustment dials CH 1 CH 2 Fig 7 Note Your cust...

Page 16: ...nly use the device again once it is completely dry 5 Do not use any chemical cleaners or abrasive agents for cleaning 6 Remove the batteries from the unit if you are not going to use it for longer per...

Page 17: ...g treatment What should I do 1 Look at the display Is any channel flashing Interrupt the program by pressing the ON OFF key Make sure that the connecting leads are properly connected to the electrodes...

Page 18: ...ritation You must therefore replace these The skin in the treatment area becomes red What should I do Stop treatment immediately and wait until the skin has returned to normal If any redness beneath t...

Page 19: ...ICATION Chapter 7 MODEL Health Vision PL 982 Digital Electric Stimulator PULSE DURATION 40 300 s PULSE FREQUENCY 1 120 Hz OUTPUT VOLTAGE Max 90 Vpp 500 0hm OUTPUT CURRENT Max 108 mApp at 500 0hm BATTE...

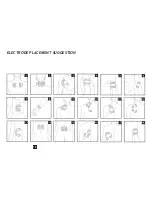
Page 20: ...18 ELECTRODE PLACEMENT SUGGESTION...

Page 21: ...19 1 Gel pad placed stimulates for surface muscles which white and Gray cable are parallel 2 Gel pad placed stimulates for deep tissue which white and gray cables are crosswise...

Page 22: ...arque 1 2 3 4 5 6 7 8 9 10 Possible Electrode Position EN C Cycle W Width F Frequency OT On time OF Off time AP application number P P 1 Arm relaxation 2 Chest relaxation 3 Abdominal relaxation 4 Arti...

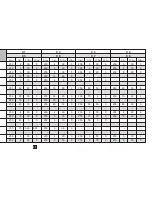
Page 23: ...0 75 4 0 250 10 20 0 250 70 4 0 250 65 4 0 250 40 30 0 250 45 30 0 250 55 30 0 250 60 30 0 250 4 30 0 250 4 20 0 250 6 30 0 250 6 20 0 250 8 30 0 250 8 20 0 250 10 30 0 250 10 20 0 250 40 5 0 250 6 10...

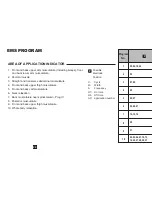
Page 24: ...umber AREA OF APPLICATION INDICATOR 1 Front and back upper arm musculature Including biceps front and back lower arm musculature 2 Pectoral muscle 3 Straight and transverse abdominal musculature 4 Fro...

Page 25: ...5 30 1 250 6 15 1 250 8 15 1 250 10 15 1 250 2 20 1 250 2 20 1 250 1 30 1 250 1 30 1 250 4 30 1 250 4 20 1 250 6 30 1 250 6 20 1 250 8 30 1 250 8 20 1 250 20 5 1 250 6 5 1 250 30 5 1 250 20 5 1 250 6...

Page 26: ...sing massage 5 Side of hand pressing massage 6 Vibratory massage 7 Tap massage switch between electrodes 8 Massage jet switch between electrodes 9 Pressure massage jet Switch between electrodes 10 Com...

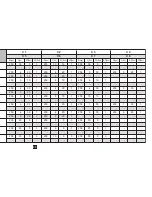
Page 27: ...40 5 0 250 50 5 0 250 60 5 0 250 75 5 0 250 90 5 0 250 110 5 0 250 20 60 0 250 30 60 0 250 40 60 0 250 50 60 0 250 60 60 0 250 75 60 0 250 90 60 0 250 110 60 0 20Hz 40 s 250 s 40 s200 8 30 0 250 6 0...

Page 28: ...26...

Page 29: ...27...

Page 30: ...LR Veldhoven Netherlands This product meets the regulations of Directive 93 42 EEC in medical device EU Representative Manufactured by Manufacture Date Attention see instructions Dispose of the devic...

Reviews: