8
Start Up
1. Press on the battery cover at the back of
the device and push it to the left side.
2. Install 3 AAA 1.5 V alkaline batteries.
Ensure that you insert the batteries with
the correct polarity as marked.
3. Replace the battery cover carefully.
4. Attach the connecting cable to the
electrodes.
Note: The electrodes have a clip fastener to
ensure easy connection.
5. Insert the connecting cable connectors
into the socket at the bottom of the
device.
6. Do not pull, twist or make any sharp
angles in the cables.
If the device is not used within 3 minutes, it
switches off automatically (automatic switch
off function). When it is switched on again,
the LCD main menu screen appears, with the
last used submenu flashing.
When a key is pressed, this is acknowledged
by a signal tone in order to ensure that any
unintentional pressing of a key is detected.
This signal tone cannot be switched off.
If an admissible key is pressed, there is one
short beep. If an inadmissible key is pressed,
there are two short beeps.
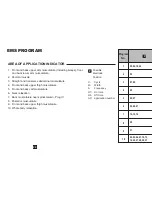
Electrodes placement
For the desired success of any stimulation
application, it is important that electrodes
are placed sensibly. The electrode positions
are suggested on page no.18 & 19 , (Figs. 1–
32) as a guide.
Electrode distance
• Most reasonable distance: approx. 5 –15
cm.
• Below 5 cm, it is mainly surface
structures which are strongly stimulated.
• Over 15 cm, large area and deep
structures are stimulated very weakly.
Electrode relationship to muscle fiber
orientation
Choice of current flow direction to be
selected for the desired muscle layer.
If surface muscles are to be stimulated the
electrodes must be placed parallel to the
Chapter 4
OPERATION


