5
5.
Slowly insert the HD24613 into the wall box until the faceplate frame is flush to the wall.
6.
Fasten both the HD24613 and the faceplate frame to the wall box with screws provided.
7.
Line-up and push the faceplate cover onto the frame until it snaps securely into place.
2.3. Connecting a Managing Computer
To configure the HD24613 using the
Advanced
option, a
managing computer
with a Web browser is
needed.
NOTE:
If you are using the browser,
Opera
, to configure the HD24613, click the menu item
File
,
click
Preferences...
, click
File types
, and edit the MIME type,
text/html
, to add a file extension
“.sht” so that Opera can work properly with the Web management pages of the AP.
Since the configuration/management protocol is HTTP-based, make sure that
the IP address of the
managing computer and the IP address of the managed AP are in the same IP subnet
(the default
IP address of the HD24613 is
192.168.100.1
and the default subnet mask is
255.255.255.0
.)
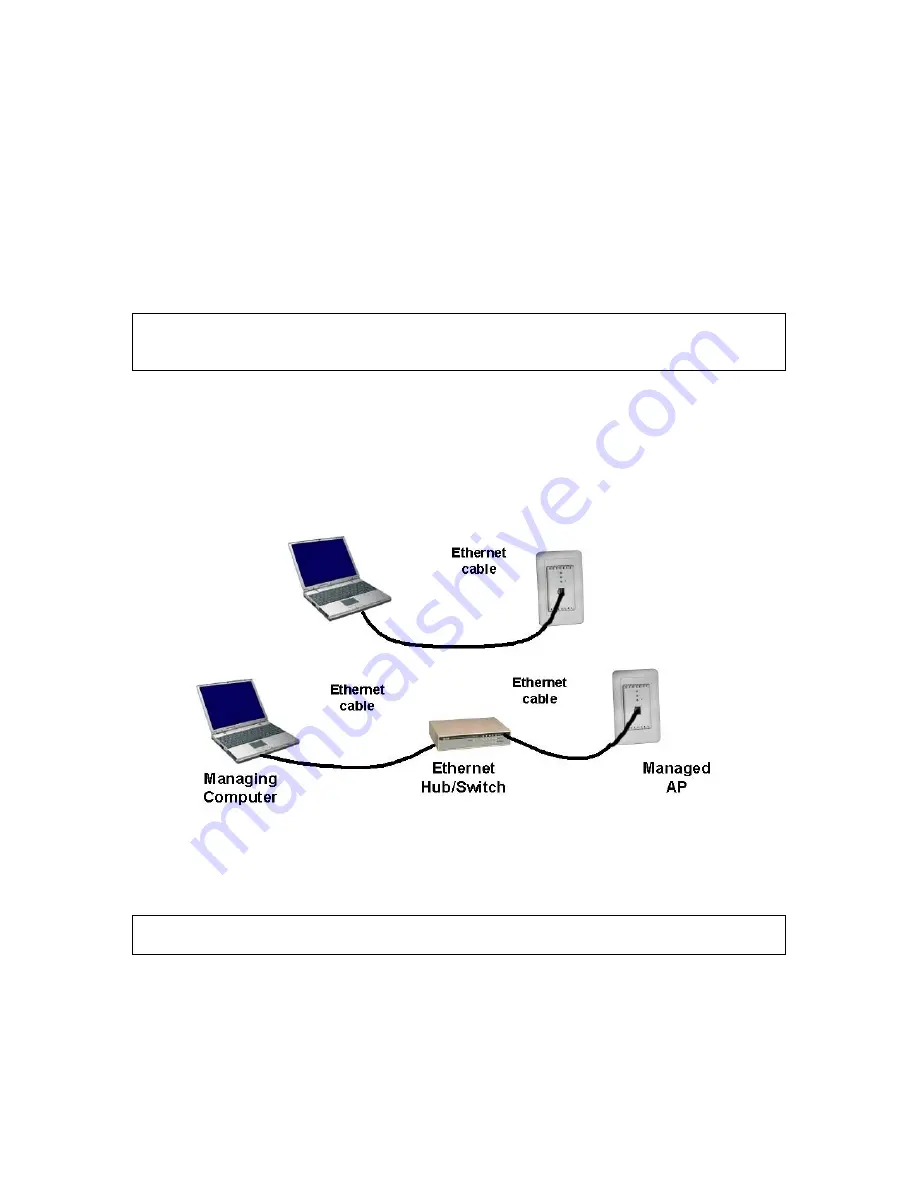
To connect the Ethernet managing computer and the managed HD24613 for first-time configuration,
you have two choices as illustrated in Fig. 1.
Fig. 1. Connecting a managing computer and the HD24613 via Ethernet
You can use either a standard Ethernet cable (included in the package) or a switch/hub with two nor-
mal Ethernet cables.
NOTE:
One connector of the Ethernet cable must be plugged into the HD24613 WAN port for con-
figuration.
2.4. Configuring the AP
After the IP addressing issue is resolved, launch a Web browser on the managing computer. Then, go
to “
http://192.168.100.1
” to access the
Web-based Network Manager
login page.


