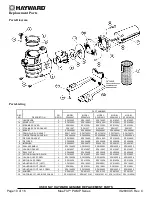


USE ONLY HAYWARD GENUINE REPLACEMENT PARTS
Page 7 of 16
Max-Flo™ PUMP Series
IS2800X5 Rev. C
Start-Up & Operation
WARNING –
All suction and discharge valves
MUST
be
OPEN
, as well as filter air relief
valve (if available) on filter,
when starting the circulating pump system. Failure to do so could result in
severe personal injury.
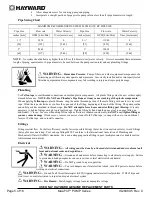
Starting/Priming the Pump:
Pumps with single speed motors are self priming to 8 ft. and pumps with 2 speed motors are self priming to
8 ft. on high speed only.
Fill strainer housing with water to suction pipe level. If water leakage occurs from anywhere on the
pump or filter, DO NOT start the pump. If no leakage occurs, stand at least 10 feet from pump and/or filter and proceed with
starting the pump.
WARNING
–
Return to filter to close filter manual air relief valve when a steady stream of water (not air or air
and water) is discharged from valve.
Failure to do so could result in severe personal injury.
ATTENTION
–
NEVER OPERATE THE PUMP WITHOUT WATER
. Water acts as a coolant and
lubricant for the mechanical shaft seal. NEVER
run pump dry.
Running pump dry may damage seals, causing leakage,
flooding, and voids warranty. Fill strainer housing with water before starting motor.
ATTENTION –
Do NOT add chemicals to pool/spa system directly in front of pump suction. Adding undiluted
chemicals may damage pump and voids warranty.
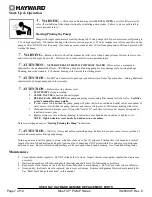
ATTENTION –
Before removing strainer cover:
1.
STOP
PUMP
before proceeding.
2.
CLOSE VALVES
in suction and outlet pipes.
3.
RELEASE ALL PRESSURE
from pump and piping system using filter manual air relief valve.
See filter
owner’s manual for more details.
4.
If water source is higher than the pump, pump will prime itself when suction and outlet valves are opened. If
water source is lower than the pump, unscrew and remove strainer cover; fill strainer housing with water.
5.
Clean and lubricate strainer cover O-ring with "Jack's 327" each time it is removed. Inspect O-ring and re-
install on strainer cover.
6.
Replace strainer cover on strainer housing; turn strainer cover hand knobs clockwise to tighten cover.
NOTE - Tighten strainer cover knobs by hand only (no wrenches).
Before re-starting pump, see “
Starting/Priming the Pump”
instructions.
ATTENTION
–
Wait five (5) seconds before re-starting pump. Failure to do so may cause reverse rotation of
motor and consequent serious pump damage.
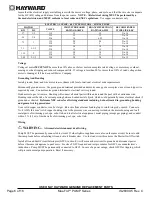
Turn on power and wait for pump to prime, which may take up to five (5) minutes. Priming time will depend on vertical
length of suction lift and horizontal length of suction pipe. If pump does NOT prime within five minutes, stop motor and
determine cause. Be sure all suction and discharge valves are open when pump is running. See Troubleshooting Guide.
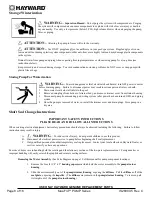
Maintenance
Clean strainer basket regularly. Do NOT strike basket to clean. Inspect strainer cover gasket regularly and replace as
necessary.
Hayward pumps have self-lubricating motor bearings and shaft seals. No lubrication is necessary.
Keep motor clean. Insure air vents are free from obstruction to avoid damage. Do NOT use water to hose off motor.
Occasionally, shaft seals must be replaced, due to wear or damage. Replace with genuine Hayward seal assembly kit.
See “Shaft Seal Change Instructions” in this manual.


