17
A.
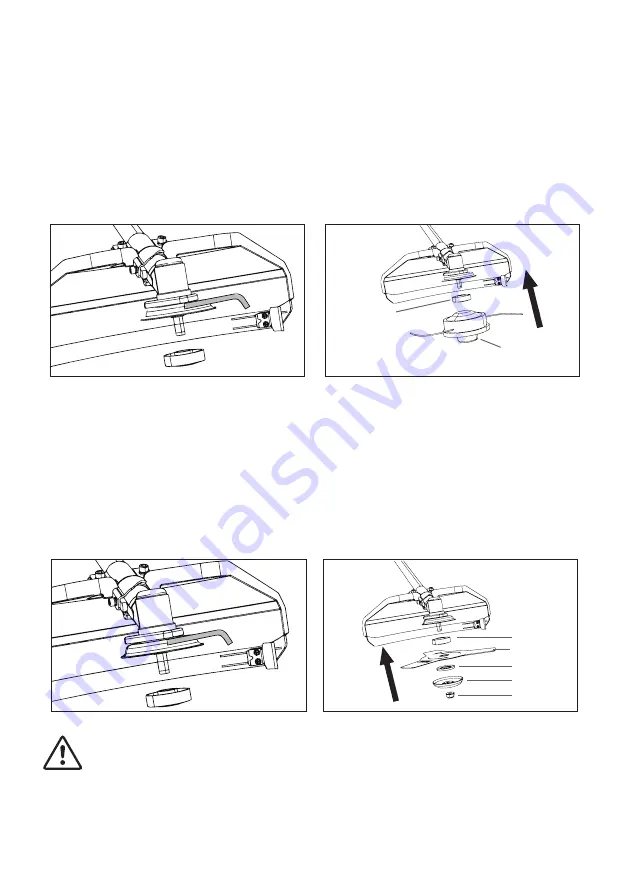
Assemble the line spool
Line up the two holes of the flange and shield(black one). Lock the spindle by inserting the 5mm
hex key through the holes. Mount the inner flange(a) and line pool into the spindle and rotate
counter-clockwise until the line spool is fitted securely.
Remove the hex key to unlock the spindle.
Store the outer flange(b), protective cover plate(c) and nut(d) in a safe place in case they are needed
for later use.
Line spool
a. Inner flange
B. Assemble the cutting blade
Line up the two holes of the flange and shield(black one). Lock the spindle by inserting the 5mm hex
key through the holes. Mount the inner flange(a), blade, outer flange(b), protect cover plate(c), nut(d)
into the spindle according to priority and rotate counter-clockwise until the cutting blade is fitted
securely. See the pictures below.
NOTE:
The blade rotation direction needs be the same as the picture below. Surface with printed
specification on blade need to be on the upside. Use the screwdriver to hold the spindle and tighten
the nut counter-clockwise. Use wrench to tight the nut and ensure the nut is tightened securely.
Blade
a
b
c
d
WARNING!
Make sure the cutting blade has been assembled correctly before use!


