


82
H4D
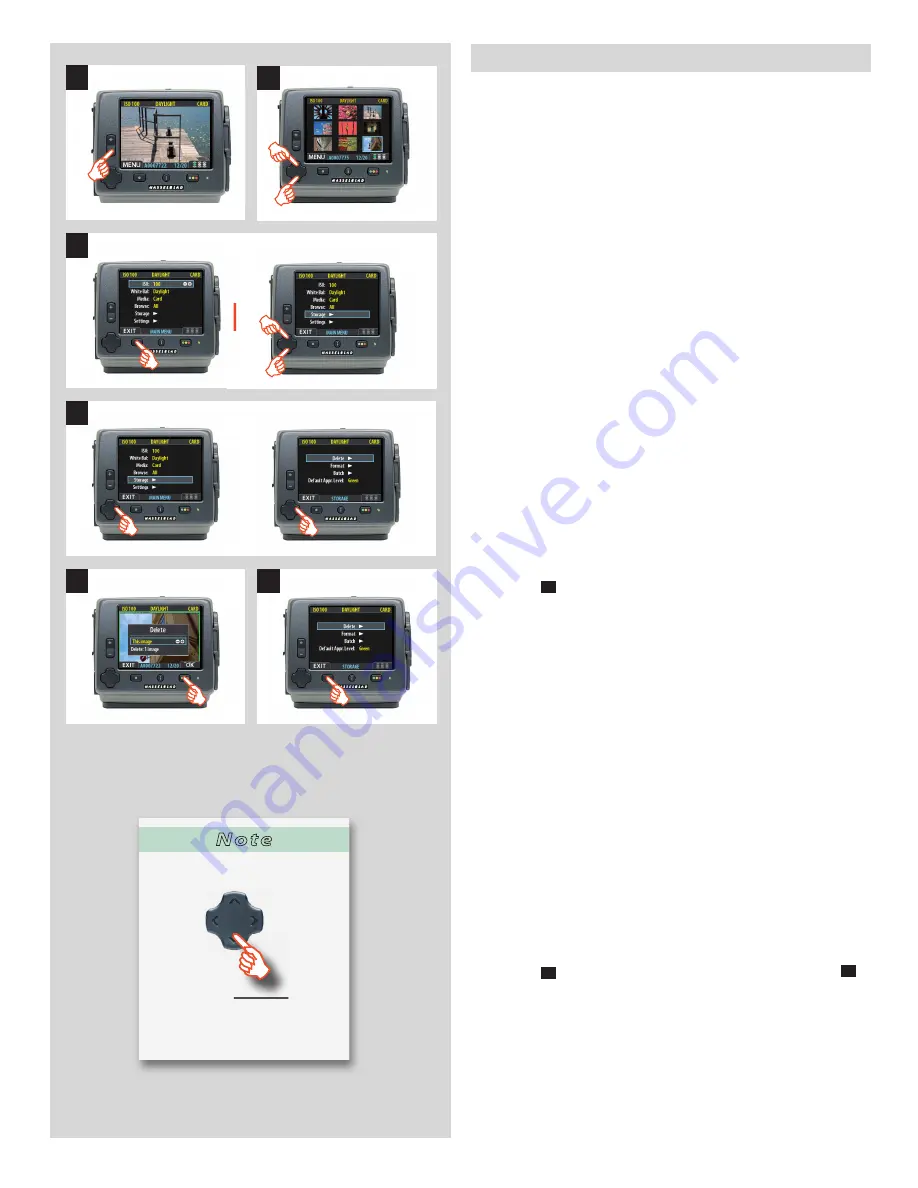
Delete
The storage settings allow you to format media and create new
batches. You can also set the initial approval status (green or yel-
low) assigned to new pictures.
The fi rst item on the storage list is fi le deletion. The great advan-
tage of digital capture is of course the ability to judge images on
the spot, delete them immediately if necessary and thereby make
room for more valuable captures.
The H4D enables you to delete images using any of the following
techniques:
• Delete the currently selected image only.
• Delete all images from the current batch
• Delete all images from the current medium
• Delete all red-status images from the current batch
• Delete all red-status images from the current medium
• Delete all red- or yellow-status images from the current
batch
• Delete all red- or yellow-status images from the current
medium
In this example, one image is to be deleted from a batch contain-
ing nine images.
To delete a single image:
1. Use the
–
button to go to the nine-thumbnail (in this case)
view to make an initial search.
2. Use the navigator button to select the image you wish to
delete. When you are viewing thumbnails, the selected image
has a coloured border around it. When you are viewing single
images, the selected image is the one currently shown. (You
can delete an image either from single image view or from
thumbnail view).
3. Select
MAIN MENU > STORAGE
4. Press
to open the
Delete
dialog.
5. You are now shown a full-size preview of the selected image
and asked to confi rm the delete. Press
OK
.
6. You now return to the main menu. Notice that the unwanted
image has been deleted and the batch only contains the three
remaining images. Press the menu button to exit the menu
system.
or:
1. Use the
–
button to make an initial search and then the
+
button to reach full-size preview.
2. Hold down
on the navigator button to open the
Delete
dialog.
3
4
2
6
5
1
N o t e
Delete shortcut
Select an image and then press
and hold
until the confi rm-
delete dialog opens.


