


G1 SCBA Radio Pairing Guide |
Harris
Rev. 5-23-2019
Page
7
of
13
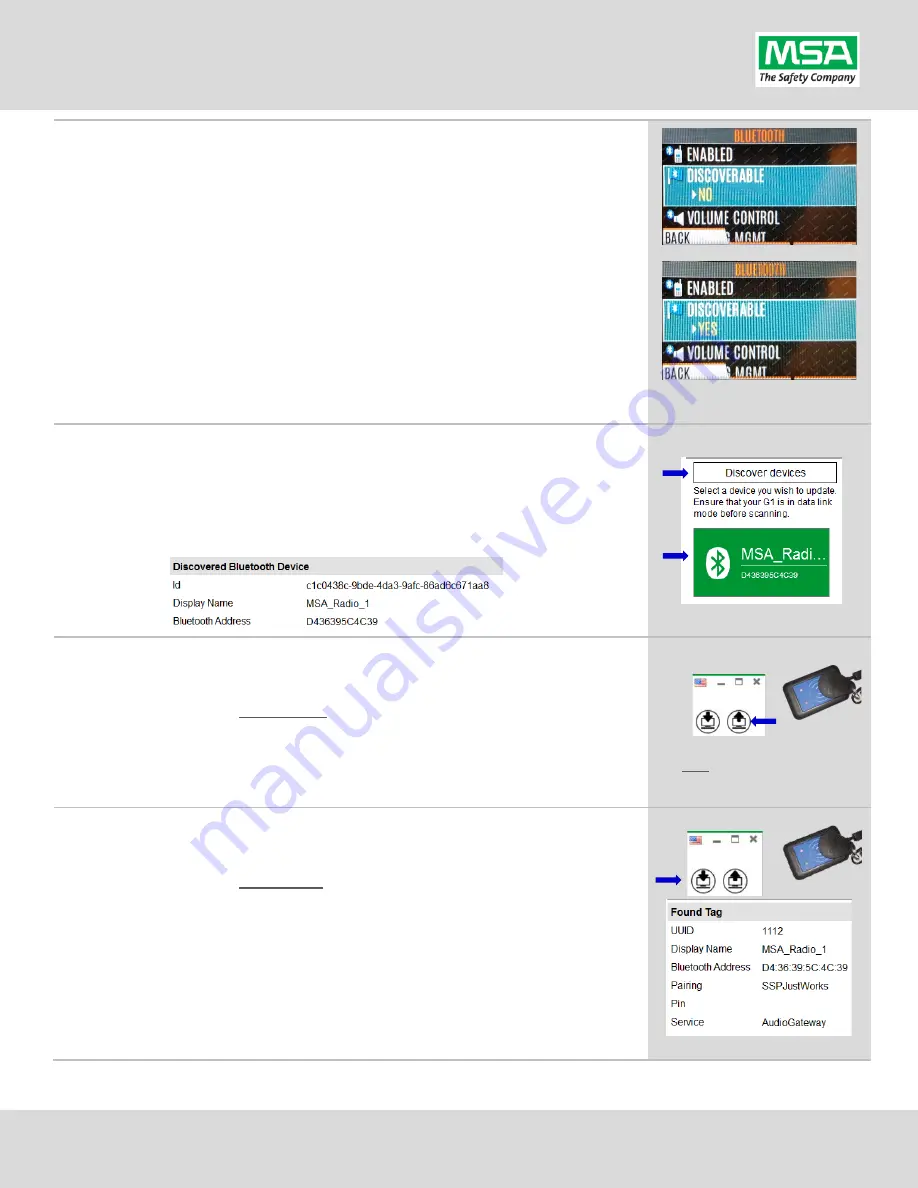
Step 7.
Make the Radio
Bluetooth
Discoverable
:
Note: Every time you power on the Harris XL-185P | XL-200P, it starts up
with Discoverability set to OFF
.
Follow this procedure to turn it ON.
If you left the Bluetooth Utility Menu, navigate back to it using the
procedure found on
Page 6,
Step 6.
method
(B) steps “a.” through “d.”
, and
then:
(A)
Up or Down arrow until “Discoverable” is highlighted
(B)
Press the menu button in the Center of the arrow pad to change to
“YES”
(C)
** STAY ON THIS SCREEN **
Leaving the Bluetooth menu will turn
discoverability OFF again. To remain “discoverable” you must stay on
this screen.
** STAY ON THIS SCREEN **
Step 8.
Discovering the Radio in A2:
(A)
Click “Discover Devices”
You may have to scan twice if the Friendly name doesn’t appear.
(B)
Select the tile for the discovered Radio in A2 to select it.
The discovered device info will load on the screen:
Step 9.
Writing the Bluetooth Audio Pairing Tag:
(A)
Place RFID Tag on the RFID Reader / Writer
(B)
Select the Write G1 Tag icon
(top-right hand side of A2 application)
(C)
Click “OK” on the “Tag was successfully written” dialog.
Note: Hovering over the icons will
also show “Write Tag” or “Read Tag”.
Step 10.
Verifying the Information Written to the Tag:
(A)
Place RFID Tag on the RFID Reader / Writer
(B)
Select the Read G1 Tag icon
(top-right hand side of A2 application)
(C)
The “Found Tag” screen will appear.
(D)
Confirm the tag’s Bluetooth Address matches the Radio.
The Radio Pairing tag is now created & can be used to pair this radio with a
G1 SCBA.


