Section-5 Maintenance
October 28, 2013
5
‐
14
Copyright
©2013,
Harris
Broadcast
WARNING:
Disconnect
primary
power
prior
to
servicing.
888
‐
2720
‐
001
5.6.3
Upload Config File
STEP 1
Establish
a
connection
to
the
transmitter
with
a
PC.
STEP 2
System>>
System
Setup>>Network>>
ISP
menu.
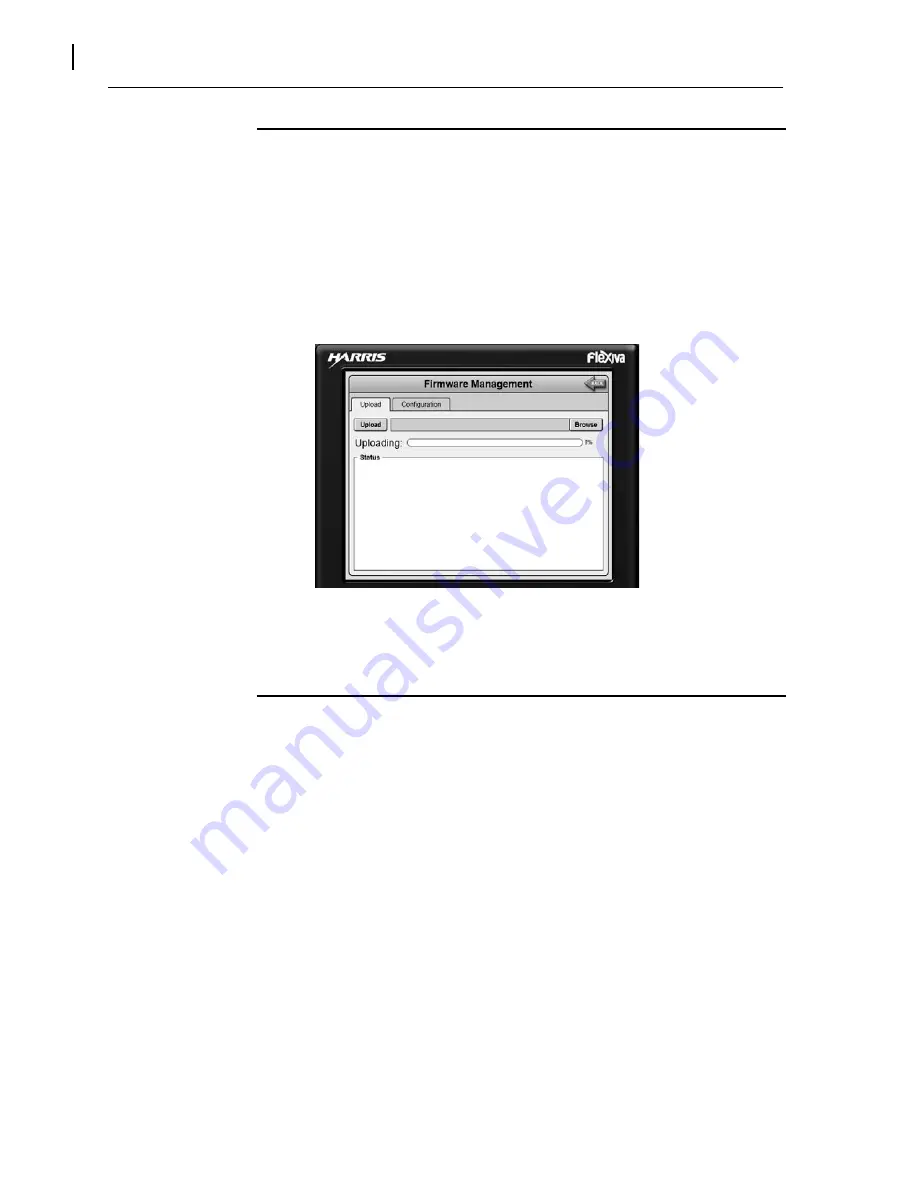
See
Figure
5
‐
5
STEP 3
Click
Browse
and
locate
the
correct
file
for
the
upload.
The
default
name
given
by
the
FAX
is
eeprom.
This
name
may
vary
if
the
name
was
changed
when
saved
from
transmitter.
Also
note
that
it
is
best
to
have
this
file
located
on
your
hard
disk
drive
not
on
a
removable
stick.
STEP 4
Click
on
the
file,
then
Open
and
the
box
should
populate
with
the
file
location
and
name.
STEP 5
Click
Submit
button
and
the
file
should
upload.
Once
the
upload
is
complete
a
PROGRAM
button
will
appear.
Figure 5-5 FAX ISP Program Screen
STEP 6
Click
on
the
PROGRAM
button,
a
box
should
pop
up
and
state
that
the
transmitter
will
loose
communication
and
loss
of
RF
output.
Click
OK,
when
programming
is
complete
the
transmitter
will
reboot.
5.6.4
Software Update Procedure
The
following
steps
detail
the
procedure
to
update
the
FAX
series
transmitter
software.
You
will
need
a
PC
to
the
Ethernet
port
to
perform
this
procedure.
Once
the
software
has
been
uploaded
and
programmed
the
transmitter
will
reboot
and
the
station
will
be
off
the
air
for
a
brief
period.
FAX
Software
part
numbers
(The
filename
will
contain
the
revision
level
of
the
code):
Complete
‐
861
‐
1154
‐
082
WEB
GUI(Only)
‐
861
‐
1154
‐
032
Application
code(Only)
‐
861
‐
1154
‐
022
These
files
can
be
obtained
on
the
Harris
Broadcast
Customer
Portal.
All
customers
should
register
at
the
website
to
obtain
any
updated
software,
manual
and
documentation
packages.
STEP 1
Connect
the
PC
to
the
transmitter
using
a
Ethernet
cable
to
either
the
front
or
rear
Ethernet
port.
See
Section
3.8
for
Network
setup
information.
STEP 2
Open
a
web
browser
(Firefox
preferred)
and
establish
a
connection
to
the
transmitter.
STEP 3
Once
the
connection
is
made
go
back
to
the
address
bar
and
type
in
/isp
after
the
IP
Address.
For
example
if
using
the
front
panel
Ethernet
port
type
192.168.117.88/isp.
Screen
should
appear
as
in
Figure
5
‐
6.
Summary of Contents for Flexiva FAX 10KW
Page 2: ......
Page 8: ......
Page 10: ...WARNING Disconnect primary power prior to servicing ...
Page 167: ......


