E
Grooves
Prongs
16
AUTOMATED LEARNING PROCESS/ACTIVATING CODE
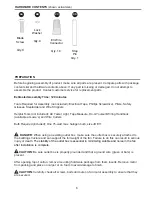
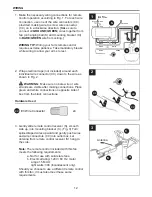
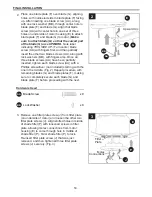
Remove battery cover from back side of remote
control transmitter (Q).
(Fig. 1)
Locate dimmer switch located
to the right of the
code switches--dimmer switch is labeled with a
“
D
” and an “
X
”
. Dimmer switch is pre-set to the
“ON” [
D
] position. If you do
not
wish to have
dimming capability, you may set the dimmer
switch in the “OFF” [
X
] position. (Fig. 1)
Install the 12-volt battery (R) provided, and then
replace battery cover on remote control
transmitter (Q). (Fig. 1)
1.
(back)
CAUTION:
The remote control transmitter (Q)
can be programmed to multiple receivers or fans.
If this is
not
desired, turn wall switch off to any
other programmable receiver or fan.
R
Dimmer
Switch
1
Code Switches
Battery
Cover
Q
FINAL INSTALLATION
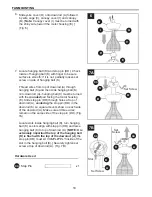
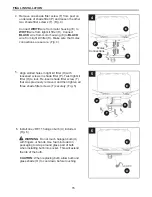
Align openings in grooves of glass shade (O)
with small protrusions on the inside of the shade
fitter (P). Turn glass shade (O) to the right
(clockwise) until it no longer turns. (Fig. 7)
Make sure that glass shade (O) is turned
completely
to the right so that it is securely
attached.
7.
O
P
7


