background image

43039 - 04/01/2008

8

ENG

SP
x

FRN

ENG

SP
x

FRN

ENG

SP
x

FRN

ENG

SP
x

FRN

ENG

SP
x

FRN

ENG

SP
x

FRN

ENG

SP
x

FRN

ENG

SP
x

FRN

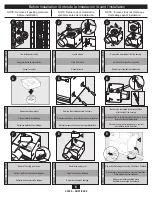
Fixer le moteur/souffleur en serrant les deux vis.

Reposer le moteur en insérant les languettes et en le  

poussant vers le haut en place. Assurez-vous que les fils 

n’ont pas été pincés entre le moteur/souffleur et le boîtier.

Connecter le câblage. NE LAISSER PAS LE MOTEUR/

SOUFFLEUR PENDRE PAR LE CÂBLAGE.

Remettre le courant.

Essayer le moteur/souffleur. Si le moteur/souffleur ne 

fonctionne pas, vérifier la connexion enfichable.

Aller à l’ètape E1 à la page 10

pour fixer la grille.

Mettre le boîtier en place au-dessus du plafond.

Passer les fils par le raccord.

Asegure el motor/soplador apretando los 2 tornillos.

Vuelva a instalar el motor/soplador introduciendo las pestañas 

y levantando a su posición. Asegúrese que los alambres no 

se pellizquen entre el motor/soplador y el alojamiento.

Conecte el mazo de cables. NO PERMITA QUE EL 

MOTOR/SOPLADOR CUELGUE DEL MAZO DE CABLES.

Encienda la fuente de alimentación.

Pruebe el motor/soplador. Si el motor/soplador no funciona, 

verifique la conexión del enchufe. 

Vaya al paso E1 en la página 10 para

fijar la rejilla

Mueva el alojamiento a su posición encima del techo.

Tienda los cables a través del manguito de  

alivio de tension.

Secure the motor by tightening the 2 screws.

Reinstall the motor by inserting the tabs and pushing up into 

position. Make sure the wires are not pinched 

between the motor and the housing.

Connect wiring from the motor to the wiring cover plate.

Turn on the power source.

A20

A20

A20

0000

A17

A17

A17

0000

A18

H

A18

H

A18

H

A19

I

A19

I

A19

I

A22

E1

A21

MARCHE

ARRÊT

A21

Encendido

Apagado

A21

ON

OFF

Test the motor. If the motor does not run, check the plug 

connection.

Go to step E1 on page 10 to attach grille.

D13

D13

D13

D12

E

D12

E

D12

E


Existing Construction

accessible only from below


Construcción existente

accesible sólo desde abajo


Construction existante

accessible uniquement du dessous

ENG

SP
x

FRN

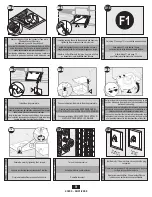
Enlever un ventilateur existant et vérifier que l’ouverture est 

assez grande pour permettre la pose d’un nouveau boîtier 

de moteur (203 mm x 216 mm [8 po x 8,5 po]).

Retire el ventilador existente y asegúrese que la abertura 

sea suficientemente grande para acomodar el alojamiento 

del motor/soplador nuevo (8 pulg. x 8 1/2 pulg.).

Remove an existing fan and check to make sure the 

opening is large enough to accommodate the new 

motor housing (8”x 8.5”).

D11

EXISTING FAN / 

VENTILADOR EXISTENTE / 

VENTILATEUR EXISTANT

Move the housing into position above the ceiling.

Pull wires through strain relief.

Summary of Contents for 80209

Page 1: ...ET CONSERVER CES CONSIGNES G u i d e d i n s t a l l a t i o n G u a d e i n s t a l a c i n Modelo 80209 Ventilador para ba o con luz LEA y CONSERVE ESTAS INSTRICCIONES Model 80209 Bath Ventilator w...

Page 2: ...licable codes and standards including fire rated construction 4 Sufficient air is needed for proper combustion and exhausting of gasses through the flue chimney of fuel burning equipment to prevent ba...

Page 3: ...normas de seguridad como las de la Asociaci n Nacional de Protecci n contra Incendios NFPA la Asociaci n de Ingenieros Americanos en Calefacci n y Aire acondicionado ASHRAE y los c digos locales 5 Al...

Page 4: ...rique conform ment tous les codes et normes applicables y compris les codes et normes de la construction pare feu 4 Il faut suffisamment d air pour une bonne combustion et un bon chappement des gaz pa...

Page 5: ...Il faut poser un raccord de c ble Non compris Verifique todos los componentes Si est n da ados llame al 1 866 405 3814 para obtener un reemplazo B C Conector de cable de 3 8 Tornillos adicionales I x...

Page 6: ...leado Apague la fuente de alimentaci n Retire el material de embalaje Retire el tornillo de la cubierta del cableado Retirer le moteur souffleur du bo tier Retire las puntas de tornillo precargadas ha...

Page 7: ...arca de profundidad en el borde inferior de la viga seg n el espesor de su plancha de yeso Tienda los cables a trav s del manguito de alivio de tension Conecte un ducto de 4 y ventile hacia el exterio...

Page 8: ...a su posici n encima del techo Tienda los cables a trav s del manguito de alivio de tension Secure the motor by tightening the 2 screws Reinstall the motor by inserting the tabs and pushing up into po...

Page 9: ...ario comprar un adaptador Conecte el mazo de cables NO PERMITAQUE EL MOTOR SOPLADOR CUELGUE DELMAZO DE CABLES Instale la placa de cubierta del cableado Aseg rese que todas las conexiones de cableado e...

Page 10: ...he en el borde del motor Reinstale el tornillo del soporte del aliviador de tensiones Retire los tornillos de mano Coloque el soporte del aliviador de tensiones debajo del motor como se muestra Retire...

Page 11: ...43039 04 01 2008 11 ENG SPX FRN ENG SPX FRN Compl ter Visser la finial en place Completo Enrosque la cubierta ornamental Complete Screw Finial into position E11 E11 E11 E10 O E10 O E10 O...

Page 12: ...e los alambres como se muestra F2 F A Motor del ventilador Luz 2 clavijas 3 clavijas Negro Tierra Verde Cobre desnudo Blanco Negro Interruptor principal 1 CA Negro Interruptor 2 CA Negro Luz Opci n Bl...

Page 13: ...segurarse que coincida con el diagrama de cableado Soluci n Verifique y apriete todos los pernos y tornillos Verifique la pantalla para asegurarse que est firme Verifique la clapeta para asegurarse qu...

Page 14: ...es les connexions enfichables pour s assurer qu elles sont correc tes V rifier le c blage pour s assurer qu il correspond au diagramme du circuit Solution Remplacer l ampoule Remettre le courant rempl...

Page 15: ...NY IMPLIED WARRANTY INCLUDING BUT NOT LIMITED TO ANY IMPLIED WARRANTY OF MERCHANTABILITY OR FITNESS FOR A PARTICULAR PURPOSE IN RESPECT TO ANY HARBOR BREEZE FAN BATH EXHAUST FAN MOTOR OR OTHER FAN PAR...

Page 16: ...DU VENTILATEUR CETTE GARANTIE TIENT LIEU DE TOUT AUTRE GARANTIE EXPRESSE LA DUR E DE TOUTE GARANTIE IMPLICITE INCLUANT MAIS SANS Y TRE LIMIT E UNE QUELCONQUE GARANTIE IMPLICITE DE QUALIT MARCHANDE OU...

Page 17: ...PRESAS LA DURACI N DE TODA GARANT A IMPL CITA INCLUYENDO PERO SIN LIMITARSE A CUALQUIER GARANT A IMPL CITA DE COMERCIABILIDAD O IDONEIDAD PARA UN PROP SITO PARTICULAR CON RESPECTO DE CUALQUIER motor s...

Page 18: ...43039 04 01 2008 18...

Page 19: ...43039 04 01 2008 19...

Page 20: ...43039 04 01 2008 20 2008 Hunter Fan Company...

Reviews: