Hansa C27EU O&M Manual
– OM-023 Revision A 16/10/19
© Hansa Chippers 2019
15
Belt tension adjustment
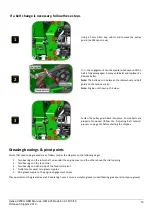
Using two 24 mm spanners, unlock the two locking nuts
from above the adjustment block on the engagement
handle by turning the top nut anti clockwise and the
bottom nut clockwise. Then move both locking nuts
upward along the thread.
From the fully disengaged position, gently turn the
engagement handle clockwise until you feel it start to
resist. From this position, turn the engagement handle
two full revolutions in the clockwise direction, or until
there is a significant resisting force on the handle (there
should be about 5 mm deflection when pressing firmly
on the belt). This is the recommended tension for the
belt drive when in the fully engaged position.
Note
: For new belts, allow another half revolution as the
tension will need to be increased after belt wear.
Using two 24 mm spanners, screw the two M16
adjustment nuts downwards until they touch the
adjustment block. Then turn the top nut clockwise and
the bottom nut anti clockwise simultaneously to lock
the nuts in place.
The new belts will wear into the pulley. Recheck the belt
tension after 10 hours of machine operation, and if
necessary, adjust them to the correct tension by
repeating this process.
Belt replacement
If the belts in your chipper look similar to any of the following images or are clearly broken, then they need to be replaced.
1
2
3
Adjustment
block
Adjustment
nuts
Adjustment
block
Adjustment
nuts
Cracked underside of belt
Sidewall belt wear
Soft, swollen belt
Worn cover on back of belt
Split belt cover


