


68
/
97
6.5.1 Vertical alignment
Run the TopJet program and then click the “Set” button to enter the “printer
parameters setting” interface.
Select the printhead vertical alignment in the drop-down-list of the alignment checking
and run printing.
Use the magnifier to observe the upper and lower parts of the small iron printed and
sees whether the two parts merge into a complete one.
If there are still lines that are not overlapping completely, then you might get them
aligned by adjusting the screw of the printhead base,and repeat Step 3
Repeat 2,3,4 until lines are overlap.
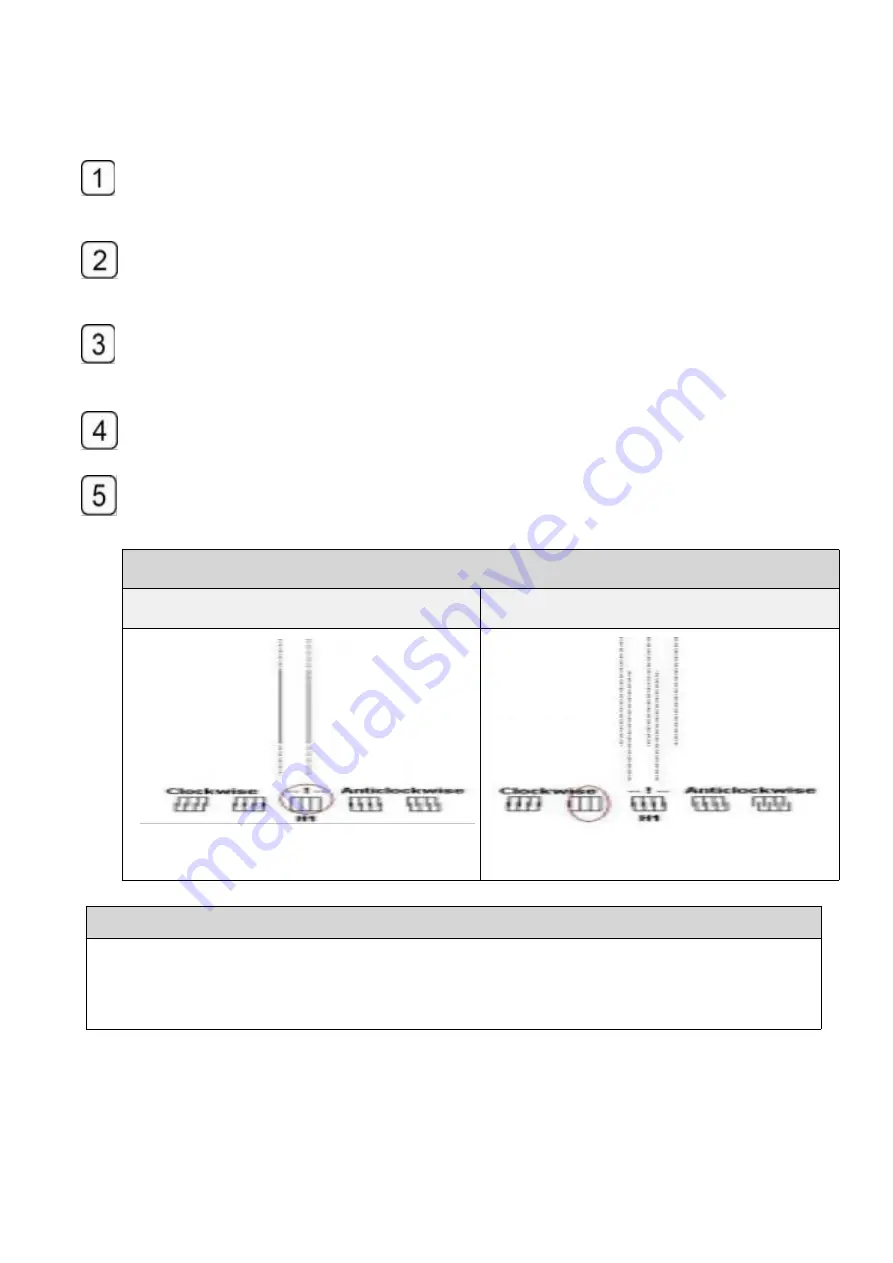
How to check vertical alignment
Overlap
Non-overlap
How to adjust the vertical screw.
loosen the screw ,Adjust the screw slightly according to the vertical checking result,Print the
vertical checking again.if the lines still not overlapping at the proper position, repeat the two
steps above.Fasten the screw , when the vertical alignment accomplished.
Summary of Contents for HT3020UV-C-K
Page 1: ...HandTop Flatbed Ink Jet Printer Operation Manual HT3020UV C K...
Page 15: ...14 97...
Page 16: ...15 97...
Page 18: ...17 97 1 Pre installation 2 1 Prepare the working field under previous instruction...
Page 27: ...26 97 Steps 1 check the parts Guide rail stand x2 Rear bearing standx2...
Page 29: ...28 97 B Put the screw on the stand 8 pcs C Insert two bolts...
Page 30: ...29 97 D Mount the guide rail screw E Tighten all the screws...
Page 39: ...38 97 The latest Topjet version only support 64bit Select communication way...
Page 40: ...39 97 Select equipment model Select print head DPI...
Page 41: ...40 97 Select print head row s...
Page 42: ...41 97 Select UV lamp type Select Topjet directory C drive is not recommended...
Page 43: ...42 97 Select shortcut Finish...
Page 44: ...43 97...
Page 45: ...44 97 Select Agreed to proceed Finish Install USB communication driver...
Page 46: ...45 97 Accept and Next Next...
Page 47: ...46 97 Finish reboot the PC...
Page 51: ...50 97 5 2 3 Printing mode interface...
Page 56: ...55 97 to the right...
Page 58: ...57 97...
Page 60: ...59 97 Ink tube and filter connection Print head connector...
Page 61: ...60 97 Preparation Flush ink tubes with flushing liquid...
Page 62: ...61 97 Disconnect the block...
Page 63: ...62 97 Connect ink tubes Next...
Page 64: ...63 97 Ink tube installation finished Dismount the protective cover of the print head...
Page 81: ...80 97 7 13 Base of spot Print with white spot as a base layer of other colors...


