


38
Wearing rubber gloves goggle to protect yourself from the ink
Shutdown the spray function
Turn off all the valves except the valves of the printhead, which needs to be
exhausted and adjust the pressure to a value of -1.0kPa.
Loosen the cap of the air exhaust tube of the printhead, and press the ink prime
button till you see a constant ink stream comes out of the tube. Then seal the tube
with the cap.
The operation must not exceed 3 seconds so as to avoid the generation of bubbles. If
the system alert occurs, click the “reset” and continue the exhausting operation when
the alert ceases
Execute the exhaust on each printhead as the operations described above.
When finishes exhaust operation, adjust the pressure to a value of -3.5kPa and
turn on all the valve, press the prime button till you see the ink comes out of the nozzles
of each printhead.
Use the lint-free towel to wipe up the ink residues on the nozzles surface.
Print a “nozzle test” and check the status of the nozzles.
4.11 Printhead calibration and alignment
The operations of the Printhead Calibration and Alignment consist of
physical alignments (Horizontal and Vertical directions), Left/Right
Direction Offset, Bi-directional Offset and Stepping calibration.
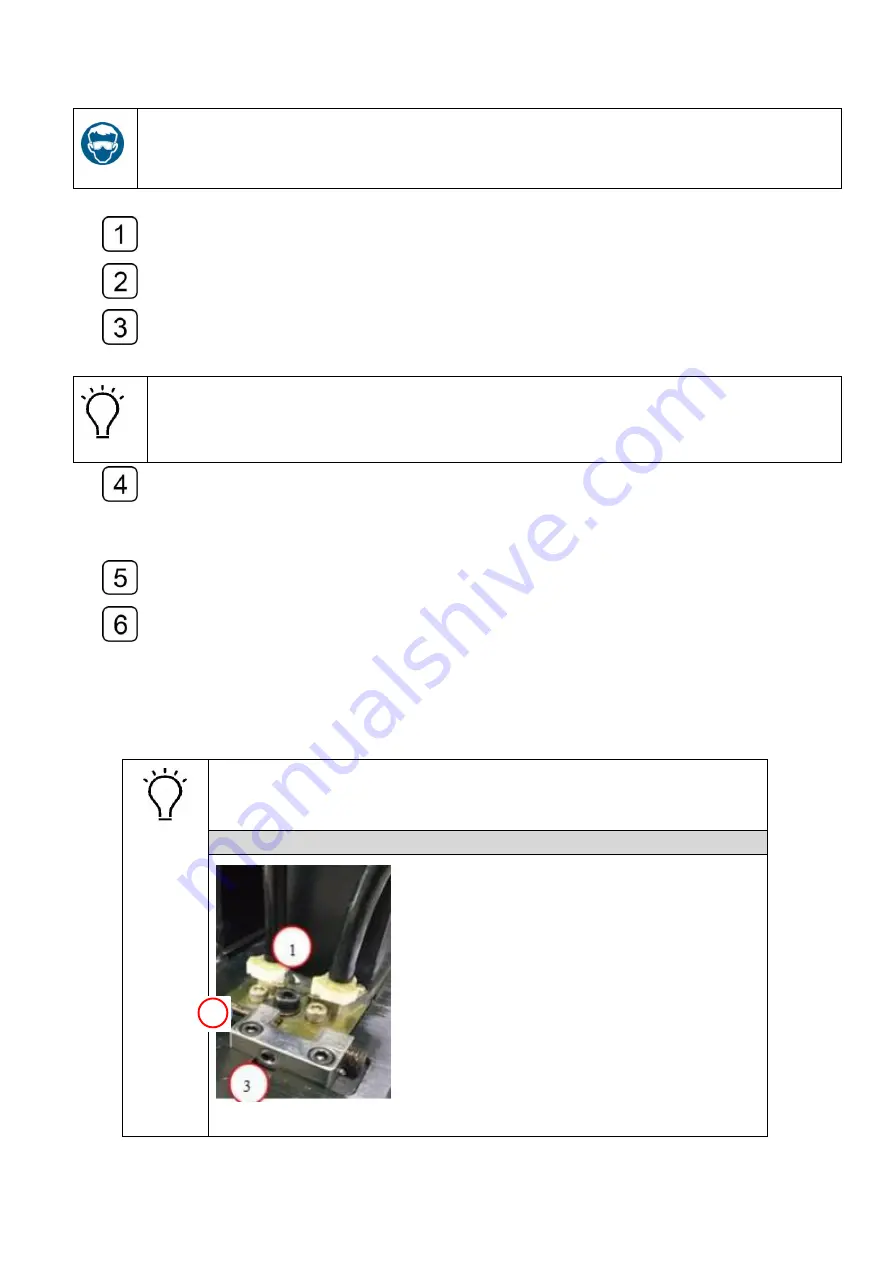
Print Head diagram
①
Head Fixing Screw
2
Summary of Contents for HT2500UV
Page 1: ...1 HT2500UV Handtop Large Format UV Printer Operation Manual Original Instructions...
Page 17: ...17 5 6 Labels and logo on printer 1 11 2...
Page 18: ...18 3 4 7 5 10 6 9 8...
Page 19: ...19...
Page 20: ...20 1 2 3 4...
Page 26: ...26 Select OS version x64 for 64 bit windows Select the communication port...
Page 27: ...27 Select the printer model Select DPI...
Page 28: ...28 Select rows...
Page 30: ...30 Select additional task Confirm and install Wait for installation...
Page 31: ...31 Install the initiations Click finish to continue...
Page 32: ...32 Install the driver for PCIE card Accept...
Page 33: ...33 Continue Finish Normally we do not have to reboot computer after installation...
Page 36: ...36 Finish the connecting between sub tank to heads and fix the printhead...
Page 45: ...45 Reset the value of the zero position in the layout option...
Page 64: ...64 2 Certifications...
Page 66: ...66 4 Rating plate...
Page 68: ...68 ii CMYKLcLmWW...
Page 69: ...69 iii CMYKVW iv CMYkWW...
Page 70: ...70 v CMYKVVWW vi CMYKLcLm...
Page 71: ...71...


