background image

5 - 6

Rev B

3/1/07

Image Kiosk 8560/8570 User’s Guide

Identity 

This is the 802.1x identity supplied to the authenticator. The identity value can be up to 63 ASCII 
characters and is case-sensitive. 

For tunneled authentication protocols such as TTLS and PEAP, this identity (called the Phase 1 identity) 
is sent outside the protection of the encrypted tunnel. Therefore, it is recommended that this field not 
contain a true identity, but instead the identity “anonymous” and any desired realm (e.g. 
[email protected]). For TTLS and PEAP, true user credentials (Phase 2 identity) are entered 
in the Tunneled authentication section.

When used with PEAP and the .NET Enterprise Server Version 5.2, this field must contain the identity 
used in both Phase I and Phase II. The Phase II identity field is ignored.

Password 

This is the password used for MD5-Challenge or LEAP authentication. It may contain up to 63 ASCII 
characters and is case-sensitive. Asterisks appear instead of characters for enhanced security.

Authentication 
type

This is the authentication method to be used - MD5-Challenge, LEAP, PEAP, TLS, or TTLS. 

Your network administrator should let you know the protocols supported by the RADIUS server. The 
RADIUS server sits on the network and acts as a central credential repository for Access Servers that 
receive the radio signals and ultimately block or allow users to attach to the network. 

Use certificate

This is the certificate to be used during authentication. A certificate is required for TLS, optional for 
TTLS and PEAP, and unused by MD5 and LEAP. Therefore, this option becomes active only when TLS, 
TTLS, or PEAP is selected as the Authentication type.

If 

Use certificate

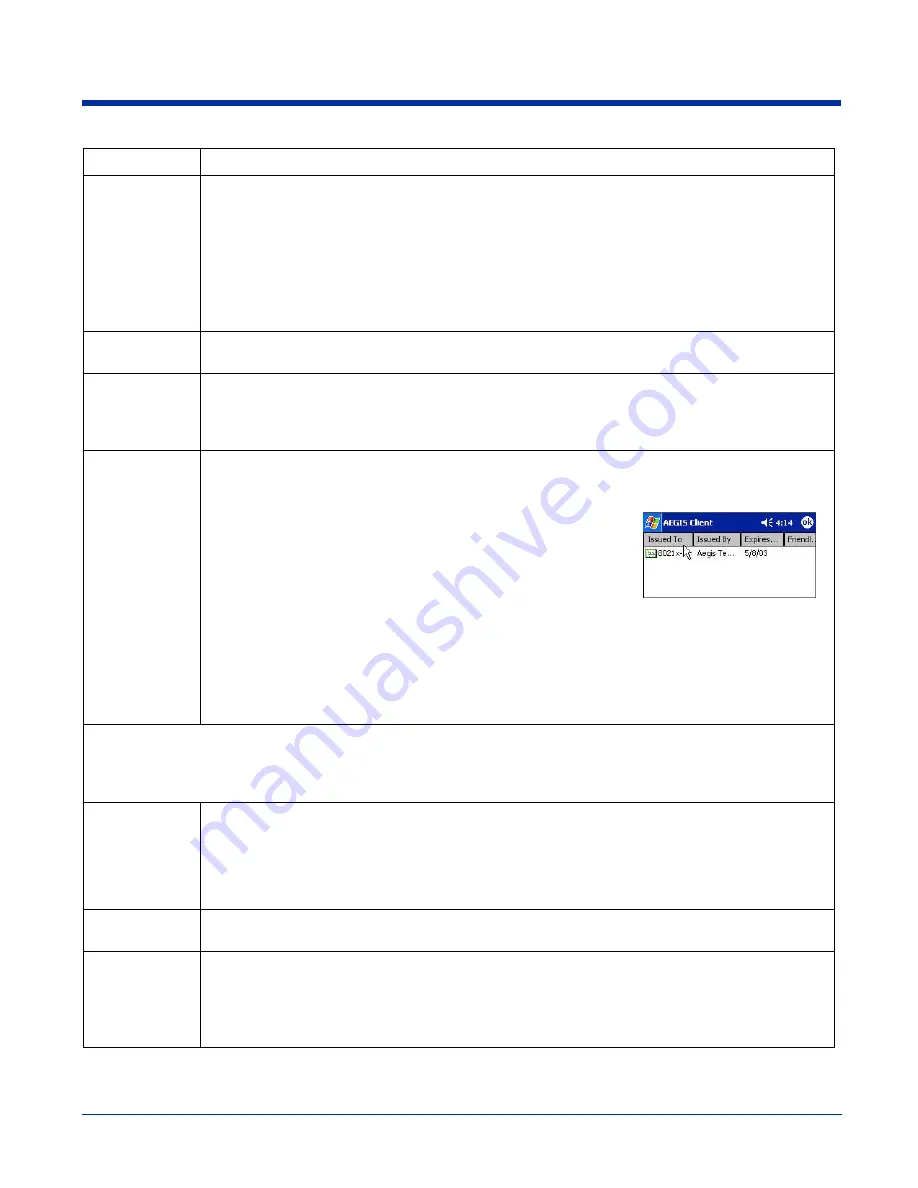
 is enabled, the client certificate displayed in the field 

is the one that is passed to the server for verification. To select a 
client certificate, tap 

Change

 and select the certificate from the list 

that appears. 

To appear in this list, certificates must be installed in the system; see 

Certificates

 on page 

5-16.

The 

Issued to

 column should match the 

Identity

 field and the user ID 

on the authentication server used by the authenticator. 

Your certificate must be valid with respect to the authentication server. This generally means that the 
authentication server must accept the issuer of your certificate as a Certificate Authority. 

When obtaining a client certificate, do not enable strong private key protection. If you enable strong 
private key protection for a certificate, you will need to enter an access password for the certificate each 
time this certificate is used. 

Tunneled authentication area 

Tunneled authentication parameters are used by only by TLS, TTLS and PEAP protocols, in Phase 2 of authentication, and 
after the secure tunnel has been established. The fields in this section are active only if the TLS, TTLS, or PEAP is selected 
as the Authentication type. 

Identity

The user identity used in Phase 2 authentication. The identity specified may contain up to 63 ASCII 
characters, is case-sensitive and takes the form of a Network Access Identifier, consisting of <name of 
the user>@<user’s home realm>. The user’s home realm is optional and indicates the domain to which 
the tunneled transaction is to be routed.

Because Microsoft .NET Enterprise Server Version 5.2 does not use this parameter for PEAP, This field 
will have no effect for PEAP at this time. Phase 1 identity is used instead.

Password

The password used for the tunneled authentication protocol specified. It may contain up to 63 ASCII 
characters and is case-sensitive. Asterisks appear instead of characters for enhanced security.

Protocol

This parameter specifies the authentication protocol operating within the secure tunnel. 

The following protocols are currently supported for TTLS: 


EAP-MD5, CHAP, PAP, MS-CHAP, MS-CHAP-V2

The following protocols are currently supported for PEAP: 


EAP-MS-CHAP-V2, TLS/SmartCard, Generic Token Card (EAP-GTC)

Field

Description

Summary of Contents for IK8560

Page 1: ...User s Guide Image Kiosk 8560 8570 with Microsoft Windows CE 5 0 ...

Page 2: ...l rights are reserved No part of this document may be photocopied reproduced or translated into another language without the prior written consent of Hand Held Products 2006 Hand Held Products Inc All rights reserved Web Address www handheld com Trademarks Microsoft Windows Windows CE Windows NT Windows 2000 Windows ME Windows XP ActiveSync Outlook and the Windows logo are trademarks or registered...

Page 3: ...ble 3 6 Rebooting the Device 3 7 Warm Boot 3 7 Cold Boot 3 7 Hard Boot 3 7 Using the Reset Switch 3 7 Using the Magnetic Stripe Reader 3 8 Swiping a Card With the MSR Demo 3 8 MSR Demo Options 3 9 Screen Protector Replacement 3 10 Maintenance 3 11 Image Kiosk Technical Specifications 3 12 Chapter 4 Communication Installing Additional Software 4 1 Microsoft ActiveSync 4 2 Requirements 4 2 Installin...

Page 4: ...tings 5 15 Certificates 5 16 Advice and Workarounds 5 18 Chapter 6 Imaging Overview 6 1 Supported Bar Code Symbologies 6 1 Default Bar Code Symbologies 6 1 Scanning a Bar Code 6 2 Omni Directional Aiming 6 2 Sample Bar Codes 6 3 Depth of Focus DOF Specifications 6 3 Scan Demo 6 4 Chapter 7 Mounting Overview 7 1 Back Panel Mounting Dimensions 7 1 Connector Slots 7 2 Side Panel Dimensions 7 2 Chapte...

Page 5: ...ystem has been tested to and conforms with the provisions noted within the 89 336 EEC Electromagnetic Compatibility Directive and the 73 23 EEC Low Voltage Directive For further information please contact Hand Held Products Inc Nijverheidsweg 9 5627 BT Eindhoven The Netherlands Hand Held Products Inc shall not be liable for use of our product with equipment i e power supplies personal computers et...

Page 6: ... This device and its antenna must not be co located or operating in conjunction with any other antenna or transmitter To maintain compliance with FCC RF exposure guidelines use only the accessories specified by the manufacturer Canadian Compliance for Image Kiosks With an 802 11b Radio This Class A digital apparatus complies with Canadian ICES 003 Operation is subject to the following two conditio...

Page 7: ... not affected by microwave ovens For European Community Users Hand Held Products complies with Directive 2002 69 EC OF THE EUROPEAN PARLIAMENT AND OF THE COUNCIL of 27 January 2003 on waste electrical and electronic equipment WEEE Waste Electrical and Electronic Equipment Information This product has required the extraction and use of natural resources for its production It may contain hazardous s...

Page 8: ...1 4 Rev B 3 1 07 Image Kiosk 8560 8570 User s Guide ...

Page 9: ...n Cables on page 3 4 Boot the Image Kiosk 1 The Image Kiosk begins booting as soon as power is applied from the cable 2 The splash screen appears as the system cold boots see Cold Boot on page 3 7 The software version numbers for both the bootloader and the kernel appear on the splash screen 3 The device begins loading software this is Autoinstall A status bar appears for each program that loads D...

Page 10: ...tart menu The communication cable is connected Double tapping this icon displays the cable type and connection status Wired ethernet cable is not connected Wired ethernet cable is connected 802 11b radio is not connected 802 11b radio is connected Displays the Soft Input Panel SIP see page 2 3 Tapping this button returns you to the Desktop The pop up menu that appears will also show two programs o...

Page 11: ...that require text entry You can also manually open the SIP when needed To open the SIP tap the Input Panel icon in the task tray and select Keyboard on the pop up menu On the soft keyboard that displays tap the character keys to enter them on the screen To close the SIP tap the Input Panel icon again and select Hide Input Panel SIP Settings You can adjust SIP panel settings by tapping Start Settin...

Page 12: ...cted accurately Note We do not recommended turning off the backlight except for test purposes Adjusting the Contrast On the Backlight Options window use the Contrast slider to adjust the contrast Using Windows Explorer You can access Windows Explorer by Double tapping the My Device icon on the Desktop OR Tapping Start Windows Explorer Windows Explorer opens to the root folder level Use Windows Exp...

Page 13: ...1238 points per inch PPI For touch screen input use your finger Use of objects such as paper clips pencils or ink pens on the touch screen can damage the input panel and will void the warranty Screen Protectors Hand Held Products requires screen protectors to protect the touch screen especially when used with applications that require high volume interfacing with the touch screen Screen protectors...

Page 14: ...from the image engine at all times For more information about imaging see Imaging on page 6 1 Back Panel Wire Slots These two slots are designed to hold the wires of the connecting cables Connectors There are three connectors in a slot inside the back panel see Connectors on page 3 3 Mount Slots The back panel is designed for easy mounting either to a wall or stand Use these slots to mount Image K...

Page 15: ...nector that matches this pin configuration This connector powers the device by receiving power from the cable and communicates with a host workstation using ActiveSync USB only For more information see Microsoft ActiveSync on page 4 2 RJ45 Jack IK8560EE IK8570E IK8570EUE A 100Base TX 10Base T communications port that supports wired ethernet communication with a standard RJ45 ethernet cable Cable m...

Page 16: ...h this cable but data transfer will occur 1 1 speeds This cable features a single 15 pin male connector that plugs into the DB15 pin female port on the back panel The other end features a standard Type A USB 1 1 or higher connector designed to fit standard USB ports Note Make sure the power switch is turned off on the computer where you will be installing the Image Kiosk 1 Plug the 15 pin connecto...

Page 17: ... port you will need to obtain a 25 pin to 9 pin adapter from your local computer store or other source RS 232 Pass Through Cable The RS 232 pass through cable uses a Y cable with AC power adapter Note Make sure the power switch is turned off on the device where you will be installing the Image Kiosk 1 Plug the 15 pin connector HDB15 of the serial cable into the back panel 2 Plug the Host DB9 conne...

Page 18: ...ge Kiosk 8560 8570 User s Guide Power Cable There is a six inch L connector power only cable you can use to power the all Image Kiosks This cable would be ideal for the models IK8560CE and IK8560CEUE that only have a radio ...

Page 19: ...he Autoinstall folder To launch a cold boot Tap Start Programs Power Tools Reboot Cold Boot Use the reset switch see Using the Reset Switch on page 3 7 Hard Boot A hard boot reboots the device erases all contents of RAM memory and re installs the CAB files stored in the Autoinstall folder To launch a hard boot power cycle the unit remove and reapply AC power Using the Reset Switch The reset switch...

Page 20: ...rt Programs Demos double tap MSR Demo Note The display area should read Ready for MSR Swipe 2 Make sure that the magnetic strip is facing down towards the touch screen display 3 Slide the card from left to right or right to left as shown on the right 4 MSR Demo reads the card beeps and displays the data according to the options selected see MSR Demo Options on page 3 9 5 You can swipe the card aga...

Page 21: ...isplay If you don t want to see information from one or more of the tracks de select it then swipe the card again Tracks 1 2 and 3 are active only when Raw Data is selected Parsed Data When you select Parsed Data from the Select Data to Display drop down list parsed data from the card displays Not all MSR cards contain parsed data If the data on the card is not parsed the display area reads PARSED...

Page 22: ...e old screen protector frame insert a straightened paper clip into the small hole in the front of the Image Kiosk This releases the protector frame which can now be lifted off 2 Clean any smudges or dirt from the Image Kiosk touch screen using glass cleaner or water Wipe the surface dry 3 Remove the protective film from the back of the new screen protector 4 Line up the holes in the protector with...

Page 23: ...e front of the screen protector This makes the protector lie flat 6 Place the protector frame back in place and press down until it snaps shut Maintenance To clean your Image Kiosk use a soft cotton cloth lightly dampened with isopropyl alcohol This removes any ink fingerprint smudges or dirt ...

Page 24: ...ta Inputs Imager Scanner 5100 Standard Range SR with LED aimer decodes from 2 1 in to 13 2 in 5 3cm to 33 5cm for 30 mil UPC Symbologies Supported See Supported Bar Code Symbologies on page 6 1 Data Outputs Display Window Resistive transparent pressure sensitive touch screen LCD Size 5 7 in 14 5 cm 1 4 VGA LCD Active Area 4 5 x 3 3 in 11 3 x 8 4 cm Active area LCD Resolution 320 x 240 dot 16 bit c...

Page 25: ...n 18 5 cm Depth 3 2 in 8 1 cm Height 8 7 in 22 1 cm including cone Weight 2 lb 9 kg Operating Storage Temperature 0 to 40 C 32 to 104 F Power Requirements Current Draw IK8560EE non RF 800mA 12V DC IK8560CE IK8560CEUE RF 860mA 12V DC IK8570E IK8570EUE 870 mA 12 Volts DC Source 120V NA or 230V EU AC adapter or powered host terminal port Approvals and Certifications Agency Conformance FCC Class A CE ...

Page 26: ...3 14 Rev B 3 1 07 Image Kiosk 8560 8570 User s Guide ...

Page 27: ...ther USB devices For more information see USB Host Port on page 4 10 802 11b Radio IK8560CE IK8560CEUE IK8570E IK8570EUE These Image Kiosks contain an on board 802 11b radio that establishes the device on a wireless network For information see Wireless LAN with 802 11b on page 5 1 Installing Additional Software You can install additional programs on the Image Kiosks through most of the communicati...

Page 28: ...ave the IK8560 inf driver and wceusbsh sys file installed in the Windows System32 directory on your workstation to establish ActiveSync communication with any Image Kiosk You can download these files from www handheld com Also when the Image Kiosk Power Tools and Demos is installed on a host workstation the IK8560 inf driver and wceusbsh sys file are installed to the following location C Program F...

Page 29: ...s Guide Rev B 3 1 07 4 3 4 Select Don t Search I will choose the driver to install 5 Click Next and select Computer as the hardware type 6 Click Next When the wizard tells you it can t find drivers for the device click Have Disk ...

Page 30: ...and select it The host workstation reads the file as HandHeld Products IK8560 8 Click Next The hardware begins installing 9 You will see a brief flash on the Image Kiosk screen then the ActiveSync Wizard appears on the workstation 10 Complete the ActiveSync Setup Wizard ActiveSync will auto configure to USB communication ...

Page 31: ... Up the Host Workstation Verify that ActiveSync on the workstation has selected the appropriate communication type by clicking File Connection Settings Verify the communication type For USB select Allow USB connections Do not check the serial cable box below it Tap OK to save changes Exploring the Device from the Host Workstation Use the Explore feature of ActiveSync to transfer files between the ...

Page 32: ...panel The jump drive will appear as hard drive under My Device on the unit and will allow files to run be copied If the File is an Installer An installer program is one that installs to the workstation and the device simultaneously one process installs to both devices 1 On the workstation double click the EXE or setup exe file The installation wizard begins 2 Follow the directions on the workstati...

Page 33: ...ion on the device is complete tap Start Programs and the program appear on the menu Tap it to open the program Synchronizing By default ActiveSync does not automatically synchronize all types of information Use ActiveSync Options to specify the types of information you want to synchronize The synchronization process makes the data in the information types you select identical on both your workstat...

Page 34: ...t port on the device and the other RJ45 connector into your ethernet outlet The Image Kiosks auto configure the wired ethernet connection when power is applied from the power cable DHCP is enabled by default a static IP must be configured manually if the network does not use DHCP To test the ethernet connection tap the Internet Explorer icon on the Desktop If the device connects to a network with ...

Page 35: ... Download the program files to your device You may see a single EXE or setup exe file or several versions of files for different device types and processors If you are copying temporary files that are to be used once for the installation then discarded then avoid copying them to the IPSM folder since the contents of the IPSM folder are preserved over reboots 3 Read any installation instructions Re...

Page 36: ...B into the USB Host port Image Kiosks can support the following USB peripherals Mouse Keyboard Mass Storage Note The USB host port can support a maximum current output of 500mA If all of your USB devices together require more power attach them to a self powered hub and plug the hub into the Image Kiosk Connecting the Image Kiosks Using USB To connect Image Kiosks to other devices via USB simply us...

Page 37: ...s public key authentication and encryption between Wireless APs WAP and roaming stations to exchange dynamic Wired Equivalent Privacy WEP keys In addition network managers can control 802 1x user profiles from a centralized RADIUS server or in the case of TTLS from a RADIUS Diameter or other AAA servers The Client supports both wireless and ethernet interfaces Supported Protocols Authentication Th...

Page 38: ...ed If the icon is not yellow red or green then either the ports are not being controlled by 802 1x or there is no authentication activity on the controlled ports The absence of yellow red or green may also indicate that the network access server is not an 802 1x aware device Blue There is no 802 11b activity The port may not be connected to an 802 1x aware entity Note If you are setting up the 802...

Page 39: ...figuring Client Authentication on page 5 5 Exit Terminates the client which stops the 802 1x protocol Menu Item Description The Standard and Advanced Views control the number of columns displayed in the main menu Standard View Displays the Port adapter name and State columns This is the default view Advanced View Displays the Port adapter name State Primary Wireless Network Wireless Network and MA...

Page 40: ...ays one of the following Not Associated AP AP s SSID MAC AP s BSSID Menu Item Description Enable Disable These commands enable or disable 802 1x operation on the port The port should be enabled before the protocol is started Enabling a port is not the same as starting it see Start Stop on page 5 3 however both actions are required for the Client to work Configure Opens the port configuration windo...

Page 41: ...iguration windows are in portrait orientation which means that a portion of the window is below the command bar at the bottom To access the rest of the window tap and hold on a point on the right side of the window that is not active for example a button or a field and drag the window up After you complete your tasks on the lower portion of the window you must drag the window back down so that you...

Page 42: ...tificate from the list that appears To appear in this list certificates must be installed in the system see Certificates on page 5 16 The Issued to column should match the Identity field and the user ID on the authentication server used by the authenticator Your certificate must be valid with respect to the authentication server This generally means that the authentication server must accept the i...

Page 43: ...cords a severity code of one debug message to four error asterisks a time stamp and a message Errors only the most severe conditions are logged Warnings less severe conditions are logged Information all errors warnings and information events are logged This is the default setting Debugging creates a log message each time the Client detects or reacts to an event Be advised that log entries fill mem...

Page 44: ...available for selection in the drop down list Allow intermediate certificates This option is selected by default and enables unspecified certificates to be in the server certificate chain between the server certificate and the certificate authority selected in the Certificate issuer must be field When selected this option allows the server certificate received during negotiation to be issued direc...

Page 45: ...eady configured with standard settings You can modify this setting to match your desired connection If you are in a location with only one AP or more than one AP that attaches to the same network the default profile may be sufficient without requiring the selection of a specific network or networks If default is last in the list it can act as a wildcard if the device is out of range of the primary...

Page 46: ... the Client restarts before giving up At that point the Client then defaults to the authenticated state but there will be no network connectivity because the protocol exchange was never completed Display EAP notifications Specifies that the EAPOL notification message will be displayed to the user An authenticator may use such notification to inform you for example about a near password expiration ...

Page 47: ...figuring a network from the list the name that appears in this field is the same as the name in the Configured Networks list and by default is the same as the broadcast SSID This name cannot be changed If you are adding a new network this field is configurable Network Name This is the SSID of the AP If the AP broadcasts its SSID then this value is retrieved from the Available Networks list and thi...

Page 48: ...ntered in the Key field is used when clients authenticate with the AP via a challenge response mechanism Shared When not selected the only authentication performed is to check that a client s SSID setting matches the SSID of the AP Open Key In this field enter the WEP key to use for data encryption or authentication to the AP ASCII 5 or 13 characters Hexadecimal 10 or 26 characters When the key en...

Page 49: ...information entered in the field below This mode is used if the 802 1x protocol is not being used for authentication Encryption Select the desired encryption WEP The least secure of the encryption methods WEP uses a single encryption key of either 40 or 104 bits WPA uses a 256 bit Pre shared key TKIP Uses the standard WEP format but changes the key with every frame for improved security and includ...

Page 50: ...sociating With Open APs To associate with open APs means to set up the 802 11b radio without authentication or encryption 1 Double tap the Client icon on the command bar 2 On the Main Window see page 5 2 tap on the port and select Configure on the popup menu 3 On the Wireless Networks Tab see page 5 9 tap Add in the Configured Networks section 4 On the Profile Info Tab see page 5 11 enter your AP ...

Page 51: ...Device 1 Configure the radio and save settings in the Client 2 Verify that the radio works that way you want it to 3 Perform a warm boot tap Start Power Tools Reboot Warm Boot Wait as the device boots up 4 When the Desktop appears tap Start Programs Power Tools RegEdit 5 Navigate to the key HKEY_CURRENT_USER Software MDC 802 1x 6 Leave the key highlighted and tap File Export 7 Save the REG file wi...

Page 52: ...les Installing Certificates with the Meetinghouse Certificate Installer 1 Download the certificate file to the device The location isn t critical but you may want to create a standard folder for consistency 2 Go to Start Programs Meetinghouse Certificate Installer 3 Navigate to the certificate location 4 Tap and hold on a certificate in the list A pop up appears asking if you want to install the c...

Page 53: ... 5 17 6 Tap on the radio port on the main window and select Configure on the popup menu 7 Tap the Server tab and select the certificate from the Certificate issuer must be drop down list 8 Tap OK to save the setting and close the port configuration ...

Page 54: ...unneled authentication section My AP does not broadcast its SSID Even though I have manually configured an AP with that name the Client won t associate with it Make sure that the Network Name field contains the AP s SSID Verify that Do Active Scan is selected on the Profile Info tab see Do active scan on page 5 11 Otherwise the Client will not attempt to find the AP I am authenticated but I don t ...

Page 55: ...bles the image engine for use in the Scan Demo only Supported Bar Code Symbologies The 5100SR image engine supports the following bar code symbologies Default Bar Code Symbologies Image Kiosks defaults to the following linear bar code symbologies UPC A UPC E EAN JAN Code 128 Interleaved 2 of 5 Code 39 Codabar MSI PDF417 Plessey Code RSS 14 Australian Post Aztec Code Aztec Mesas British Post Canadi...

Page 56: ...de information simply slide a bar code underneath the illumination cone A beep sounds on successful decoding Omni Directional Aiming Image Kiosks supports omni directional aiming in two of the three optimal imaging modes Omni directional aiming means the bar codes label can be read if placed under the illumination cone in any orientation Illumination Cone ...

Page 57: ...e illumination cone Ambient light level at 535 Lux Depth is measured in inches Code Near Far MaxiCode 35 mil Contact 10 2 Data Matrix 15 mil ECC 200 0 9 3 7 PDF417 ECL4 10 mil 0 3 6 2 PDF417 ECL4 8 mil 0 5 5 2 PDF417 ECL4 6 6 mil 1 7 3 4 Code 39 15 mil Contact 10 0 Code 39 10 mil 0 4 6 4 Code 39 8 mil 0 7 4 8 UPC A 13 mil 100 Contact 9 7 Postnet 1 2 3 1 12 point OCR A Contact 9 0 12 point OCR B Co...

Page 58: ...s and the bar code data appears on the screen Scanning Options You can always manually scan the bar code inserted under the illumination cone by tapping the Scan button The Scan menu offers you two additional scan options Automatic and Continuous Automatic Scan Automatic scan activates the image engine at regular one second intervals To set the device to automatic scan tap Scan Automatic and the e...

Page 59: ... a scan session tap Setup View Statistics The Scan Demo begins recording scan statistics beginning with the next bar code scanned The scan statistics will appear underneath the bar code readout Beeper By default the beeper sounds after each successful decoding To turn off the speaker tap Setup Sound The beeper will not sound after your next successful scan Decode Mode By default the Scan Demo deco...

Page 60: ... than one symbology at a time When you are done enabling and disabling tap Close and then Yes on the confirmation dialog In addition to individual manual selection the Scan Demo offers you three selection options All Selects all the symbologies in the list None De selects all the symbologies in the list this button de selects even the default symbologies Default Selects only the default symbologie...

Page 61: ...bled To see the aiming beam see Omni Directional Aiming on page 6 2 Auto Send Auto send allows you to send decoded information over a TCP IP connection both wired and wireless to a workstation 1 Enter the TCP IP parameters by tapping Setup Radio Frequency 2 Use the SIP to enter the IP Address of the receiving workstation 3 Verify that the default TCP Port of 6000 is correct 4 Tap Close to save 5 T...

Page 62: ...6 8 Rev B 3 1 07 Image Kiosk 8560 8570 User s Guide ...

Page 63: ...an use a mounting bracket or simply fasten screws directly to the vertical surface and hang the Image Kiosk on the screws Make sure to use screws appropriate to the material of the vertical surface such as wood or drywall Back Panel Mounting Dimensions Use the following dimensions to mount your Image Kiosks 7 29 in 185 1 mm 1 48 in 37 6 mm 3 96 in 100 6 mm 54 in 13 7 mm 2 36 in 59 9 mm 7 56 in 192...

Page 64: ...ou want the Image Kiosk to lay flat against the mounting surface make sure that the wires from the connectors are secured in the wire slots Side Panel Dimensions The following graphic shows the depth of Image Kiosks at its widest point Connectors Wire Slots 3 16 in 80 26 mm ...

Page 65: ...l naservice handheld com Latin America Telephone 704 998 3998 option 8 option 4 Telephone 800 782 4263 option 8 option 3 Fax 239 263 9689 E mail laservice handheld com Brazil Telephone 55 21 2178 0500 Fax 55 21 2178 0505 E mail brservice handheld com Mexico Telephone 52 55 5203 2100 Fax 52 55 5531 3672 E mail mxservice handheld com Europe Middle East and Africa Telephone 31 0 40 2901 633 Fax 31 0 ...

Page 66: ...echsupport handheld com Brazil Telephone 55 21 2178 0500 Fax 55 21 2178 0505 E mail brsuporte handheld com Mexico Telephone 704 998 3998 option 8 option 3 E mail latechsupport handheld com Europe Middle East and Africa Telephone 31 0 40 7999 393 Fax 31 0 40 2425 672 E mail eurosupport handheld com Asia Pacific Telephone Hong Kong 852 3188 3485 or 2511 3050 Telephone China 86 21 6361 3818 E mail ap...

Page 67: ... to Hand Held Products EXCEPT AS MAY BE OTHERWISE PROVIDED BY APPLICABLE LAW THE FOREGOING WARRANTY IS IN LIEU OF ALL OTHER COVENANTS OR WARRANTIES EITHER EXPRESSED OR IMPLIED ORAL OR WRITTEN INCLUDING WITHOUT LIMITATION ANY IMPLIED WARRANTIES OF MERCHANTABILITY OR FITNESS FOR A PARTICULAR PURPOSE HAND HELD PRODUCTS RESPONSIBILITY AND PURCHASER S EXCLUSIVE REMEDY UNDER THIS WARRANTY IS LIMITED TO ...

Page 68: ...8 4 Rev B 3 1 07 Image Kiosk 8560 8570 User s Guide ...

Page 69: ......

Page 70: ... Hand Held Products Inc 700 Visions Drive P O Box 208 Skaneateles Falls NY 13153 0208 IK8560 UG Rev B 3 1 07 ...

Reviews: