


- 65 -
2. Map setup
▶
[
MENU]->Advance->Map Setup
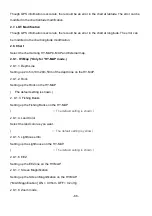
2.1. Map orientation
2.1.1. True motion
You can select “True motion”
(
☞
The default setting is OFF.)
2.1.2. Up mode
You can select “Map Orientation”
(
☞
The default setting is North Up.)
2.2. UserData Display
Setting up shown/hide the user data on the display.
2.3. INFO Display
Setting up shown/hide common item between the HY-MAP and the C-MAP on the display.
2.4. Map scale
Setting up the map scale on the display.
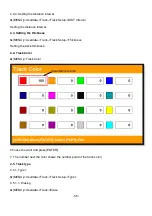
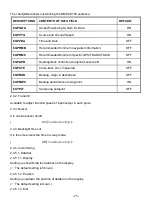
2.5. Palette
It is possible to the palette used to enhance the visibility of the screen depending on the surround light
condition. The possible choices are listed in the table below:
2.5.1. Normal
It set the maps are displayed in ordered to use colors as similar as possible to the ones used in the
original paper charts.
2.5.2. Sunlight
It is designed to enhance the visibility of the screen when Smart7/8/10 seriesis exposed to the sunlight.
The maps are much brighter than in the other displays.
2.5.3. NOAA
Allows setting NOAA paper chart colors presentation.
(*It is available NOAA menu on C-MAP.)
2.6. LAT. Modification
Summary of Contents for Smart10 Series
Page 8: ... 8 ...
Page 11: ... 11 2 Specification of the connectors 2 1 Metal connectors ...
Page 12: ... 12 2 2 Plastic connectors ...
Page 15: ... 15 3 3 Navigation Data Page 3 3 1 Navigation Data Type1 3 3 2 Navigation Data Type2 ...
Page 19: ... 19 ...
Page 25: ... 25 Fig 1 3 3 When finishing press to exit ...
Page 28: ... 28 Fig 1 6 3 ...
Page 39: ... 39 2 2 Detail Choose the AIS target and press ENTER 2 3 Goto Choose the AIS target and press ...
Page 45: ... 45 ...
Page 51: ... 51 2 9 Sorting MENU Userdata WPT List MENU Sorting the order of WPT on the list ...
Page 63: ... 63 The maximum range of Correction Offset is 5nm ...
Page 71: ... 71 ...
Page 79: ... 79 ...
Page 95: ... 95 ...
Page 98: ... 98 Smart10 Flush Mounting Smart7 8 Flush Mounting ...
Page 111: ... 111 ...


