


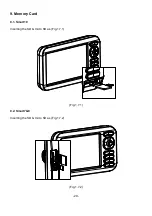


- 22 -
When finishing the set up, press to exit.
(*Please, refer “Customizing” for further question.)
4.2. Display
▶
[
MENU]->Advance->Setup->Customizing->Databar->Display
Setting the databar, “Shown/Hidden”.
4.3. Position
▶
[
MENU]->Advance->Setup->Customizing->Databar->Position
Setting the databar position on the top or bottom.
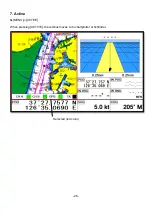
5. Cursor
5.1. Calling the cursor
Press [
◀
][
▶
][
▼
][
▲
] on the chart, the cursor comes out.
5.2. Moving
Press [
◀
][
▶
][
▼
][
▲
], the cursor is moving to the direction.
Press [
◀
][
▼
] together, the cursor is moving to “
↙
”
.
Press [
▶
][
▼
] together, the cursor is moving to “
↘
”
.
Press [
◀
][
▲
] together, the cursor is moving to “
↖
”
.
Press [
▶
][
▲
] together, the cursor is moving to “
↗
”
.
5.3. Removing the cursor
Press to remove the cursor.
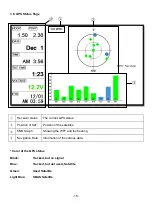
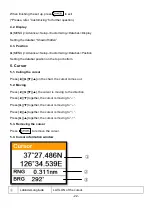
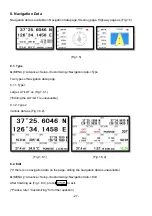
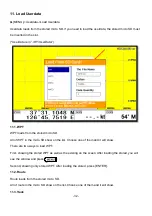
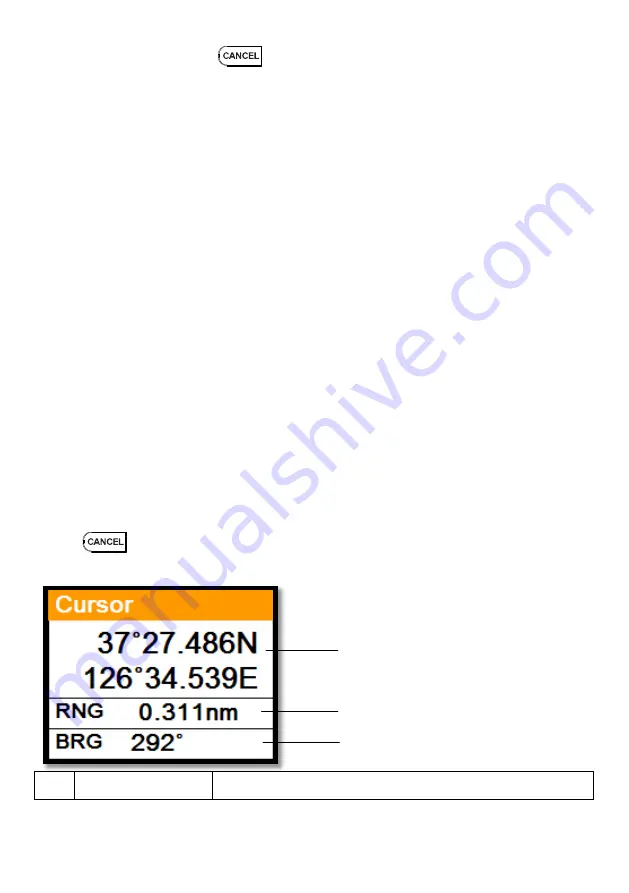
5.4. Cursor information window
①
Latitude/Longitude
LAT/LON of the cursor.
①
②
③
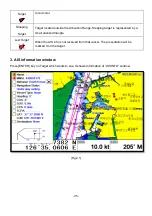
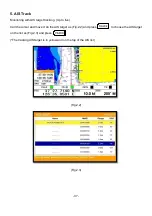
Summary of Contents for Smart10 Series
Page 8: ... 8 ...
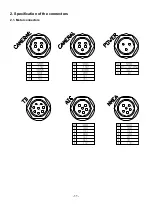
Page 11: ... 11 2 Specification of the connectors 2 1 Metal connectors ...
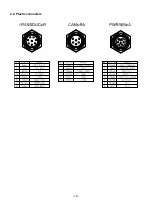
Page 12: ... 12 2 2 Plastic connectors ...
Page 15: ... 15 3 3 Navigation Data Page 3 3 1 Navigation Data Type1 3 3 2 Navigation Data Type2 ...
Page 19: ... 19 ...
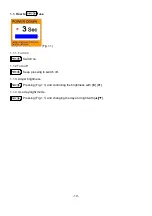
Page 25: ... 25 Fig 1 3 3 When finishing press to exit ...
Page 28: ... 28 Fig 1 6 3 ...
Page 39: ... 39 2 2 Detail Choose the AIS target and press ENTER 2 3 Goto Choose the AIS target and press ...
Page 45: ... 45 ...
Page 51: ... 51 2 9 Sorting MENU Userdata WPT List MENU Sorting the order of WPT on the list ...
Page 63: ... 63 The maximum range of Correction Offset is 5nm ...
Page 71: ... 71 ...
Page 79: ... 79 ...
Page 95: ... 95 ...
Page 98: ... 98 Smart10 Flush Mounting Smart7 8 Flush Mounting ...
Page 111: ... 111 ...


