PREP
A
R
A
TI
ON
IMP
O
RT
AN
T:
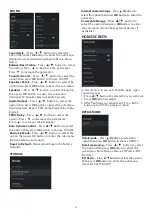
Do not apply pressure to the screen display
area which may compromise the integrity of the display.
The manufacturer’s warranty does not cover user abuse
or improper installations.
A
TT
AC
HI
N
G THE ST
AN
D
IMP
O
RT
AN
T:
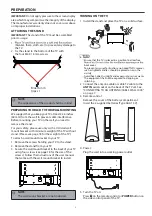
The stand of the TV must be assembled
prior to usage.
1.
(blanket, foam, cloth, etc.) to prevent any damage to
the TV.
PREP
A
RI
N
G Y
O
UR L
C
D TV F
O
R W
A
LL M
O
U
N
TI
N
G
We suggest that you keep your TV at least 2.36 inches
(60 mm) from the wall to prevent cable interference.
Before mounting your TV on the wall, you need to
remove the stand.
For your safety, please use only with a UL listed wall
mount bracket with minimum weight of the TV without
stand. (Please see page 18 for the weight of the TV.)
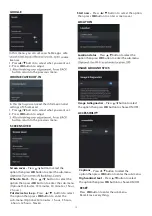
To attach a wall mount bracket to your TV:
1. Remove the screws holding your TV to the stand.
2. Remove the stand from your TV.
3. Secure the wall mount bracket to the back of your TV
using four screws (see page 18 for the size of the
screws). Follow the instructions of the user manual
that came with the wall mount bracket to install.
TUR
N
I
N
G
ON
THE TV
1. Install the stand and place the TV on a solid surface.
Ensure that the TV is placed in a position to allow free
back cover.
To prevent any unsafe situations, no naked
sources,
such as lighted candles, should be placed on or in the
vicinity.
Avoid heat, direct sunlight and exposure to rain or water.
The equipment shall not be exposed to dripping or
splashing.
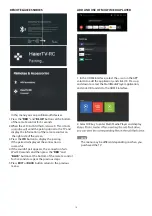
2. Connect the antenna cable or cable TV cable to the
AN
T I
N
aerial socket on the back of the TV set. See
"CONNECTING TO AN ANTENNA/CABLE WALL JACK"
on page 7.
3. Remote control:
Remove the cover of the battery compartment.
Insert the 2 supplied batteries (Type AAA 1.5V).
4. Power:
Plug the cord into a working power outlet.
5. Turn the TV on:
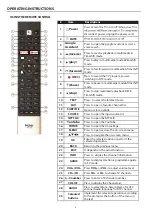
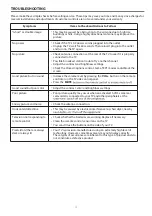
Press
on the remote control or
P
O
WER
button on
the side control panel of the TV.
NO
TE
The wall mount bracket are not included.
NO
TE
The appearance of the product shall be in kind.
Min
1 m
NO
TE
M4x16 mm
(4pcs )
2.
Fix the stand to the bottom of the TV with
the four M4 X 16 mm screws.
PRESS
3
Summary of Contents for LE50K9000UA
Page 1: ...LE50K9000UA LE55K9000UA ...
Page 3: ...IMPORTANT SAFETY INSTRUCTIONS 1 ...
Page 22: ...www Haier com ...


