17
Installing a fan tray
CAUTION:
•
The firewall comes with the fan tray slots empty. Before powering on the firewall, make sure the
firewall is fully configured with fan trays of the same model.
•
If a fan tray fails during operation, replace the fan tray as soon as possible and keep the failed fan
tray in place before replacing it.
•
Before installation, make sure the fan tray airflow direction meets the requirements for installation
ventilation.
•
Before installation, orient the fan tray with the "TOP" mark on the top.
No fan trays are provided with the firewall. Purchase them as needed.
To install a fan tray:
1.
Face the rear panel of the firewall.
2.
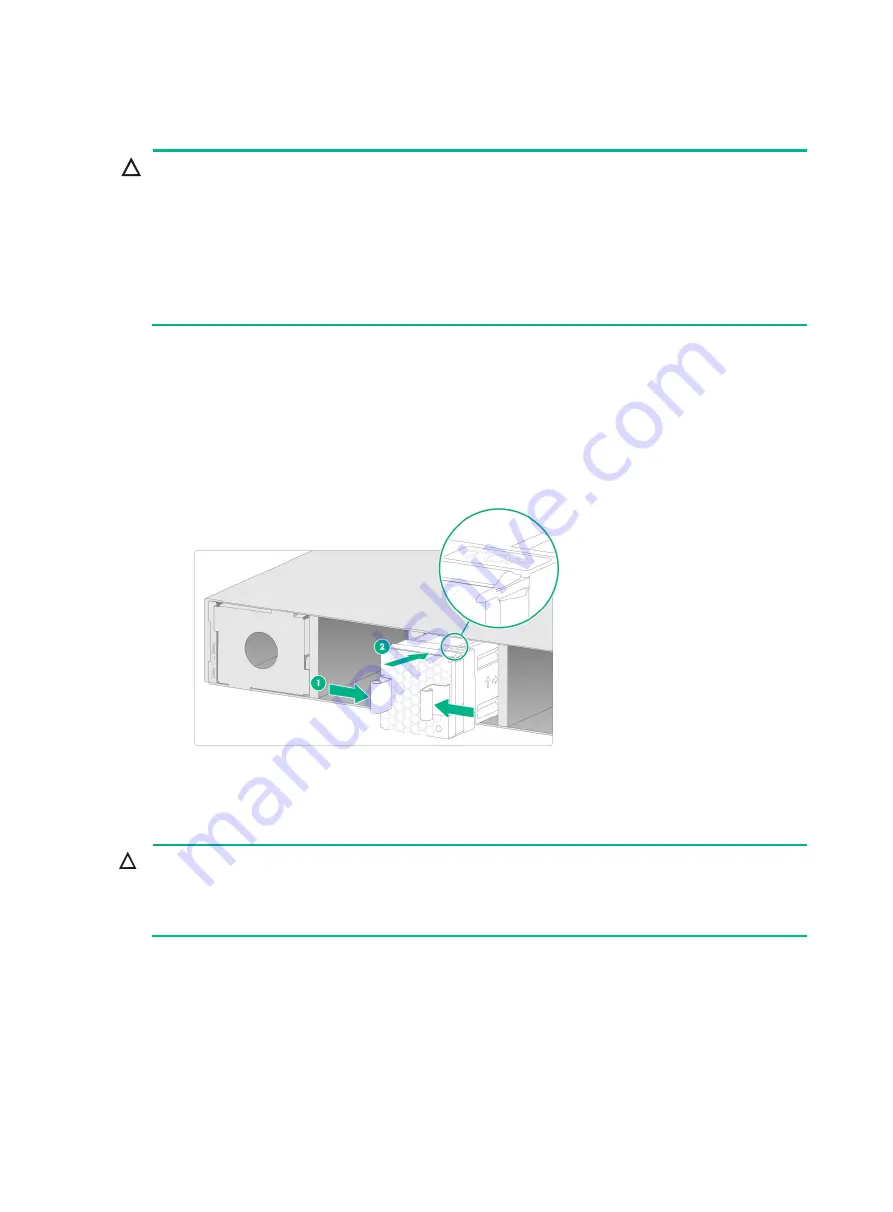
Orient the fan tray with the "TOP" mark on the top. Grasp the handle of the fan tray with one
hand and support the fan tray bottom with the other. Slide the fan tray along the guide rails into
the slot until the fan tray is fully seated in the slot.
Figure2-11 Installing a fan tray
Installing a power supply
CAUTION:
•
Do not install AC and DC power supplies on the same firewall.
•
Before installing a power supply, make sure the power supply is powered off and the grounding
cable is correctly connected.
No power supplies are provided with the firewall. Purchase them as needed. The installation
procedure is similar for power supplies of different models. This section installs a PSR250-12A1
power supply.
To install a power supply:
1.
Face the rear panel of the firewall.
2.
To install the power supply in slot PWR0, remove the filler panel from the slot and install the
filler panel in slot PWR1. To install the power supply in slot PWR1, skip this step.


