background image

DrawingBoard VI 12 


They keys numbered 1-18 can be used as both Configuration and Macro keys.  When the tablet 

is in Configuration Mode, the keys function as Configuration keys.  These keys allow you to set 

specific tablet options by turning different combinations of Configuration keys ON or OFF. 

When Configuration Mode is OFF, the keys function as Macro keys.  Macros can be recorded 

only with the TabletWorks software. 

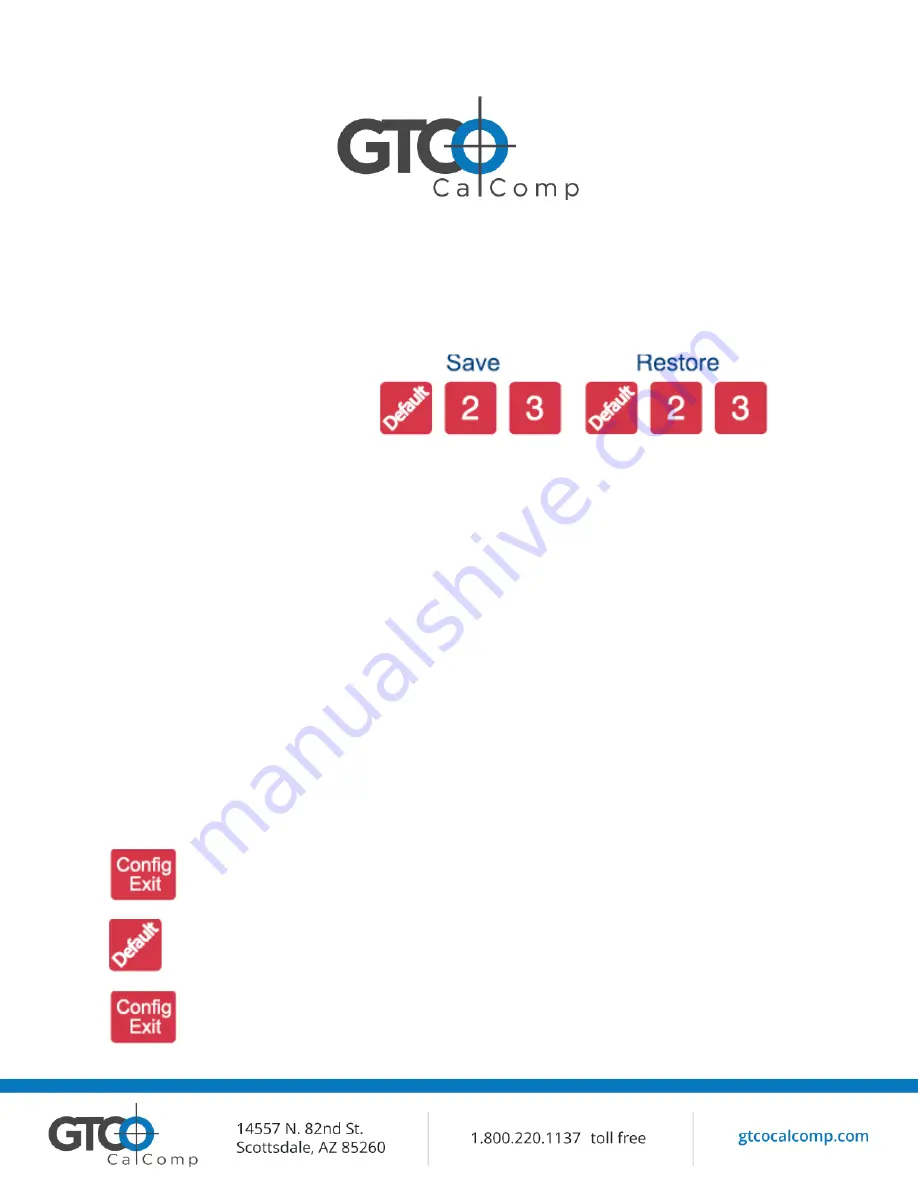
3 Save and 3 Restore Keys 


The Save and Restore keys work hand-in-hand.  They are used to save, or recall/restore, a 

setup to or from one of three Save Areas.  The tablet comes with three pre-programmed 

setups.  You can use these setups directly or overwrite them with your own.  The Default Save 

Key controls the first Save Area.  The setup saved to this area is activated whenever you 

power-up the digitizer.  We recommend you save the setup you use most often as 

Default

Selecting a Pre-Programmed Setup 

There are three pre-programmed setups available with DrawingBoard VI: 


GTCO CalComp DP5 High Resolution Binary 


Summagraphics MM 1201 


CalComp 2000 ASCII 

These setups are commonly used within software applications as required tablet formats.  They 

are stored in Save Areas 

Default

2

 and 

3

, respectively.  Check the manual that came with your 

software package to see if your application requires one of these pre-programmed setups.  The 

Default 

setup is available when you power on the digitizer. 

To select one of the other setups: 


1. Turn on Configuration Mode by clicking on the Config/Exit key. 


2. Click on the desired Restore key. 


3. Click on the Config/Exit key again to exit Configuration Mode.  The new 

setup is activated. 

Summary of Contents for DrawingBoard VI

Page 1: ...DrawingBoard VI 1 DRAWINGBOARD VI USER S GUIDE THE DRAWINGBOARD VI FAMILY OF SMALL FORMAT AND LARGE FORMAT DIGITIZERS ...

Page 2: ...Connection Optional RS 232 Serial Connection Tablet Power On Customizing the Tablet Overview of the Menu Strip Selecting a Pre Programmed Setup Selecting a Custom Setup Tablet Options Recommended Setups for Common PC Software Applications Restoring a Pre Programmed Setup Learning the Basics Using the Transducer Using the Cursor Using the Pen Learning Basic Movements Clicking and Double Clicking Dr...

Page 3: ...face By placing a drawing or sketch on the tablet s surface and tracing over it graphical information can be easily converted into accurate digital information for entry into the computer DrawingBoard VI digitizers utilize the same Advanced Function Technology that has set the world standard for performance since 1975 These high performance tools are Engineered with a state of the art positioning ...

Page 4: ...e able to transmit data in such a way that the digitizing application recognizes and understands it Before setting up DrawingBoard VI you should determine Requirements of the digitizing software application being used Whether the digitizing application requires software drivers to communicate with DrawingBoard VI Hardware communications connection USB or serial being used between DrawingBoard VI a...

Page 5: ...r while a serial connection requires the use of a TabletWorks driver and or a custom application program After installing the TabletWorks software DrawingBoard VI will work with all Windows based applications specifically designed for use with digitizers For a USB Installation Microsoft Windows 7 8 or 10 One available USB port 10 MB of free disk space Application software that accepts digitizer in...

Page 6: ...rip The Menu Strip is the row of keys located in the lower left corner of the large format tablet and across the top of the small format tablet You can use the keys to customize your tablet or to assign macros to Configuration keys for greater productivity Indicator Light The power proximity LED in the upper right corner of the large format DrawingBoard VI frame or the proximity configuration ligh...

Page 7: ...Each pen corded and cordless are similar in appearance to a ballpoint pen The pen transducer has three buttons two on the side of the barrel and one in the pen tip Preparing the Large Format DrawingBoard VI Mounting on a Stand Visit our Website www gtcocalcomp com to see our Recommended Tilt Stand Versa Table Attaching the Accessory Tray or the Optional Plan Holder Additional T Nuts have been incl...

Page 8: ... Interface Only Many application programs provide configuration information for specific digitizers If the DrawingBoard VI digitizer is not listed you can use the configuration for GTCO CalComp by Turning Technologies Digi Pad Type 5 or Type 5A T5 T5A CalComp 9100 9500 or Summagraphics Microgrid III or ID Series Installing the TabletWorks Driver Visit our Website https www gtcocalcomp com software...

Page 9: ...r s Connector Panel The connector is keyed and will fit only the correct jack Do not force it USB Connection DrawingBoard VI USB port connection is USB 1 1 and 2 0 compatible When the digitizer is connected to the USB port Windows will recognize that there is a new device connected If Windows displays the Found New Hardware prompt follow the onscreen instructions to complete the driver installatio...

Page 10: ...serial cable to the serial jack on the Connector Panel The connector is keyed and will fit only the correct jack Do not force it Attach the other end to an RS 232 serial port on your computer 2 Plug the power supply into an AC outlet Join the power supply to the appropriate jack on the Connector Panel Turn the power switch on The digitizer will beep once indicating it has power ...

Page 11: ...ing TabletWorks TabletWorks is a Windows program included with the digitizer software that helps you use the full capabilities of your DrawingBoard VI You can map your digitizer to the screen area and program stylus and cursor buttons with custom macros If you have chosen to use the optional serial interface you will be able to customize the tablet data format and communications parameters using t...

Page 12: ...trols the first Save Area The setup saved to this area is activated whenever you power up the digitizer We recommend you save the setup you use most often as Default Selecting a Pre Programmed Setup There are three pre programmed setups available with DrawingBoard VI GTCO CalComp DP5 High Resolution Binary Summagraphics MM 1201 CalComp 2000 ASCII These setups are commonly used within software appl...

Page 13: ...s by turning different combinations of Configuration keys ON or OFF The available tablet options are listed below To setup the tablet 1 Turn on Configuration Mode by clicking on the Config Exit key 2 Click on the Bank key where you need to work A B or C You can determine which bank you are in by placing the transducer over one of the Bank keys The Indicator light is on if the Bank is active 3 Dete...

Page 14: ...t Options The following sections show the various tablet options available through Configuration keys on the Menu Strip Follow the procedure described on the previous page using the keys shown for the option The circles represent the Indicator light on the tablet Defining operating mode ...

Page 15: ...DrawingBoard VI 15 Setting up increment mode Turning on prompt mode Setting up data rate for CalComp 2000 format Setting up data rate for Summagraphics MM ASCII format ...

Page 16: ...DrawingBoard VI 16 Setting up data rate for Summagraphics MM binary format Setting up resolution Resolutions up to 10 000 lpi are available on the large format tablets for applications that support it ...

Page 17: ...DrawingBoard VI 17 Setting up format ...

Page 18: ...DrawingBoard VI 18 Adding line feed Setting up data stop bits Setting up baud rate Setting up parity Setting corded frequency No longer Applicable Using Summagraphics MM or CalComp 2000 commands ...

Page 19: ...ing ESC for 9X00 commands Sending data out of proximity Turning on pressure pen data Turning on pen height data Turning on pen tilt data Turning on pen tilt correction Setting up CTS line enable Removing CR on ASCII formats ...

Page 20: ...mended Setups for Common PC Software Applications The following sections show the Configuration key setups for some common PC software packages Setup the Configuration keys as shown below see Selecting a Custom Setup The circles represent the Indicator light on the digitizer ...

Page 21: ...DrawingBoard VI 21 ...

Page 22: ...DrawingBoard VI 22 ...

Page 23: ...DrawingBoard VI 23 ...

Page 24: ...etup to one of the Save areas the pre programmed setup will be overwritten To restore the original setup place the Configuration keys as shown below following the steps in the Selecting a Pre Programmed Setup procedure The circles represent the Indicator light on the digitizer ...

Page 25: ...ducer be sure that Sleep Mode is turned off by pressing a button or in the case of the pen touching the tip of the tablet s surface Using the Cursor When you use the cursor the intersection point of the crosshairs on the lens identifies the point you are selecting The crosshairs are etched on the bottom of the lens to increase accuracy For maximum precision look through the lens from a position di...

Page 26: ...ter using the transducer to the item to be selected Tap the pen or press Button 0 on the cursor A double click requires you to quickly tap the pen or press the button two times while the tool remains in the same place You can also double click by pressing the pen or cursor button that has been defined as a double click button Dragging Dragging is the action of moving the transducer during a select...

Page 27: ...or digitizing Do not drill any holes on the digitizer or controller Cleaning the Tablet To clean the tablet s surface use a soft non abrasive cloth Hardened dirt may be removed with a slightly dampened cloth Do not clean pencil lines with a soft cleanser or pencil eraser This may create an undesirable shiny spot on the tablet s surface that cannot be removed Cleaning the Cursor To clean the cursor...

Page 28: ...replace the pen tip grasp the tip and pull straight out see figure Insert the new tip and press until it clicks into place Replacing the Cordless Pen Batteries The pens require two 393 silver oxide batteries The average battery life is 200 hours ...

Page 29: ...he pen Replacing the Cordless Cursor Batteries The cordless cursor requires two AAA batteries The average battery life for the cursor is 2 000 hours To replace the batteries 1 Place the cursor face down in the palm of your hand Use a Phillips screwdriver to remove the two screws located on the bottom of the cursor see figure Remove the cursor base 2 Remove the old batteries from the battery casing...

Page 30: ...Chart Keep in mind that the problem could be your computer display or software instead of the digitizer 3 If you still experience an issue call GTCO CalComp Technical Support at 1 800 220 1137 in the U S or Canada or email us at support gtcocalcomp com Outside the U S or Canada contact your local GTCO CalComp Dealer Please have the following information available when you call Description of the p...

Page 31: ...and the computer Check that the cable is connected to the serial port specified in your software package Is the transducer cable connected to the digitizer Is the tablet setup according to the software recommendations Are any of the connector cables or receptacles damaged Check for bent pins cut insulation and loose wires Computer Checklist Is the computer plugged into a live outlet Did you turn o...

Page 32: ...oblem lies with the new setup Check all the connectors Is the tablet still plugged into the same port If yes reset the tablet by unplugging and re plugging the USB connector or if you are using serial unplug and re plug the power supply Restart the software Did you reset or power down the computer If you are using a serial connection during reset and power on the computer can send meaningless char...

Page 33: ...t shares the same IRQ as the tablet COM port i e your tablet is connected to COM1 IRQ4 and your modem is connected to COM3 IRQ4 Tablet is set too close to the screen monitor Press any button on the transducer If the configuration light is on click on the Config Exit key on the Menu Strip Is the serial port being used correctly identified in your software application Check that the power cable is i...

Page 34: ...Support at 1 800 220 1137 or email us at support gtcocalcomp com Technical Support will assist you in determining if your tablet is defective and will help you obtain a Return Merchandise Authorization RMA number Important Please do not return your product without first discussing the issue with and receiving an RMA from GTCO CalComp Technical Support Repackaging for Shipment Whenever you ship ele...

Page 35: ...m either 0 or 1 Button Switch on the cursor or pen used to input data Byte Group of eight bits that acts as a single unit of information Coordinate Pair Pair of numbers representing a unique point on the digitizer surface usually the distance across and up from the tablet origin CR The ASCII Carriage Return character usually added to the end of the X Y coordinate pairs sent by the tablet ASCII for...

Page 36: ...rection and has satisfied the requirements of the operating mode These increment distances are set separately for each axis Jitter Repeatability error of short duration caused by electrical noise Key Portion of the tablet surface available to the user for tablet setup Line Feed Optional character added to the end of an output format that causes the printer to move to the next line or causes a line...

Page 37: ...y bit confirms that the data was not altered during transmission Point Mode The digitizer transmits one coordinate data point when a cursor button or the pen tip is depressed Prompt Mode The digitizer transmits one coordinate pair each time the computer sends a prompt character to the unit Prompting can operate with any mode except Mouse mode Proximity Greatest distance above the Active Area that ...

Page 38: ...y changes or modifications not expressly approved by the party responsible for compliance could void the user s authority to operate the equipment This equipment has been tested and found to comply with the limits of a Class B digital device pursuant to Part 15 of the FCC rules These limits are designed to provide reasonable protection against harmful interference in a residential installation Thi...

Page 39: ...tes relating to electromagnetic compatibility This product has been tested and found to comply with the limits for Class B Information Technology Equipment according to CISPR 22 European Standard EN55022 The limits for Class B equipment were derived for typical industrial environments to provide reasonable protection against interference with licensed communication devices European Union WEEE Dire...

Page 40: ...ellers Importeurs Dieses Geraet wurde einzeln sowohl als auch in einer Anlage die einen normalen Anwendungsfall nachbildet auf die Einhaltung der Funkentstoerbestimmungen geprueft Es ist jodoch moeglich dass die Funkentstoerbestimmungen unter unguenstigen Umstaenden bei anderen Geraetekombinationen nicht eingehalten werden Fuer die Einhaltung der Funk entstoerbestimmungen seiner gesamten Anlage in...

Page 41: ...rranty covers all defects in material or workmanship in the products The following are not covered by the warranty 1 Any product on which the serial number has been defaced modified or removed if applicable 2 Damage deterioration or malfunction resulting from a Accident misuse abuse neglect fire water lightning or other acts of nature unauthorized modification for any purpose unauthorized product ...

Page 42: ...t is available free of charge to the original consumer Please contact our Technical Support Department at 1 800 220 1137 Disclaimer of Unstated Warranties The warranty printed above is the only warranty applicable to this purchase ALL OTHER WARRANTIES EXPRESS OR IMPLIED INCLUDING BUT NOT LIMITED TO THE IMPLIED WARRANTIES OF MERCHANTABILITY AND FITNESS FOR A PARTICULAR PURPOSE ARE DISCLAIMED Assumi...

Page 43: ...ocument is subject to change without notice GTCO CalComp by Turning Technologies assumes no responsibility for technical or editorial errors or omissions that may appear in this document or for the use of this material Nor does GTCO CalComp by Turning Technologies make any commitment to update the information contained in this document This document contains proprietary information which is protec...

Reviews: