


-16-
G0803
(Mfd. Since 09/15)
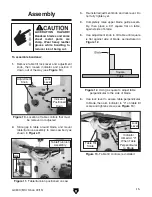
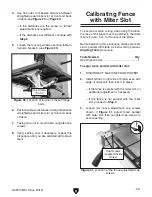
8. Slide fence rail notches over knob threads
(see
Figure 15), then tighten knobs to secure
fence rail snug against edge of table.
7. Thread (2) M6-1 x 16 fence rail knobs into
table just enough so they will not fall out. Do
not tighten yet (see
Figure 14).
Figure 14. M6-1 x 16 fence rail knobs installed.
Adjustment
Overview
The bandsaw is one of the most versatile wood-
working machines. However, it has multiple com-
ponents that must be properly adjusted for the
best cutting results.
For practical and safety reasons, some adjust-
ments and test operations must be performed
before performing other necessary adjustments.
Below is an overview of all the adjustments and
the order in which they should be performed:
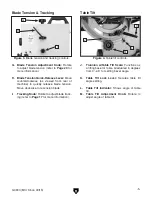
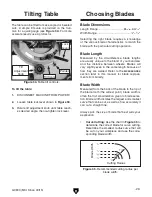
1. Blade Tracking
2. Dust Collection
3. Test Run
4. Tension Blade
5. Adjusting Blade Support Bearings
6. Adjusting Blade Guide Bearings
7. Table Tilt Calibration
8. Aligning Table
9. Aligning Fence
11. Pull fence lock lever up and place fence
assembly onto fence rail, making sure it
snaps into place, then push lock lever down
to secure fence (see
Figure 16).
Figure 16. Fence installed on fence rail.
Fence Base
on Fence
Rail
Fence
Lock Lever
9. Insert "D" nut into slot shown in Figure 16.
10. Thread M6-1 x 24 fence rail knob up through
middle notch of fence rail, into "D" nut, and
tighten.
"D" Nut
Slot
Figure 15. Installing fence rail.
Notch
Notch
Shaft
Fence Rail
Knob
Threads
Summary of Contents for G0803
Page 56: ...54 G0803 Mfd Since 09 15...
Page 60: ......