background image

Service Manual

41

Installation and Maintenance

4

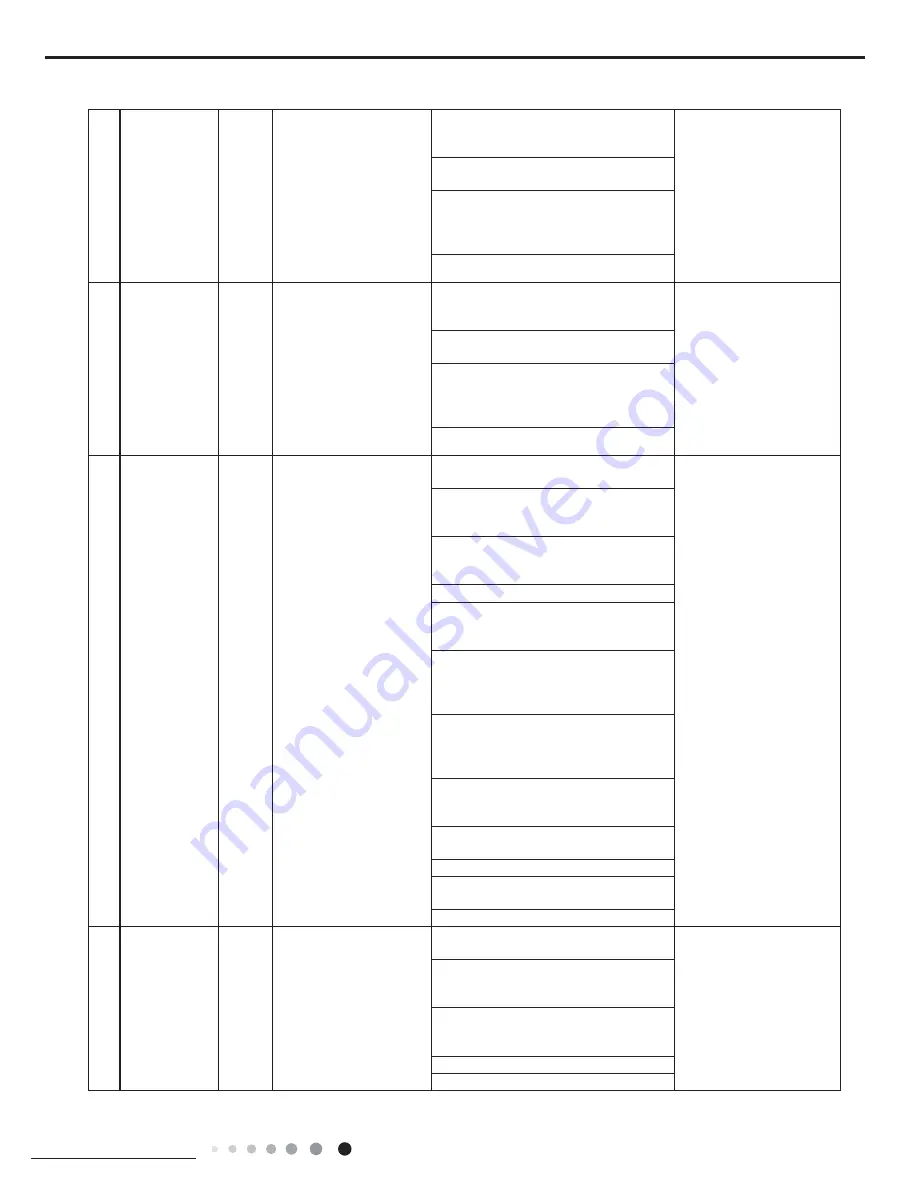
Outdoor 

condenser 

temperature 

sensor is open/ 

short-circuited

F4

The unit will stop 

operation as it reaches 

the temperature point. 

During cooling and drying 

operation, the compressor 

stops operation while IDU 

fan motor operates; During 

heating operation, the 

heating fan motor operates 

according to the conditions 

of blowing residual heat.

1. The wiring terminal between outdoor 

condenser temperature sensor and 

maiboard is loosened or poorly contacted;

Refer to Malfunction 

Detection Flowchart

2. There’s short circuit due to trip-over of 

the parts on maiboard;

3. Outdoor condenser temperature sensor 

is damaged (Please check it by referring 

to the resistance table for temperature 

sensor);
4. Mainboard is broken.

5

Outdoor 

discharge 

temperature 

sensor is open/ 

short-circuited

F5

The unit will stop 

operation as it reaches 

the temperature point. 

During cooling and drying 

operation, the compressor 

stops operation while IDU 

fan motor operates; During 

heating operation, the 

heating fan motor operates 

according to the conditions 

of blowing residual heat.

1. The wiring terminal between outdoor 

discharge temperature sensor and 

maiboard is loosened or poorly contacted;

Refer to Malfunction 

Detection Flowchart

2. There’s short circuit due to trip-over of 

the parts on maiboard;

3. Outdoor discharge temperature sensor 

is damaged (Please check it by referring 

to the resistance table for temperature 

sensor);
4. Mainboard is broken.

6

High pressure 

protection

E1

During cooling and drying 

operation, except IDU 

fan motor operates, all 

loads stop operation. 

During heating operation, 

the complete unit stops 

and operation of remote 

controller or buttons is 

unavailable.

1. The mainboard and the display board 

are not connected well;

Refer to Malfunction 

Detection Flowchart

2. The OVC terminal on mainboard is not 

connected well with the high pressure 

switch on the complete unit;

3. The wiring terminal between high 

pressure switch and maiboard is loosened 

or the high pressure switch is broken;

4. Refrigerant is superabundant;

5. Poor heat exchange (including blocked 

heat exchanger and bad radiating 

environment );

6. Ambient temperature is too high; (if it is 

3-phase unit, the high pressure protection 

may be caused by overcurrent protection 

due to this reason);

7. The supply voltage is abnormal (if it is 

3-phase unit, the high pressure protection 

may be caused by overcurrent protection 

due to this reason);

8. The air intake and air discharge at 

indoor / outdoor heat exchanger are not 

smooth;

9. Filter and heat exchange fins of indoor/

outdoor units are blocked;

10. The pipeline is blocked;

11. The gas valve and liquid valve for 

outdoor unit are not completely opened;

12. The OVC input is at high level.

7

Low pressure 

protection of 

compressor

E3

The complete unit stops.

1.The mainboard and display board are 

not connected well;

Refer to Malfunction 

Detection Flowchart

2. The LPP terminal on the mainboard is 

not connected well with the high pressure 

switch;

3. The wiring of high pressure switch 

is loosened or high pressure switch is 

damaged. 

4. The refrigerant is insufficient;
5. The LPP input is at high level.

Summary of Contents for GVA24AL-K3NNC7A/I

Page 1: ...Service Manual Models Change for life GREE ELECTRIC APPLIANCES INC OF ZHUHAI GVA24AL K3NNC7A GVA48AL M3NNC7A GVA55AL M3NNC7A Refrigerant R410A...

Page 2: ...16 6 Function and Control 19 6 1 Function Buttons of Air Conditioner 19 6 2 Remote Control Operations 21 6 3 Introduction of Each Mode Function 25 Part Installation and Maintenance 30 7 Notes for Ins...

Page 3: ...10 1 Indoor Unit 55 10 2 Outdoor Unit 59 11 Removal Procedure 63 11 1 Removal Procedure of Indoor Unit 63 11 2 Removal Procedure of Outdoor Unit 78 Appendix 87 Appendix 1 Reference Sheet of Celsius a...

Page 4: ...chnical Information 1 Summary Part Technical Information Indoor Unit Remote Controller Outdoor Unit GVA24AL K3NNC7A I GVA48AL M3NNC7A I GVA55AL M3NNC7A I GVA24AL K3NNC7A O GVA48AL M3NNC7A O GVA55AL M3...

Page 5: ...2 32 50 Indoor Unit Model of indoor unit GVA24AL K3NNC7A I Product Code CG156N00200 Fan Type Centrifugal Diameter Length DXL mm 350X130 5 Fan Motor Cooling Speed SH H M L SL r min 450 415 380 345 Fan...

Page 6: ...Motor Speed rpm 780 Output of Fan Motor W 85 Fan Motor RLA A 0 8 Fan Motor Capacitor F 4 5 Air Flow Volume of Outdoor Unit m3 h 3200 Fan Type Axial flow Fan Diameter mm 520 Defrosting Method Automati...

Page 7: ...el of indoor unit GVA48AL M3NNC7A I Product Code CG156N00300 Fan Type Centrifugal Diameter Length DXL mm 369X180 5 Fan Motor Cooling Speed SH H M L SL r min 550 490 440 390 Fan Motor Heating Speed SH...

Page 8: ...rpm 840 Output of Fan Motor W 68 Fan Motor RLA A 0 65 Fan Motor Capacitor F 3 5 Air Flow Volume of Outdoor Unit m3 h 6000 Fan Type Axial flow Fan Diameter mm 470 Defrosting Method Automatic Defrosting...

Page 9: ...Model of indoor unit GVA55AL M3NNC7A I Product Code CG156N00100 Fan Type Centrifugal Diameter Length DXL mm 369X180 5 Fan Motor Cooling Speed SH H M L SL r min 550 490 440 390 Fan Motor Heating Speed...

Page 10: ...d rpm 840 Output of Fan Motor W 68 Fan Motor RLA A 0 65 Fan Motor Capacitor F 3 5 Air Flow Volume of Outdoor Unit m3 h 6000 Fan Type Axial flow Fan Diameter mm 470 Defrosting Method Automatic Defrosti...

Page 11: ...lve Connection pipe length 5 m Rated cooling condition C DB WB Model Pressure of gas pipe connecting indoor and outdoor unit Inlet and outlet pipe temperature of heat exchanger Fan speed of indoor uni...

Page 12: ...Service Manual 9 Technical Information 2 4 Noise Curve 24K 48K 55K 60 50 40 30 20 10 0 Noice dB A low Middle High Super High Indoor side noise when blowing Indoor fan motor rotating speed...

Page 13: ...Service Manual 10 Technical Information 3 Outline Dimension Diagram 3 1 Indoor Unit Unit mm Model W H D 24K 507 1770 320 48 55K 587 1882 394...

Page 14: ...Service Manual 11 Technical Information Unit mm Unit mm 3 2 Outdoor Unit 364 560 700 396 340 965 897 24K 48K 55K 1032 572 378 412 1250...

Page 15: ...OOLING Discharge Suction Heat exchanger evaporator Heat exchanger condenser condenser Valve Valve Valve Liquid pipe side Liquid pipe side Gas pipe side Accumlator Compressor Strainer Strainer Strainer...

Page 16: ...03 78 6 1625 1 83 2 1 67 33 1 02725 7 5 7 67 33 1 02725 1 8 20 3 211 725 0 7 1 2 7 1 0 B 7 B 7 8 2 7 7 5 87 67 7 5 8 8 1 127 0RWRU JURXQG RQO DSSOLHV WR WKH LURQ VKHOO PRWRU 5 Electrical Part 5 1 Wiri...

Page 17: ...97 35 17 5 8 7 2 5 7 50 1 2 7 1 225 81 7 97 1 3 20 0 1 7 6 1625 57 57 0 1 20 1 211 725 0 0 0 1 8 1 2 7 7 1 0 287 225 81 7 20 287 20 63 1 1 6 1 8 1 1 3 0 1 3 02725 1 3 83 2 1 67 33 1 02725 7 5 7 67 33...

Page 18: ...the iron shell motor R3 T PIPE AP1 PRINTED CIRCUIT BOARD INDOOR UNIT 6 4 TEMP ROOM AC CONTACTOR PE SENSOR TEMP TUBE SENSOR L1 6 A2 1 A1 0 T1 4 4 WAY VALVE 4WAY N1 VT 4YV VT JUMP CAP 3 0 5 6 1625 7 03...

Page 19: ...it Terminal with outdoor unit communication wire 1 2 2 Netural wire 3 Iive wire 4 4 3 Fuse 5 5 Heater Iive wire 6 6 Needle stand for indoor fan 7 7 Up down swing interface 8 8 Left right swing interfa...

Page 20: ...Fuse of E heater1 9 9 Live wire terminal of E heater2 10 10 11 12 13 14 15 16 17 18 19 Fuse of E heater2 11 Live wire terminal of E heater3 12 Fuse of E heater3 13 Needle stand connected with drive bo...

Page 21: ...scharge temperature sensor 6 6 Interface of high pressure switch 7 7 Interface of low pressure switch 8 8 Output terminal of transformer 9 9 Input terminal of transformer 10 10 11 11 12 12 13 13 14 14...

Page 22: ...ble for dry mode Fan speed can t be adjusted under dry mode Turbo cannot be set in FAN mode low medium high turbo Note FUNCTION button 4 Under on status press Function button to switch between timer a...

Page 23: ...display Fan display Icon function introduction Fan speed display Defrosting display low medium high turbo button 6 Left and right swing this button controls the left and right swing motor single press...

Page 24: ...ower Heat mode Fan mode Dry mode Cool mode Auto mode Operation mode I feel function Sleep mode WiFi This is a general remote controller Some models have this function while some do not Please refer to...

Page 25: ...displayed as well Press FAN button can adjust fan speed Press button can adjust fan blowing angle After selecting cool mode air conditioner will operate under cool mode Cool indicator on indoor unit...

Page 26: ...an DRY and Auto modes this function is not available WiFi button 11 This function is only available for some models Press WiFi button to turn on or turn off WiFi function When WiFi function is turned...

Page 27: ...tus press and MODE buttons simultaneously to switch temperature display between and 1 After putting through the power press ON OFF button on remote controller to turn on the air conditioner 2 Press MO...

Page 28: ...ooling only unit when Tamb 20 the system operates under fan mode Ex factory set temperature is 20 Protection function is same as that under cooling drying and heating mode See function protection of t...

Page 29: ...ized all the time The IDU fan motor will blow residual heat after operating at set speed for a period of time consecutively to make sure the inner temperature of air conditioner won t be too high In h...

Page 30: ...at position B control by remote controller Stay at position C control by remote controller Stay at position D control by remote controller Swing between L and D control by remote controller Stop at an...

Page 31: ...ion About 3 mins later if overcurrent is released the system will resume original operation If overcurrent protection occurs for 6 times consecutively and resume operation time won t exceed 6 mins eve...

Page 32: ...uit or its detection circuit element is broken Malfunction of indoor evaporator temperature sensor indoor unit displays F2 which means indoor evaporator temperature sensor is open circuit or short cir...

Page 33: ...unding wire can t be used for other purposes 6 Must apply protective accessories such as protective boards cable cross loop and wire clip 7 The live wire neutral wire and grounding wire of power suppl...

Page 34: ...sure rise or compressor rupture resulting in injury 4 During refrigerant recovery make sure that liquid valve and gas valve are fully closed and power is disconnected before detaching the connection p...

Page 35: ...e 4 Electroprobe 7 Electronic leakage detector 10 Pipe pliers pipe cutter 2 Screw driver 5 Universal meter 8 Vacuum pump 11 Pipe expander pipe bender 3 Impact drill drill head electric drill 6 Torque...

Page 36: ...0cm at Away from back side Away from ceiling least for piping side Away from wall 30cm at least for piping side 5cm above 10cm above 10cm above 200cm above 30cm Away from obstacles 60cm above A w a y...

Page 37: ...es pass through the wall hole and then connect outdoor unit Neaten the pipes Vacuum pumping and leakage detection Check after installation and test operation Finish installation Note this flow is only...

Page 38: ...t and overload Caution please do not use the fuse only for protect the circuit 8 2 Installation Parts checking 8 3 Selection of Installation Location 8 4 Requirements for electric connection Basic Req...

Page 39: ...ig 8 2 Bind the joint with tape As show in Fig 8 3 Add insulating pipe in the indoor drain hose in order to prevent condensation As show in Fig 10 Fig 10 drain hose insulating pipe Fig 8 Fig 9 Step si...

Page 40: ...the wall hole 2 Stuff the gap between pipes and wall hole with sealing gum As show in Fig 15 3 Fix the wall pipe 4 Check if the indoor unit is installed firmly 1 The power cord and control wire can t...

Page 41: ...clip connect the power connection wire and power wire to the wiring terminal according to the color fix them with screws As show in Fig 23 2 Fix the power connection wire and signal control wire with...

Page 42: ...n The client approves the air conditioner installation Specify the important notes for air conditioner to the client 2 Method of test operation Put through the power press ON OFF button on the remote...

Page 43: ...ng operation except IDU fan motor operates other loads stop operation During heating operation the heating fan motor operates according to the conditions of blowing residual heat 1 The wiring terminal...

Page 44: ...en 6 High pressure protection E1 During cooling and drying operation except IDU fan motor operates all loads stop operation During heating operation the complete unit stops and operation of remote con...

Page 45: ...or the air inlet and air outlet are blocked 5 The fan speed of fan motor is too low or the fan motor doesn t run 6 The compressor is not running normally There is abnormal sound oil leakage or the te...

Page 46: ...nd indoor fan all stop operation 1 Whether a jumper cap is installed on the mainboard of ODU Cooling compressor and outdoor fan stop operation while indoor fan operates Heating compressor outdoor fan...

Page 47: ...oller loosened or poorly contacted Insert the temperature sensor tightly yes Is malfunction eliminated Is there short circuit due to trip over of the parts Make the parts upright yes Is malfunction el...

Page 48: ...th the high pressure switch on the complete unit well no Malfunction is eliminated no If the wire of high pressure switch is loosened please connect the wires according to the circuit diagram If the h...

Page 49: ...no no yes yes yes yes yes yes yes Malfunction is eliminated Malfunction is eliminated Malfunction is eliminated End Is the system pressure higher than the operation pressure value of low pressure swit...

Page 50: ...Service Manual 47 Installation and Maintenance 4 High discharge temperature protection of compressor E4 mainboard Check the wiring and fan capacitor replace motor...

Page 51: ...shell too high etc Is the indoor outdoor heat exchanger too dirty or are the air inlet and outlet blocked Normal fluctuation is within 10 of the rated voltage on the nameplate Malfunction is eliminate...

Page 52: ...lfunction type with communication malfunction detector Malfunction of outdoor communication circuit Replace outdoor mainboard AP1 Replace indoor mainboard AP2 Is the malfunction eliminated Is the malf...

Page 53: ...Start If the outdoor ambient temperature is higher than 53 C is good If the indoor and outdoor fan are running normally Replace outdoor mainboard Connect normally Adjust the connection Replace fan ca...

Page 54: ...cked End Remove blockage in the system System is blocked inside dirt block ice block oil block Y valve no fully open Compressor doesn t work normally Strange noise or leakage occurs Make compressor ru...

Page 55: ...ard Is the jumper cap inserted correctly and tightly Replace the jumper cap with the same model Appearance of the jumper cap Assemble the jumper cap with the same model Insert the jumper cap tightly I...

Page 56: ...for details Malfunction of compressor Compressor can t operate Refer to point 5 of maintenance method for details 9 3 Maintenance Method for Normal Malfunction 1 Air Conditioner Can t be Started Up 2...

Page 57: ...n pipe Replace drain pipe Wrapping is not tight Water leaking from the pipe connection place of indoor unit Wrap it again and bundle it tightly 5 Compressor Can t Operate Possible causes Discriminatin...

Page 58: ...Service Manual 55 Installation and Maintenance 10 Exploded View and Parts List 10 1 Indoor Unit The component picture is only for reference please refer to the actual product GVA24AL K3NNC7A I...

Page 59: ...20303 1 16 Guide Louver 3 1056420503 1 17 Air Outlet Panel Assy 00801400056 1 18 Front Door Plate Sub assy 000055000028 1 19 Display Board 300001000198 1 20 Display Sub Assy 000057000041 1 21 Air Inta...

Page 60: ...Service Manual 57 Installation and Maintenance The component picture is only for reference please refer to the actual product GVA48AL M3NNC7A I GVA55AL M3NNC7A I...

Page 61: ...74435 1 20 Gasket 70414201 70414201 1 21 Electric Box Cover Sub Assy 01404388 01404388 1 22 Electric Box Assy 100002002913 100002002913 1 23 Main Board 300002000687 300002000687 1 24 Capacitor CBB61S...

Page 62: ...and Maintenance 34 35 36 13 14 1 2 3 4 5 6 29 30 31 32 33 26 25 24 23 22 21 17 18 16 15 9 8 7 19 28 27 10 12 11 20 The component picture is only for reference please refer to the actual product 10 2...

Page 63: ...2 Valve Cover 22245002 1 13 Handle 26233053 14 Condenser Assy 011002000688 1 15 4 Way Valve Assy 030152000406 2 16 Magnet Coil 4300040047 1 17 Clapboard 01245200018 18 Motor Support Sub Assy 01705036...

Page 64: ...tion and Maintenance 34 13 14 1 2 3 4 5 6 29 30 31 32 33 26 25 24 23 22 21 17 18 16 9 8 7 19 20 28 27 10 12 11 The component picture is only for reference please refer to the actual product GVA48AL M3...

Page 65: ...001 1 16 Gas liquid Separator 07220030 07220030 1 17 4 Way Valve Assy 030152000364 030152000393 1 18 Magnet Coil 4300040022 4300040047 1 19 Inhalation Tube Sub assy 030010000575 030010000614 1 20 Capi...

Page 66: ...l Procedure Step 1 Outside view of indoor unit big front panel sub assy screw cover screw 2 Remove the big front panel sub assy Open the screw cover use screwdriver to remove the screws at both side o...

Page 67: ...nel sub assy 5 Remove filter sub assy Remove two screws on the air in panel sub assy Open the air in panel along the arrow direction and then remove the air in panel Extend your hands into grooves at...

Page 68: ...he electric box cover disconnect the wiring terminal of each electronic components and then remove related electronic components according to your requirements 1 Remove the two screws fixing the elect...

Page 69: ...at the upper part of the upper cover and two screws at the back side of the air outlet panel After removing the air guiding connecting robe and then pull the horizontal louver outwards to remove it Af...

Page 70: ...5 screws used for fixing the top cover pull it upwards and then remove the top cover Remove 4 screws used for fixing the guide grille and then remove the guide grille Remove 4 screws fixing the electr...

Page 71: ...for fixing the centrifugal blade and then pull the centrifugal blade outwards Take out the centrifugal blade Remove 4 screws fixing the motor and 2 screws fixing the wire pressing late and then remov...

Page 72: ...hassis right side plate sub assy left side plate sub assy 16 Remove left and right side plates sub assy Remove screws on both plates pull it to both sides respectively and then remove left and right s...

Page 73: ...nance 48 55K 1 Outside view of indoor unit 2 Remove air in panel Open the screw cover use screwdriver to remove screws used for fixing the air in panel at both sides and then remove the air in panel A...

Page 74: ...ire passing groove and then remove the wire passing groove cover Remove 3 screws used for fixing the wire passing groove and then remove the wire passing groove sub assy 4 Remove electric box and wire...

Page 75: ...ssy downwards slightly to remove it 6 Remove big front panel sub assy Remove 3 screws at the top part of the air out panel 2 screw at the lower part and screws under the screw cover push the air outpu...

Page 76: ...m and then remove the air outlet foam Remove 2 screws at the upper part of the upper cover and 2 screws at the back side and then the upper cover can be removed Remove the air guide connection rod and...

Page 77: ...move electric heating part Remove 4 screws on the protective grille and then remove the protective grille Remove 4 screws on the electric heating part and then remove the electric heating part 10 Remo...

Page 78: ...over upwards to remove it Remove 3 screws on the evaporator 2 screw at the middle part and 2 screws at the lower part Pull left and right side plates outwards slightly and then take out the evaporator...

Page 79: ...housing Rotate the guide loop to a certain position along the clockwise direction and then remove the guide loop Remove 9 screws used for fixing the propeller housing and then remove the propeller hou...

Page 80: ...tenance Procedure Step 16 Remove left and right side plate sub assys Right side plate sub assy Left side plate sub assy Remove screws at both sides pull them to both sides respectively and then left a...

Page 81: ...crew connecting the big handle and right side plate and then remove the big handle Remove the screw connecting the valve cover and right side plate and then remove the valve cover a 1 Remove big handl...

Page 82: ...n plate and chassis lift the outer case upwards loosen the clasps of outer case with right side plate and left side plate and then remove the outer case a b 2 Remove grille and cabinet screw grille sc...

Page 83: ...stopper to remove the motor support motor support chassis stopper 5 Remove motor support sub assy and motor Remove the 6 screws fixing the motor and then remove the motor screw screw motor 6 Remove e...

Page 84: ...as valve Unsolder the welding joint connecting the valve with capillary and condenser unsolder the welding joint connecting the gas valve and air return pipe remove the 2 bolts fixing the gas valve to...

Page 85: ...way valve assy with capillary sub assy compressor and condenser remove the 4 way valve Note Before unsoldering the welding joint wrap the 4 way valve with a wet cloth completely to avoid damage to th...

Page 86: ...1 Remove valve cover 2 Remove top cover Remove screws used for fixing the valve cover push the valve cover downwards slightly and then remove the valve cover Valve cover Screw Top cover Remove screws...

Page 87: ...ed for fixing the grille and the rear side plate the grille and the chassis and then remove the grille Remove screws used for fixing the front side plate lift the front side plate upwards and then rem...

Page 88: ...ard and screws used for fixing the electric box and then remove the electric box Use wrench to loosen the nuts used for fixing the axial flow blade take out the nut and the washer in turn and then the...

Page 89: ...he 4 way valve The welding process must be as quick as possible and then gauze should be kept wet all the time Please note that don t let the flame burn the leading wired of compressor Remove screws u...

Page 90: ...8 66 67 66 2 19 75 76 75 2 24 84 85 84 2 29 68 68 20 77 77 25 86 86 30 1 Standard length of connection pipe 5m 7 5m 8m 2 Min length of connection pipe is 3m 3 Max length of connection pipe and max hig...

Page 91: ...llowing steps A Cut the pip Confirm the pipe length according to the distance of indoor unit and outdoor unit Cut the required pipe with pipe cutter B Remove the burrs Remove the burrs with shaper and...

Page 92: ...66 88 33 10 63 72 2 439 111 0 737 5 63 46 34 10 2 73 2 358 112 0 717 4 60 23 35 9 779 74 2 28 113 0 697 3 57 18 36 9 382 75 2 206 114 0 678 2 54 31 37 9 003 76 2 133 115 0 66 1 51 59 38 8 642 77 2 06...

Page 93: ...983 5 84 61 34 13 59 73 3 144 112 0 956 4 80 31 35 13 04 74 3 04 113 0 93 3 76 24 36 12 51 75 2 94 114 0 904 2 72 41 37 12 76 2 844 115 0 88 1 68 79 38 11 52 77 2 752 116 0 856 0 65 37 39 11 06 78 2 6...

Page 94: ...62 11 32 101 3 22 15 362 9 24 51 41 63 10 93 102 3 13 14 342 8 25 49 19 64 10 54 103 3 04 13 323 9 26 47 08 65 10 18 104 2 96 12 306 2 27 45 07 66 9 83 105 2 87 11 289 6 28 43 16 67 9 49 106 2 79 10 2...

Page 95: ...6 756 8669426 E mail gree gree com cn www gree com HONG KONG GREE ELECTRIC APPLIANCES SALES LIMITED Add Unit 2612 26 F Miramar Tower 132 Nathan Road TST Kowloon HK Tel 852 31658898 Fax 852 31651029 Fo...

Reviews: