


❏
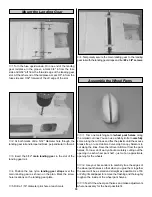
3. Tape the front of the cowl to the top and bottom cowl
halves and wick CA along the joint.
❏
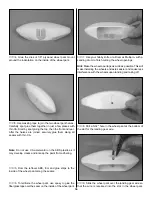
4. Use a sharp hobby knife or Dremel MultiPro with a
sanding drum to accurately trim the openings in the front of
the cowl.
❏
5. Use coarse sandpaper to thoroughly scuff the inside of the
cowl along all the seams. Use 30-minute epoxy to glue strips of
fiberglass cloth over the joints on the inside of the cowl.
❏
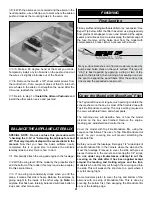
6. If you have removed the engine, reinstall it. Use a piece
of thin cardboard or plastic as a template to locate the cowl
for the head of the engine, muffler, needle valve and any other
accessories that may protrude from the cowl (example: fuel fill
valve, engine, choke, etc.). Tape the template to the fuselage
side, accurately indicating the position of the accessories.
❏
7. Measure the distance from the front of the firewall to the
front of the drive washer on the engine. Remove the engine
from the engine mount and position the cowl on the front of
the fuselage so that the forward edge of the cowl is 1/8" aft
of the measurement you just made. Use a felt tip marker to
transfer the location of the engine and accessories onto the
outside of the cowl.
❏
8. Remove the cowl and template and mount the engine on
the engine mount. Cut out the holes marked in the last step
slightly smaller than drawn. Test fit the cowl over the engine,
adjusting the size and position of the holes as needed.
36