❏
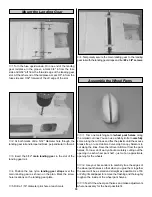
7. Insert the pushrods into the outer pushrod tubes.
Position the control horns on the elevator and rudder as
shown on the plans. Mark the location of the control horn
mounting holes and drill 3/32" holes at the marks. Temporarily
mount the control horns to the elevator and rudder with the
backing plates and 2-56 x 1/2" machine screws.
❏
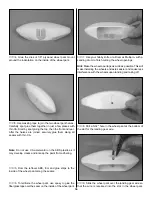
8. Mount the receiver switch on the side of the fuse. We
use a Great Planes Switch & Charge Jack Mounting Set on
all of our planes. This allows you to check and charge the
receiver battery without removing the wing.
❏
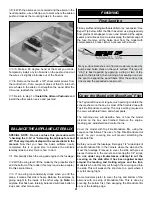
9. Wrap the receiver and receiver battery in 1/4" foam rubber.
❏
10. Temporarily position the receiver and receiver battery
on the fuse bottom, in front of former F-3. Later, the receiver
battery may be moved forward or aft to balance the plane.
Plug the receiver battery into the receiver switch.
❏
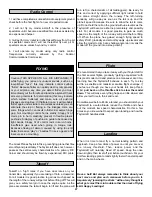
11. Mount the elevator, rudder and throttle servos, using
the hardware that came with your radio, on the 1/4" x 1/4"
servo rail. Note: If a 2-stroke engine is being installed, the
throttle pushrod will possibly need to be routed down the
center of the fuse, requiring the throttle servo to be mounted
in the center of the servo rails. If a 4-stroke engine is
installed, the throttle servo may need to be mounted next to
the fuse side.
❏
12. With the servos centered and the control surfaces in
neutral position, use a felt-tip pen to mark where the
elevator and rudder pushrods cross the mounting holes in
the servo arms. Note: The servo arms have been painted
for clarity.
❏
13. Disconnect the clevises from the control horns. Make
a 90 degree bend at the marks you made. Temporarily install
a nylon FasLink
™
on each pushrod and cut the wire so it
slightly protrudes out of the FasLink. Hint: If you prefer to
bend and cut the pushrods out of the fuselage, remove the
clevis, pull the pushrod out, make the 90 degree bends at
the marks and cut the rods. Reinstall the pushrods in the
guide tubes from the front and screw the clevises back on.
Note: If necessary, enlarge the holes in the servo arms with
a 5/64" drill bit (or a #48 drill for precision).
39


