


❏
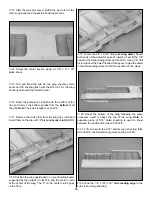
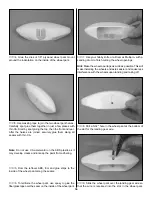
2. With the wing mounted on the fuse, center the stabilizer
on the stab saddle, aligning the centerline of the stab with
the centerline of the fuse and the notch in the LE of the stab
with the notch at the aft end of the aft deck base. Align the
stab so that the TE corners are equal distance from the
center of the fuselage The LE of the stab should be flush with
the forward edge of former F-6 and the TE approximately
3/8" from the aft end of the fuse. From a few feet behind the
fuselage, view the stabilizer, checking that the stabilizer is
parallel with the wing. If not, remove the stabilizer and sand
the saddle slightly. When satisfied with the fit, use 30-minute
epoxy to glue the stab to the fuse. Double-check the stab
alignment while the epoxy is curing.
❏
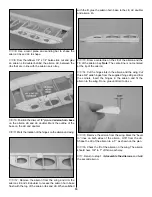
3. Set the fin in position on the stab. The fin TE must line
up with the aft edge of the fuse. The bottom of the fin TE
may need to be sanded slightly to allow the fin to seat on the
stab. Cut a slot in the forward edge of the TE so that the
joiner wire will fit between the fin and the stab TE.
❏
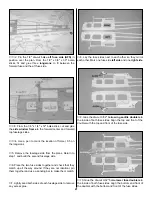
4. Sight down the fin, checking that it is in line with the
centerline of the fuselage. It is very important that the fin be
aligned with the centerline of the fuse and perpendicular to
the stab. If it is not, the plane will be difficult to trim. Use
30-minute epoxy to glue the fin to the stab, aft deck base
and former F-6.
❏
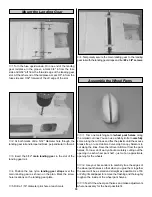
5. Mark the location of the tailgear wire on the rudder and
the nylon tailgear bearing on the fuselage.
A
A
A = A
30