❏
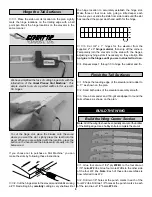
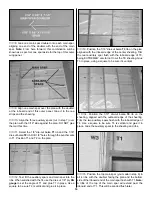
2. Determine the location of the pushrod exit holes from
the plan. Use a hobby knife to sharpen one end of a piece
of 3/16" (outer diameter) brass tubing, then use this tubing
to cut the pushrod exit holes (you may use a 3/16" drill bit,
but the brass tube makes a much neater cut). Hint: You
may chuck the brass tube into your drill to aid in cutting
these holes.
❏
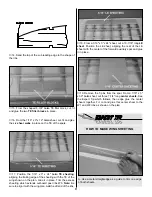
3. From the 36" long gray outer pushrod tube, cut two 13-
1/2" long pieces. Insert the 13-1/2" tubes through the holes
you just cut in the fuse side and through formers F5 and
F4B so that 1/4" extends past F4B and out the fuse sides.
❏
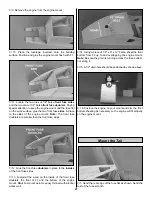
4. Glue the tubes to the fuse sides, F5 and F4B with
thin CA.
❏
5. Cut off the tubes at the exit points and sand them flush
with the fuse sides.
❏
6. Mount the wing on the fuse. Trim the wing bolts off 1/8"
above the WBP.
❏
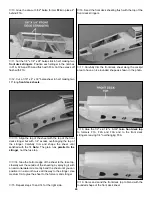
7. Turn the plane right side up. Glue the die-cut 3/32
balsa former F6 vertically in its slots.
❏
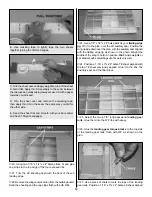
8. Accurately measure the trailing edge of the stabilizer
and mark the center point.
❏
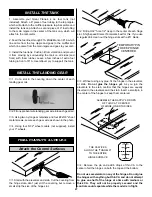
9. Lay the stab in position (the TE should be flush with the
TE of the fuse) with the center point lined up with the center
of the fuse. Carefully check the stab alignment by standing
directly behind the fuselage and “eyeballing” whether or not
the stab is parallel to the wing. Sand the stab saddle (a little
at a time!) until the stab aligns properly with the wing. Also,
using your string, measure from the stab tips to a center point
on the front of the fuse to make sure the stab is aligned.
❏
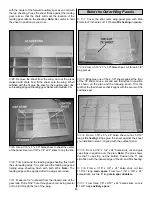
10. Using 6-minute epoxy, glue the stab to the fuse. Hold
or pin it in proper alignment until the epoxy has fully cured.
Note: Wipe off any excess epoxy, with a cloth moistened
with alcohol, before it sets.
❏
11. Carefully align the fin on the stab. The fin must be
positioned perpendicular to the stab and must line up
with the fuselage centerline EXACTLY! Sand the slot in
F6, if necessary to properly align the fin. Glue the fin in
place. Note: The turtle deck stringers and the turtle deck
top will also lock the fin into position.
❏
12. Remove the wing from the fuse.
22
Summary of Contents for SlowPoke
Page 6: ...6 DIE CUT PATTERNS...
Page 32: ...TWO VIEW...


