❏
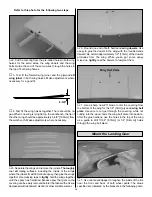
13. Cut holes in the cowl where required for the fuel filler
valve, the remote glow plug hookup and the needle valve.
❏
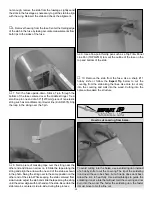
14. Use epoxy or fuelproof paint to coat any bare wood
such as the cowl ring, the cowl mounting blocks and the
mount for the fuel filler valve.
❏
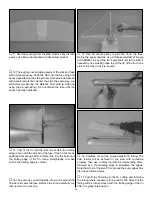
15. If you feel it necessary for the engine you are using,
cut additional holes in the cowl for cooling. With the O.S.
®
MAX .91 FS no additional holes were required.
❏
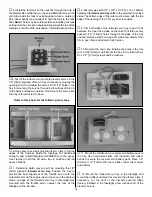
1. Mount the on/off switch in a convenient location on the
side of the fuselage opposite the engine exhaust. The switch
on the model shown was mounted with a Great Planes
Switch and Charge Jack (GPMM1000). This setup provides
access to the battery charging cord from outside the model
for quick field charging and battery monitoring. If you have
not yet already done so, mount the battery and receiver. The
final location of the battery pack could be determined while
balancing the model (to minimize or eliminate the
requirement for additional ballast), but the model shown in
this manual required no tail weight with the components
mounted where shown. Be certain the receiver and battery
are cushioned with 1/4" or 1/2" [6mm or 13mm] R/C foam
rubber to protect them from vibration. Connect all the wires
to the receiver and hook up the battery and switch.
❏
2. Glue the piece of leftover throttle pushrod tube inside
the fuselage to keep the receiver antenna away from the
servos and pushrods. Make a
strain relief from a cut-off
servo arm and slip it onto the antenna, then route the
antenna through the tube and out of the fuselage. On the
model shown in the manual the antenna was routed out the
bottom of the fuselage through a small piece of tubing, then
connected to a hook fashioned from another leftover servo
arm which was connected to a rubber band and a wire hook
inserted into the bottom of the fuse.
❏
3. Make certain all the servo arms are secured to the
servos with the screws that came with them and that all the
clevises have retainers on them.
Finish the Radio Installation
24

