❏
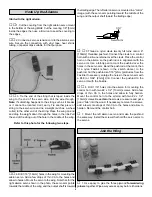
1. Use 30-minute epoxy mixed with lightweight Top Flite
Microballoons Filler to glue the 1/8" [3mm] plywood cowl
ring inside the cowl an equal distance from the aft edge all
the way around. The distance should be approximately 1"
[25mm] to 1-3/8" [35mm]–wherever it fits best. Set the cowl
aside and allow the epoxy to harden.
❏
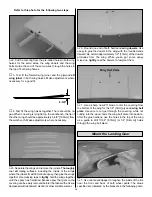
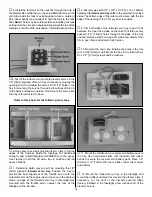
2. Cut the holes in the front of the cowl for the engine crank
shaft and for the air inlets where shown. (Though not marked
on the cowl, for scale effect, an additional round hole was cut
to match the hole on the full-size STA-M.) A Dremel with a
carbide cutter, followed by a drum sander, works best for
cutting the holes. Use protective goggles and a particle mask
when cutting fiberglass. Finish by sanding the openings by
hand with 400-grit sandpaper to smooth the edges.
❏
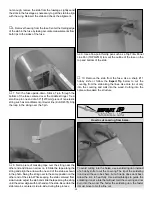
3. Determine your engine exhaust configuration. With the
O.S.
®
MAX .91 Surpass
™
II used on this model, an O.S. “in”
type exhaust header pipe (OSMG2624) was used to
position the muffler near the bottom of the cowl. (This
requires removing a portion of the bottom of the plywood
cowl ring to accommodate the muffler.)
❏
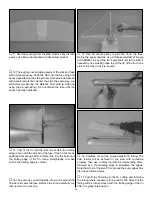
4. Make two upper cowl mount blocks and two lower
cowl mount blocks to fit the full-size drawings above from the
9/16" x 9/16" x 1-3/16" [14.3 x 14.3 x 30mm] hardwood blocks.
❏
5. Use coarse sandpaper to roughen the fuelproof
coating where the cowl mount blocks will be glued (indicated
by the arrows) so the epoxy will adhere. Temporarily hold the
cowl mount blocks in position with a rubber band.
❏
6. Test fit the cowl. The cowl should not fit tightly over the
blocks. There should be approximately 1/32" [.8mm] between
the cowl and the mounting blocks. If necessary, trim the cowl
mount blocks to get the cowl to fit correctly.
Lower
Cowl
Mount
Upper
Cowl
Mount
Mount the Cowl
22


