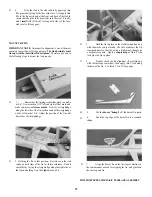
D 6. Using an Xacto knife, cut the hinge slots in the
wing and ailerons.
D 7. Temporarily attach the ailerons to the wing with
the hinges, but do not glue until after the wing has been
covered!
INSTALL AILERON SERVO AND HORNS
NOTE: Install the aileron servo in the bottom of the wing!
D 1. Cut an opening in the fiberglass and bottom sheeting for
your servo. CAUTION: Do not cut into the wing spar or
shear webs!
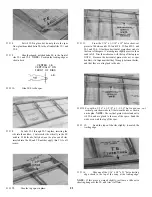
D 2. Remove a sufficient portion of the center rib and
the W-1 ribs to fit your servo. NOTE: The die-cut openings
will have to be enlarged and deepened. (A Dremel Moto tool
with a 1/8" router bit is excellent for this, but it may also be
done with an Xacto knife and a long-nose pliers). The servo
must be installed as deep into the wing as possible.
D 4. Mount the servo using the screws provided with
your radio.
NOTE: Because the nylon horn mounting screws pass through the
inboard aileron hinges, we glued only these two hinges into the
ailerons (permanently), mounted the horns (temporarily), and
worked around these hinges when covering the ailerons. If you do
not want these hinges in the way when covering, we suggest that you
wait until the airplane is covered and the hinges glued in before
installing the nylon horns.
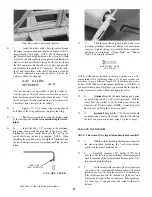
D 5. Hold the nylon horns on the bottom of the ailerons
in the locations shown on the plan, and mark the locations
of the mounting screws.
D 3. Make two servo rails from the 1/8" ply die-cutting
scrap, and glue in place. (See the side view of the aileron
servo installation on the plan).
D 6. Drill 5/32" holes through the ailerons (and
hinges). Put a drop of thin CA into each hole (to harden the
balsa), wait until the glue hardens, then re-drill the holes.
D 7. Temporarily mount the nylon homs with the 2-56
x 5/8" screws and nylon nutplates. You may cut off the
portion of the screws that protrude through the nutplates.
NYLON HORN AND NUT PLATE
2 - 5 6 x 5/8" SCREW
26


